Fitting the Cosecha Pants -Blending Sizes
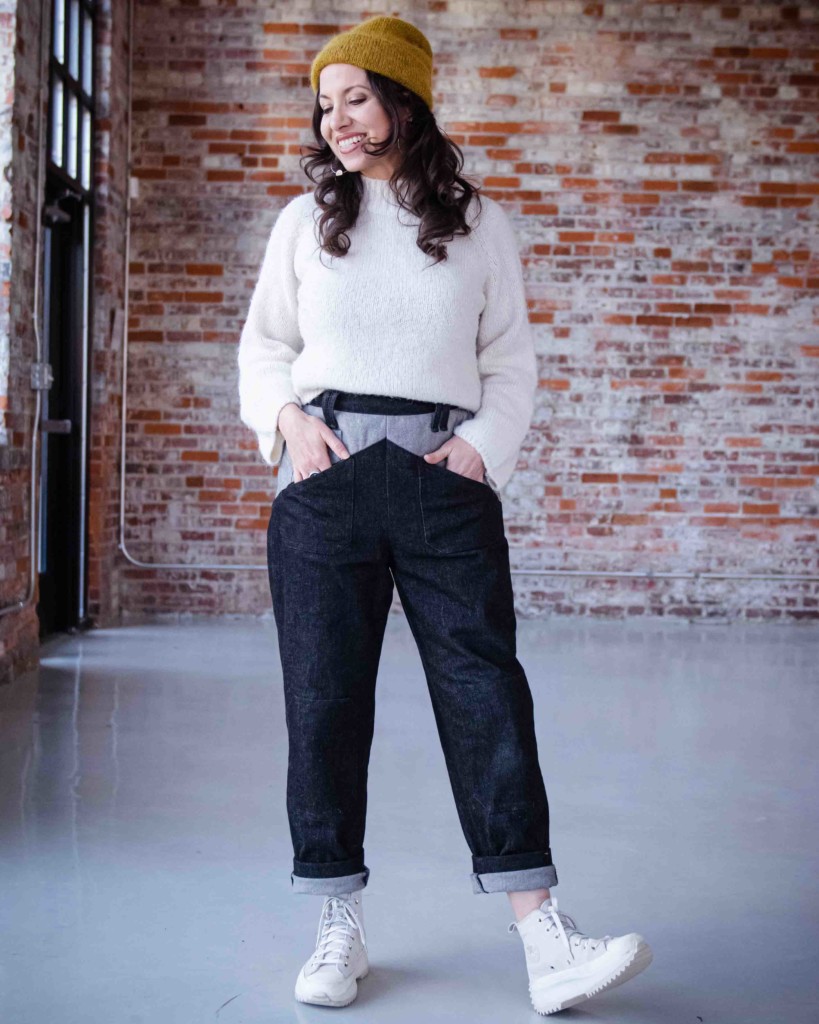
Everyone’s body is a little different, and the beauty of sewing is you can make your Cosecha Pants pattern fit your unique shape. Before diving into blending sizes, start with this post, all about pants fitting basics. Blending between sizes is one of the more common sewing pattern changes that needs to be made, and the beauty of making your own pants is that you can just go for it! No need to shop around to find a particular unicorn brand that fits you until next season – blending sizes is a fabulous skill to practice that will equip you both in making these Cosecha Pants and in other future projects.
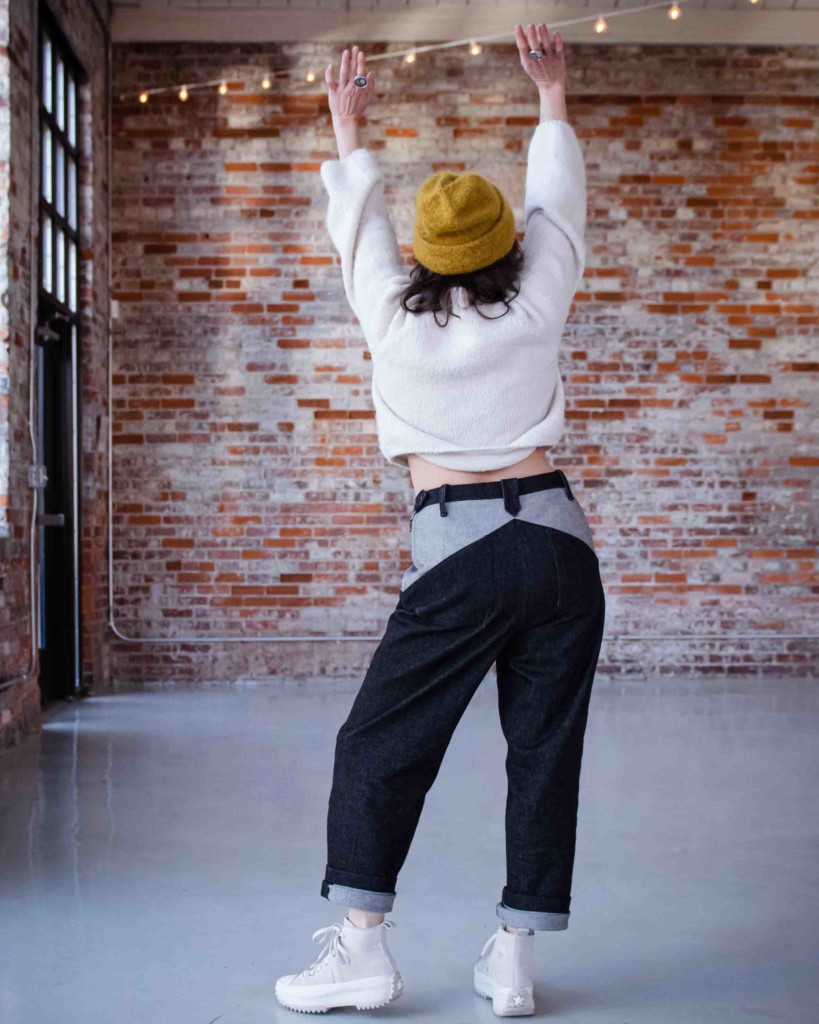

Remember the previous post about the fitting process for the Cosecha pants?
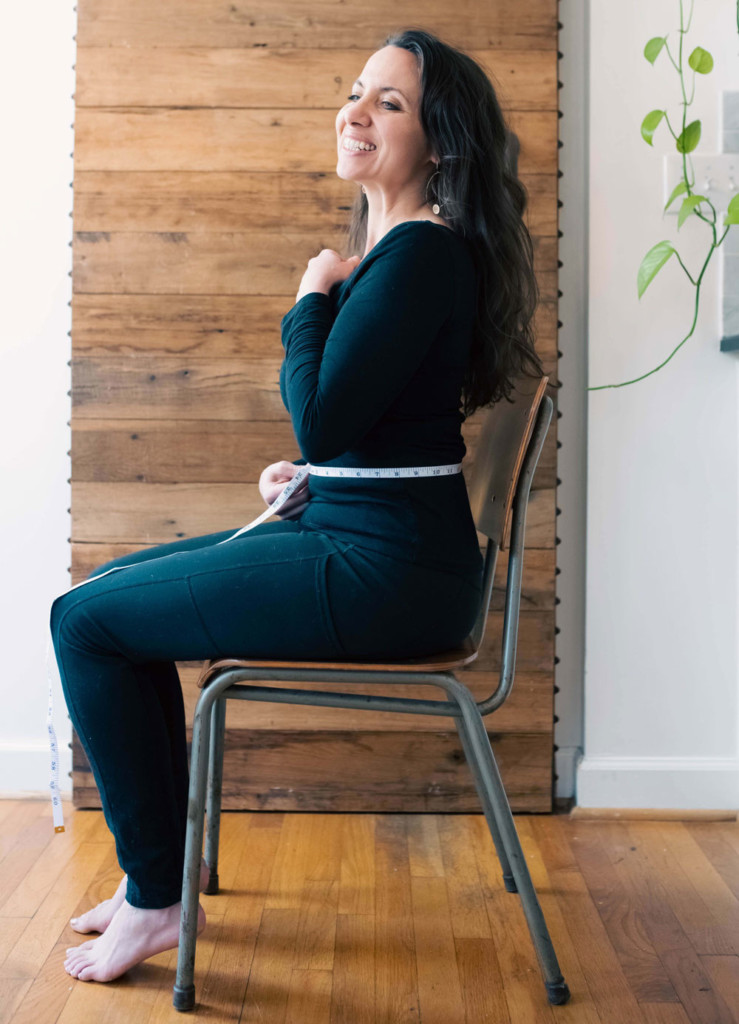
When choosing a size, take your measurements first. Even when you think you know your size, take your measurements at the beginning of every project, and work from the charts. Let your hip circumference determine the size for this pants pattern, and make your personal fit adjustments to the waist from there. The exception to this guideline is if your waist circumference is greater (in measurement, not size number) than your hip circumference. Then you would use your waist circumference to determine your size, and make your personal fit adjustments from there.
Let’s talk through a few potential size combination scenarios.
I’ll make up some sizing combinations so that I can show you the pattern adjustments, and you can follow the essence of the directions for other sizes.
- Small waist, larger hip
- Larger waist size than hip size
- Shortening the rise
- Adding to the rise at the back waist
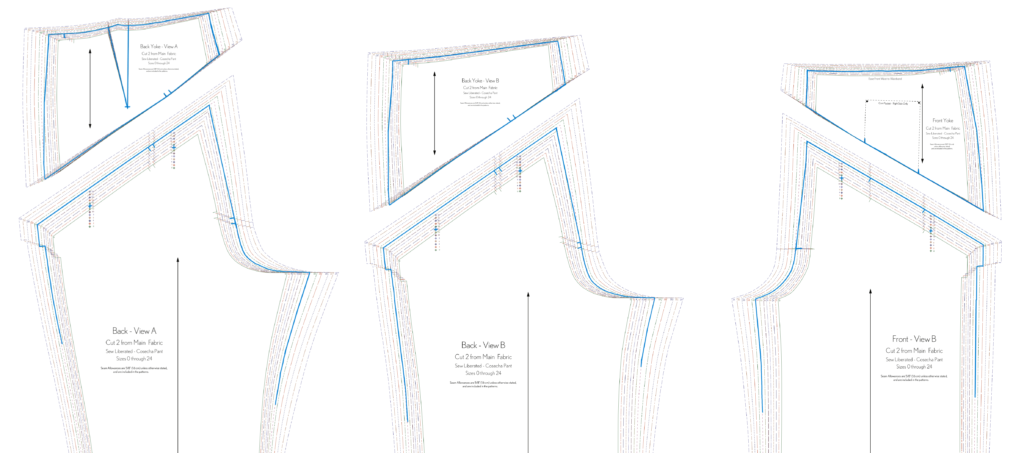
1 – Smaller waist size than hip size.
Let’s say your waist measures 30” and your hip is 40.5” (that’s 77cm waist, 106 cm hip). The waist size is 10, and the hip is size 14, so there’s some size blending to be done! Since the hip measurement takes priority, I’d start with size 14 for the Front, and Back, use sizes 10 and 14 for the Front Yoke and Back Yoke, and size 10 for the waistband. If you’re tracing off, trace sizes 10 and 14 down the side seam a bit below the hip, and for the whole crotch curve.
Starting above the yoke, blend in from size 14 to size 10 at the side seams. At the center front seam and center back seam, you’ll need to blend the sizes below the yoke seam, or the yoke will have a very sharp angle. Start with size 14 below the notch, and blend gradually to size 10 at the waist seam. I like to line up the pattern pieces as if the yoke seam were sewn for this part – it helps me make sure that the seam lines stay smooth and accurate. If you’re using the size 10 size lines by the time you reach ⅝” away from the cut edge of the seam, you’ll be able to use the size 10 waistband. If you make other changes, like decreasing less at the side seam and using a dart in the front or increasing the dart at the back, you’ll need to measure the waist seam (on the seam line) to make sure the waistband will fit.
You can see how these sizes blend together in the BLUE lines in the diagrams.
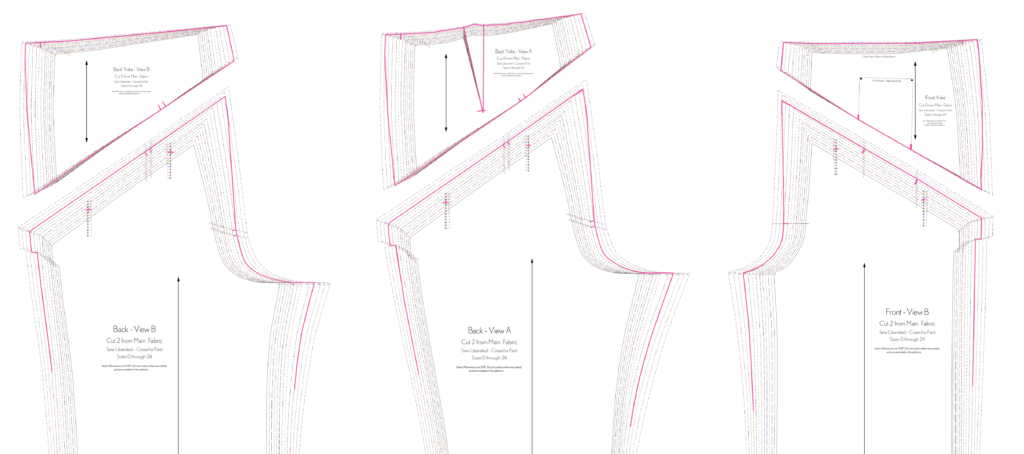
2 – Smaller hip size than waist size.
Let’s say your waist measures 40.5” and your hip is 45” (that’s 103 cm waist, 114 cm hip). The waist size is 22, and the hip is size 18. Since the hip measurement takes priority, I’d start with size 18 for the Front, and Back, use sizes 18 and 22 for the Front Yoke and Back Yoke, and size 22 for the waistband. If you’re tracing off, trace sizes 18 and 22 down the side seam a bit below the hip, and for the whole crotch curve.
Starting above the yoke, blend out from size 18 to size 22 at the side seams. At the center front seam and center back seam, you’ll need to blend the sizes below the yoke seam, or the yoke will have a very sharp angle. Start with size 18 below the notch, and blend gradually to size 22 at the waist seam. I like to line up the pattern pieces as if the yoke seam were sewn for this part – it helps me make sure that the seam lines stay smooth and accurate. If you’re using the size 22 size lines by the time you reach ⅝” away from the cut edge of the seam, you’ll be able to use the size 22 waistband. If you make other changes, like increasing less at the side seam and reducing the dart at the back, you’ll need to measure the waist seam (on the seam line) to make sure the waistband will fit.
You can see how these sizes blend together in the PINK lines in the diagrams.
3 – Shortening the rise.
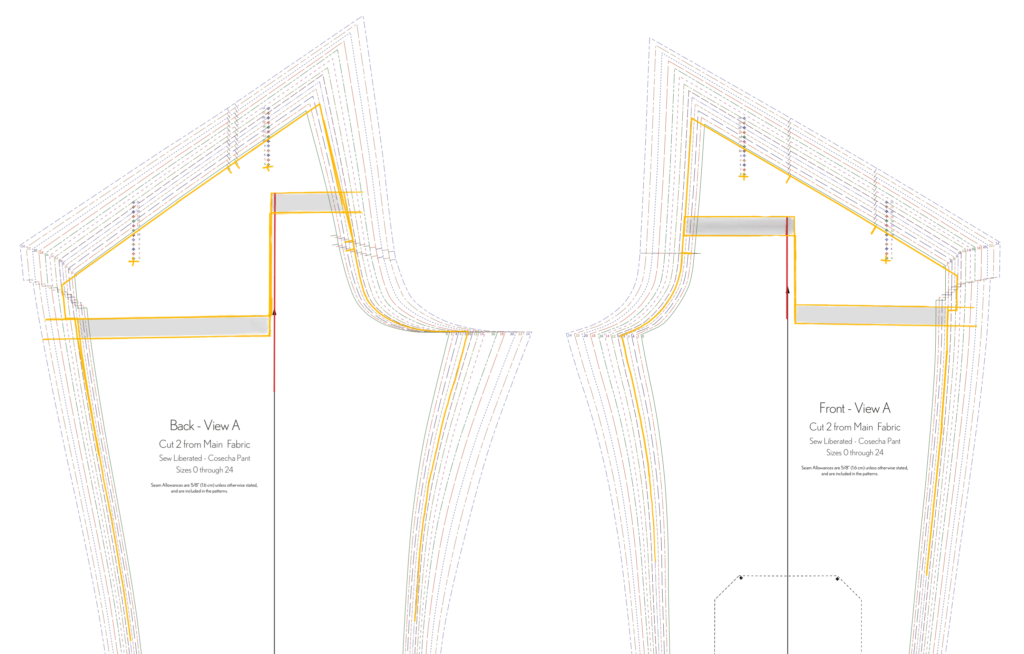
For this example, let’s say your measurements fit a size 8, but you’re 5’3” (160 cm), and you want to remove some of that length difference in the rise. The body rise is 10.5” (26.67 cm) on size 8, so perhaps you want to remove 1” (2.5 cm). When you shorten the rise on a pant with details on the area where you’d make the adjustment, you need to modify the standard process a little. One way to make it work is to divide the difference above and below the yoke seam. I’d prefer to leave the proportion of the yoke as designed, so in order to remove the length below the yoke seam, it’s necessary to use a stepped cut line. It will be shaped like a step, so the shaping of the side seam to the end of the yoke can remain unchanged, but the adjustment can still be made in the long straight portion of the crotch seam.
Draw the line as shown in the diagram, making sure you’re avoiding crucial details like the zipper end, notches, and the pocket placement markings. You’ll draw a cut line on the Front and the Back of whichever view you’re making. Measure the distance you need to reduce the rise by, and mark that in a few places below your cut line. Cut along the line, and slide the piece downwards, making sure the grainline stays aligned and the pieces don’t shift sideways. Tape the pieces together, and blend any jogged lines as needed.
You can see how the shortened rise looks in the YELLOW lines in the diagrams. The grey area is overlapped paper.
4 – Adding at the Back Rise
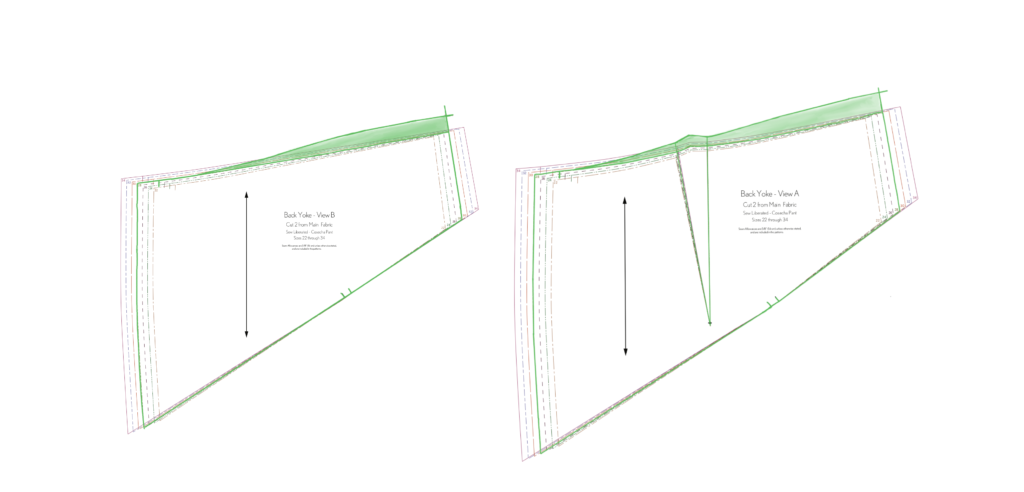
Sometimes you’re pretty happy with a size, but you need a little extra coverage at the back rise. This is common on curvy figures, so I”ll show you how to add to the back rise on size 28. When you change the rise on a pant with details on the area where you’d make the adjustment, you need to be careful not to impact the details, in this case the yoke seam. Adding the length below the yoke seam will impact the angle of the seam, causing the pockets to angle very strangely, or not line up with the seam as intended, so the length should be added above the seam.
Extend the Center Back line up a little more than you plan to add. Measure the distance you need to increase the rise by, and mark that amount above the original size. Extend the line from the center back about 2” evenly above the original line, then start blending it towards the side seam. If you’re making View B, the line will be a long smooth curve, and if you’re making View A, the line will need to include the dart. To get the dart and the waist shape nice and smooth and accurate, tape the dart closed first, then mark the new line in a smooth curve, cut the new waistline, and then release the tape. You’ll have a nicely trued up dart and a smoothly increased back rise.
You can see how the increased rise looks in the GREEN lines in the diagrams of the View A Back Yoke and the View B Back Yoke. The shaded green is added paper.
This should get you started blending between sizes for many pants-fitting scenarios for this sewing pattern. We also have a guide to the basics of fitting the Cosecha Pants pattern, with tips about choosing a size and adjusting from muslin. We hope you love your Cosecha Pants and you can always email us at support@sewliberated.com with fitting questions.


Responses