How to do a full bust adjustment on a knit t-shirt pattern
One of the many wonderful things about t-shirts is their forgiving fit – soft fabrics with stretch make for a simpler fitting process! Sometimes some adjustments are still necessary, and a FBA is one of those times.

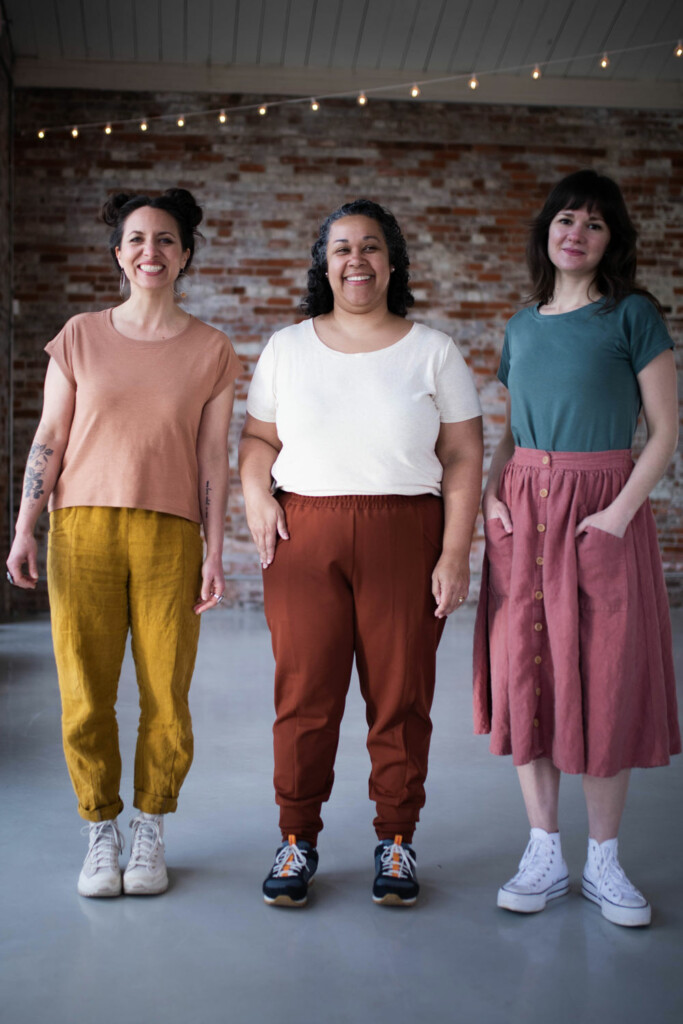
An FBA (a Full Bust Adjustment) on a knit top such as Bedrock or Stasia is often different from a FBA that you may do on a fitted or semi-fitted woven bodice. Ideally, we’d like to do the FBA without creating a dart. While you can create a dart, and some people will still want to do so, many sewists prefer to avoid making darts on light, stretchy fabrics like t-shirt knits.
You can also get away with skipping a FBA if you’re only a little outside the range of the pattern’s sizing. Both the Stasia and Bedrock patterns are drafted for a C cup, but within those patterns, the intended fit is different. The Stasia Tank, Tee, and Dress have fitted knit bodices, while the Bedrock View A is semi-fitted and View B is boxy. If your high bust and full bust have a difference of greater than 3” (7.6 cm) and you’re making the Stasia in any of its options, an FBA may be in order, but for Bedrock, you have a little more leeway. If you have a dressmaker’s D cup, for example, you could likely skip the FBA for Bedrock, especially for View B. Making a muslin with a knit fabric that’s close to your final fabric is a good way to help you analyze the fit and decide.
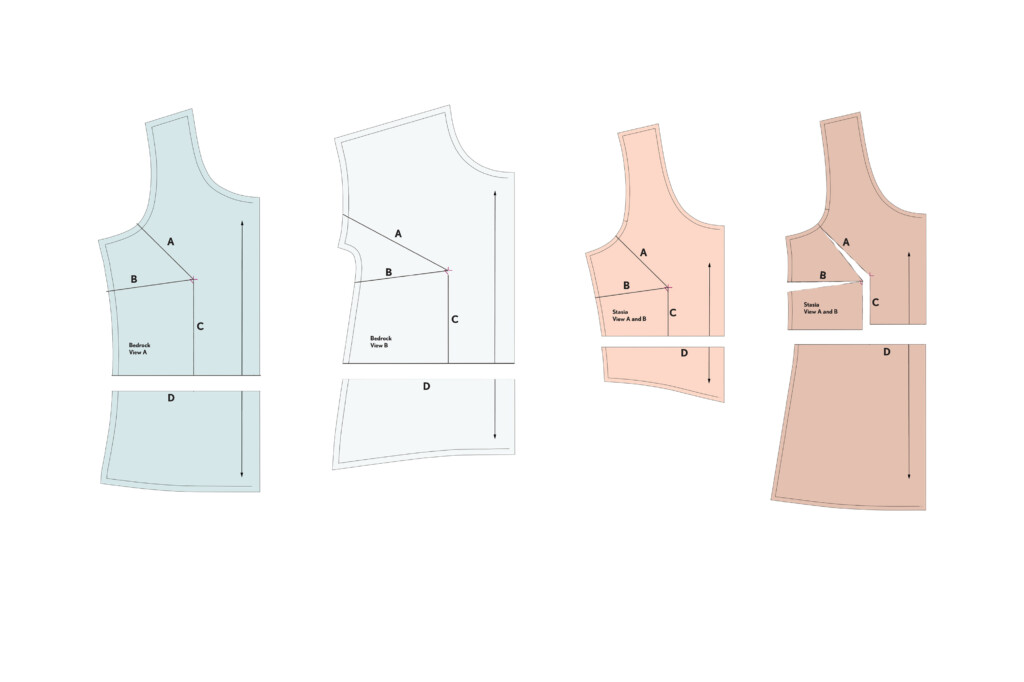
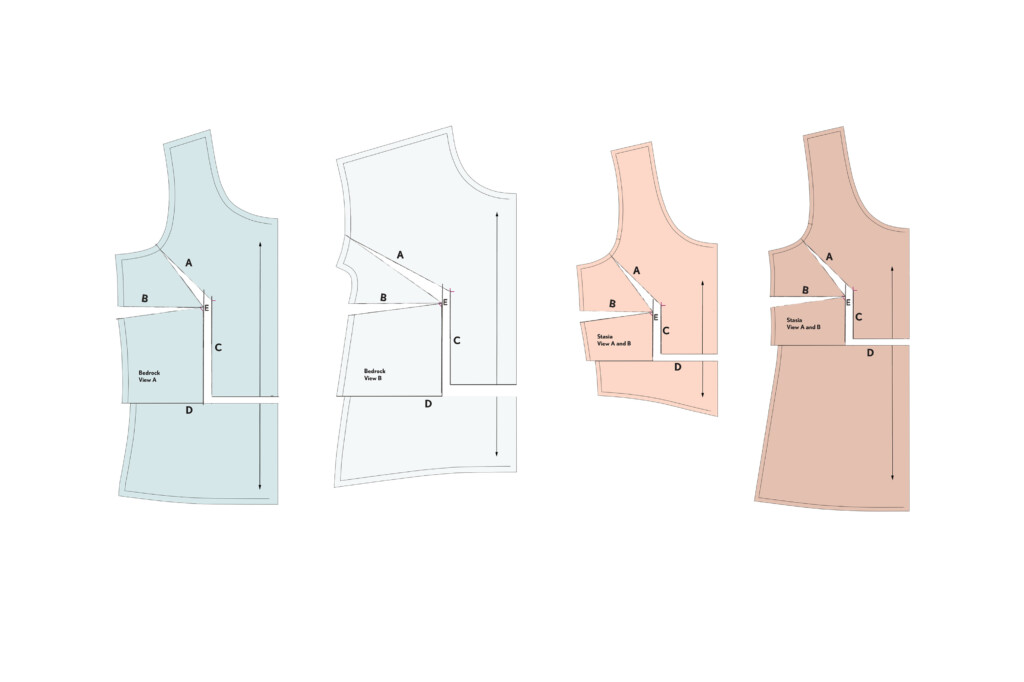
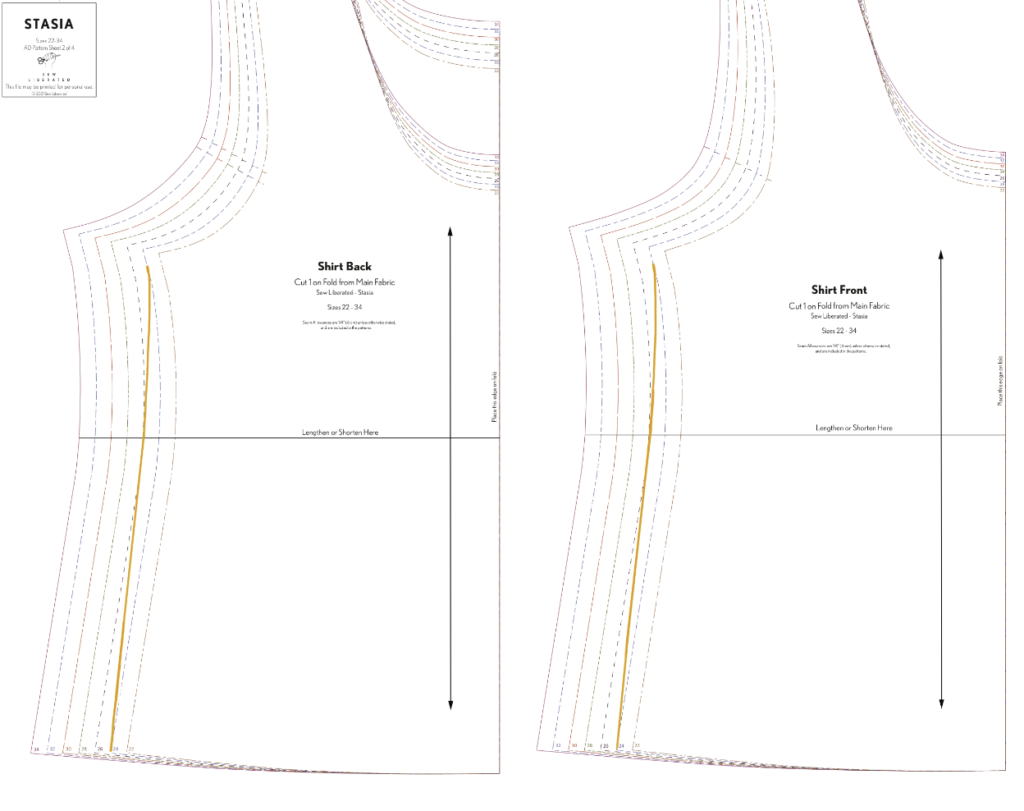
With all of that said, let’s get to work on creating a dartless FBA on a knit bodice! There are a few different ways to accomplish this, so I’m going to keep things simple and just share one method here. It’s the same method that is taught for the Limestone Top in our Learn to Sew Knits class. You’ll see diagrams for Bedrock Views A and B, and the Stasia Dress and Tee bodices. (They’re color coded so you can follow them easily.)
You’ll need:
- A fresh copy of your front bodice pattern piece. We don’t recommend working on your only copy, so that you can work backwards if you need to!
- Some extra paper, to add to the pattern piece
- Tape
- Scissors
- A ruler
- A pencil
Instructions for the FBA
- Locate your bust apex by holding the pattern piece against your body and marking it. (This will support the adjustment but you’re not actually making a dart, so you don’t have to get this absolutely perfect.)
- Mark in your seam allowances – ¼” (6 mm) on Stasia, and ⅜” (1 cm) on Bedrock. It’s important to be using the seam lines while we make pattern changes, and then restore the seam allowances when we’re finished. It makes for significantly more accurate work.
- Draw the cut lines:
- A – apex to armscye (⅜” /1 cm) *NOTE – for View B, since the shoulder is dropped, we need to ensure that we don’t impact the shape of the entire shoulder area. The line should meet the armscye at ⅓ of the way from the underarm, ⅔ down from the shoulder seam.
- B – apex to side seam (⅜” /1 cm)
- C – apex to waist.
- D – across the pattern @ waist (I used the lengthen/shorten line.)
- The hinge points are at the armscye on line A and the apex on line B.
- Cut across line D if you have it. Cut line C from waist to apex, then from apex to armscye on line A leaving a hinge at the armscye seam. Cut line B from side seam to apex, leaving a tiny hinge at the apex.
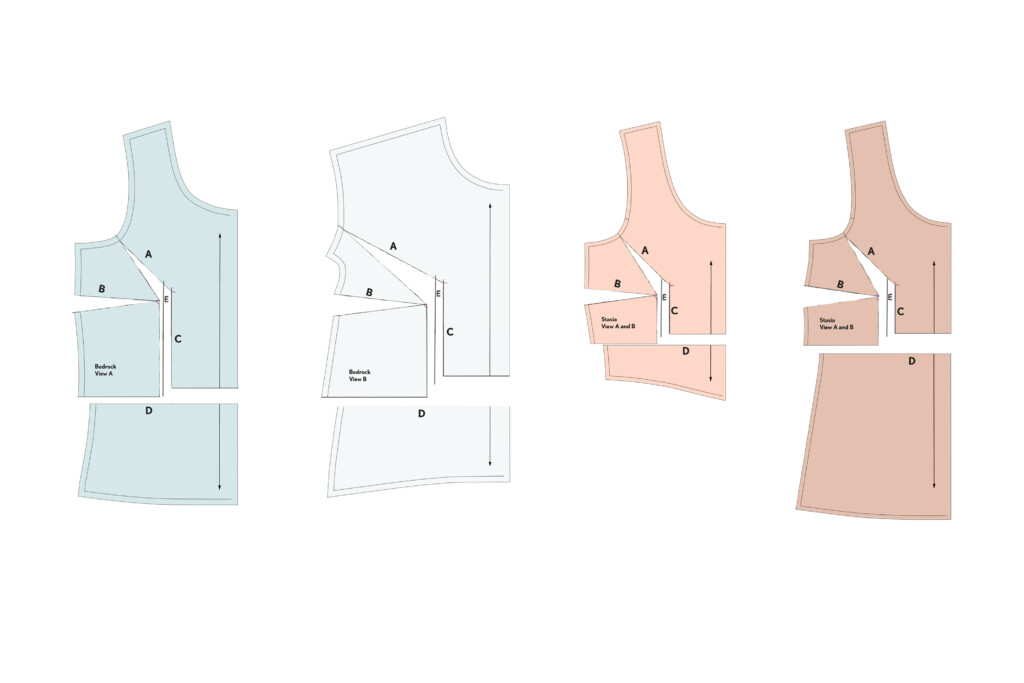
- Draw a vertical line (we’ll call it E) parallel to line C. The distance between the lines is half the amount of the total amount by which you want to increase. If you’re doing a 2” FBA, the distance between lines C and E is 1”.
- Slide the lower side front down and out until its edge lines up with E. You’ll have seen line B open up into a dart shape as the pieces shift.
- If you had a line D, re-attach the bodice at the waist, aligning the CF. Blend at the side seam.
- Where the dart would be, mark 2” on the top and bottom of the gap. You’ll be gathering this area to control the extra length at the side seam that we added with the added circumference. Add notches to the back at the side seam as well, measuring up from the hem and down from the underarm, with a 2” gap in between them. These will help to keep the gathers at the side seam contained right in the full bust area.
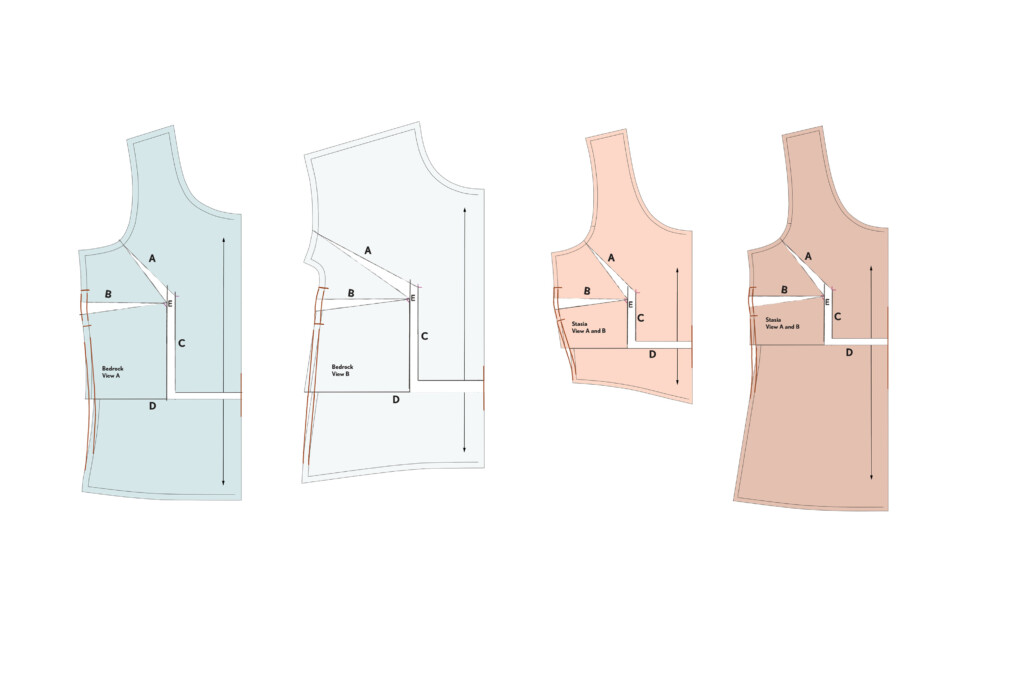
You did it! Remember that making a muslin is the best way to check your pattern changes before cutting into your prized fabric. For knits, try to find an inexpensive sample fabric that is as similar to the hand of your final fabric as possible.
If you find that your t-shirt is still fitting not-quite-right, you may need a shoulder adjustment. Check out this tutorial on common shoulder adjustments for t-shirt patterns.



Such an informative post, but now I’m hoping you’ll explain how to make a small bust adjustment on a knit top! I made view B with no alterations and am happy with the fit, but had been thinking view A might need some tweaking.
Hi Angie! 🙂 Hm, since the bust fits with negative ease on View A and there’s no dart, it’s not common to need to make more of a significant change than a side seam blend… but you’re welcome to send me a message and I can help you troubleshoot!
Aha–thank you, Judith! Perhaps the question I should ask instead is this: how do I know when a knit garment might need a small bust adjustment? There’s about 1.5″ difference between my high and full bust (varies slightly based on undergarments). A quick internet search yields plenty of information for full bust adjustments but very little for those of us who are, well, little. 🙂
Oh I see! You actually don’t often end up making an SBA on knits with no fitting devices – since the knit itself serves as a fitting device, it also adjusts itself within certain parameters. For example, if you sew a knit top with negative ease at the bust, and a single cup size difference from the pattern, either larger or smaller, you likely wouldn’t make a change at all. If the top is designed to have negative ease and your full bust is a different size than your bicep, high bust, waist, and hip, you might take the top in at the side seam, but only a little. The reason an FBA is the more common change on a knit top is that as the cup size increases, new issues arise like lack of front length, folds in the armscye and around the bust, overall lack of front circumference, etc, and a smaller cup size won’t see the opposite of those issues on a simple knit tee (where on a woven bodice, you would see the opposite issues).