Lichen Duster Sew-Along Day 1: Fabric + Fitting
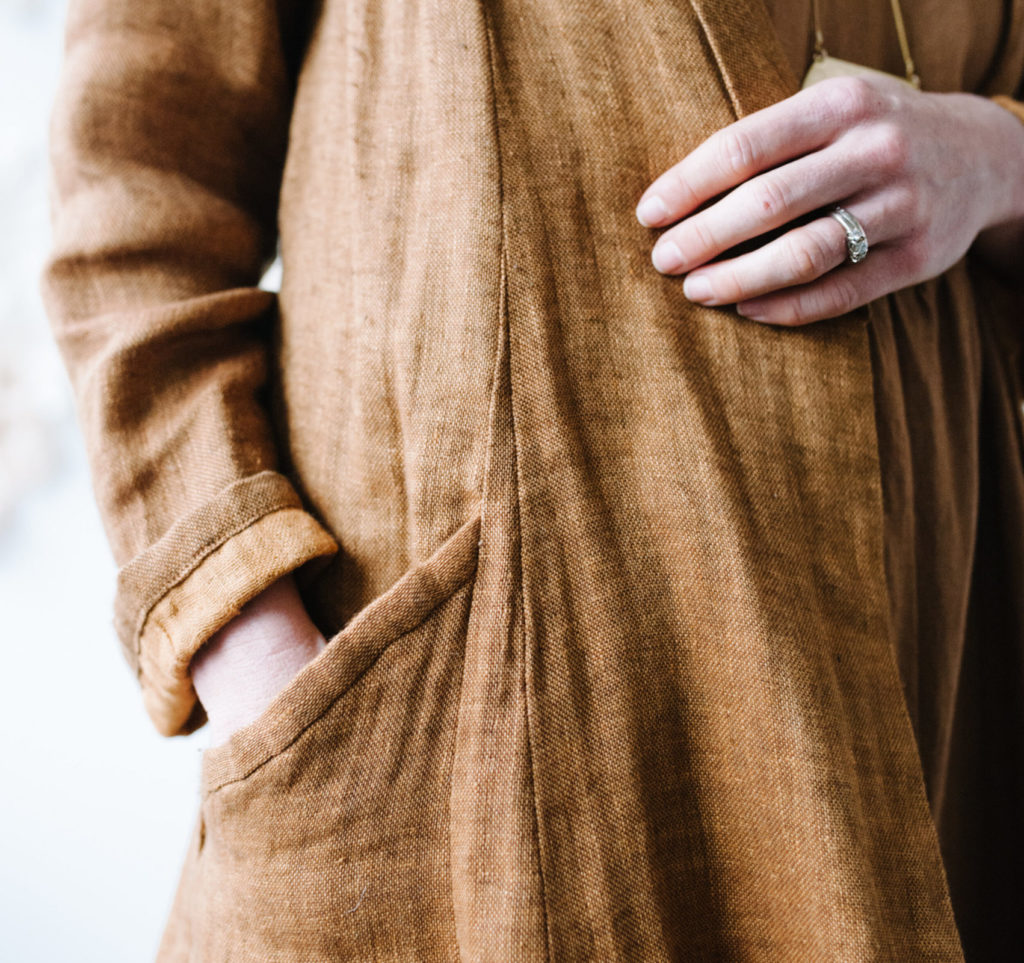

Welcome to the Lichen Sew Along! The Lichen Duster is a pretty special garment, both in the drama and utility that it adds to your wardrobe, as well as in the sewing process. We’re going to be taking the sew along really slowly, allowing time for careful thought and consideration during the process.
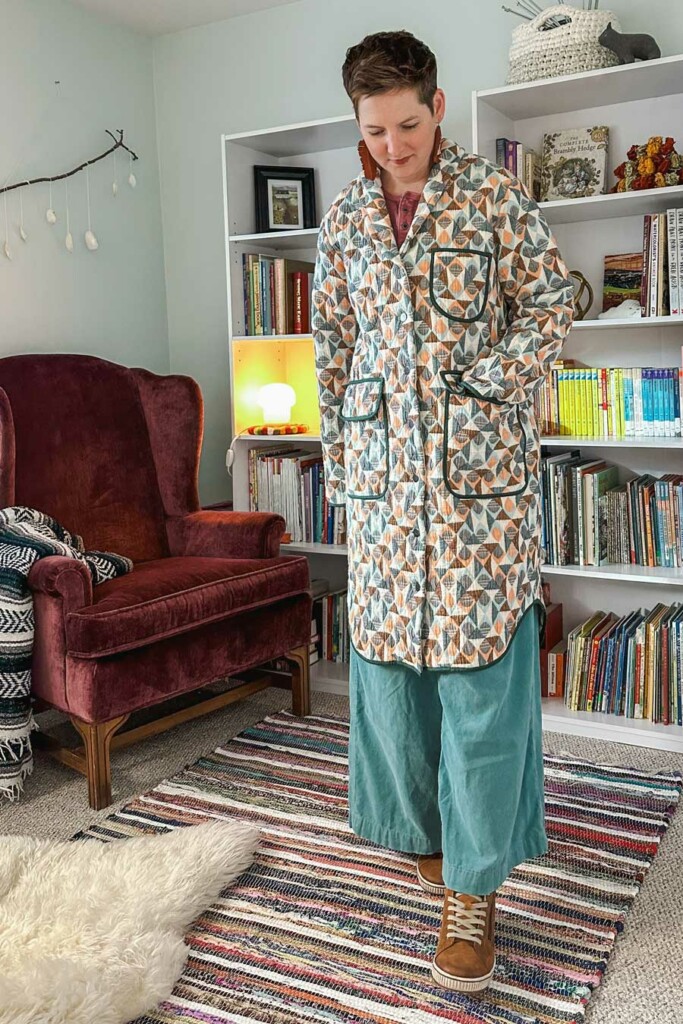
The Lichen Duster features a dramatically shaped hem, shawl collar, roomy pockets, long sleeves, and classic princess seaming with inset gores. The fit is tidy, with well shaped shoulders and back waist seam, yet is generous enough to allow for layering and ease of movement. The Lichen can be styled open and flowy, worn belted as a dress or over your outfit as a coat.
The pattern is suitable for intermediate sewists, with a glossary of seam finishes adding a wonderful opportunity for learning new skills. You will learn how to construct a shawl collar with facings, make a pocket with a bound edge, and use stay stitching strategically to strengthen your garment. An optional straight hem is marked on the pattern. The pattern also includes bust and waist notches, to make fitting adjustments simple.
Today’s post features fabric and fit – it’s a hefty one, but well worth taking the time to work through. One thing that you’ll get familiar with during the making of this pattern is the value of slow sewing. Taking your time with each step, reading the entire instruction ahead of time, cutting out carefully, and lining up notches will pay off for you in accuracy, fit, professional finish, and a more pleasant experience. There is plenty of opportunity for hand sewing on the Lichen Duster, and taking the chance to do so offers even more opportunity for slow, mindful stitching.
Making a muslin (toile, sample garment) gives you the chance to try out the techniques and assess the fit, and saves on costly mistakes in precious fabrics. Making a muslin is a great opportunity to get to know the steps and ensure that you’re making good choices on your seam finishes, and that you’ve read the instructions thoroughly before cutting your final fabric. You don’t have to go out and buy muslin fabric – a thrifted sheet in a hand that’s similar to your final fabric works great. Of course, if your final fabric is quite hefty, like a brushed or felted wool, you’ll have to consider your muslin with accommodations for the changes to fit that a bulky fabric will create. The pattern is quite significant, so you’ll probably want a king-sized sheet, or a sheet set.
Fabric and materials recommendations
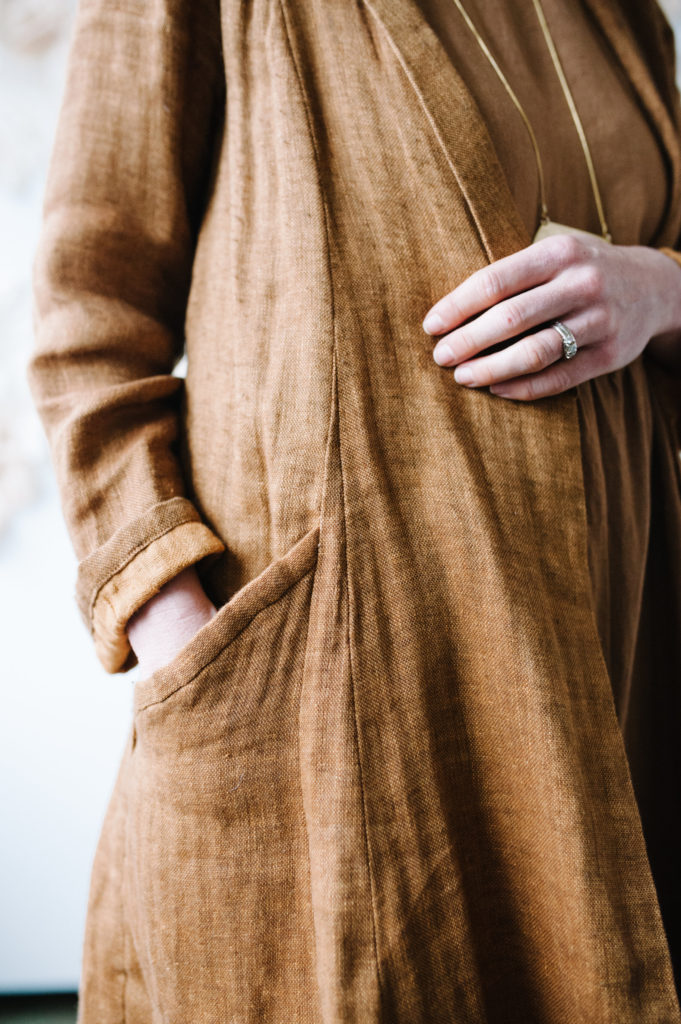
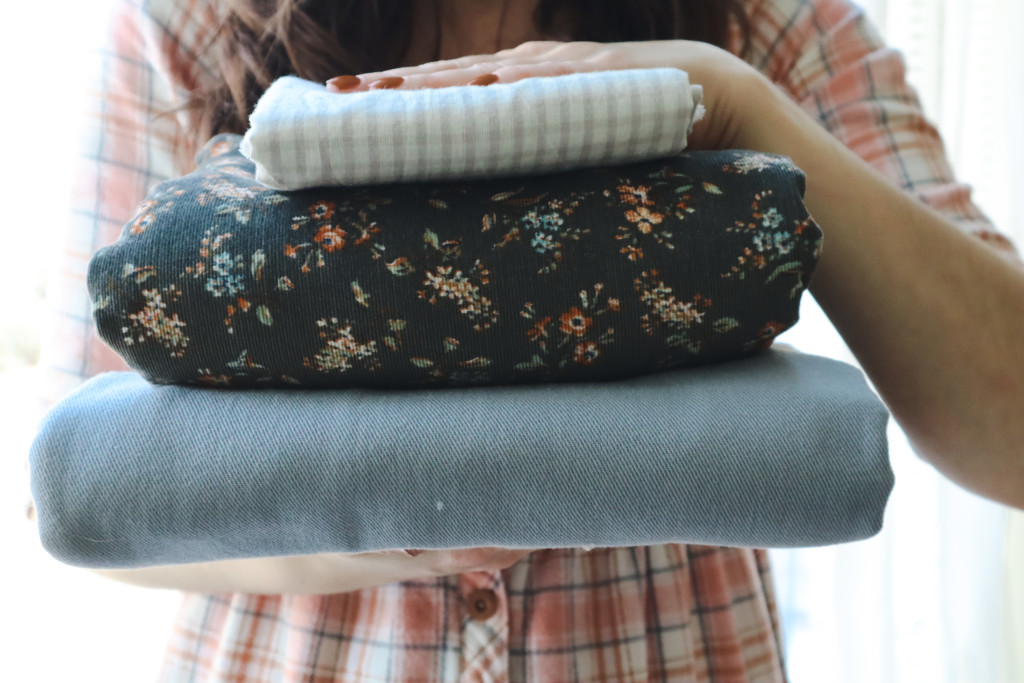
The Lichen Duster is designed for woven fabrics. Look for fabrics that are medium weight, with stable weave structure. You want enough drape to allow the skirt and sleeve to fall smoothly, with enough body to support the collar’s construction. There are so many incredible potential fabrics for this style of duster, like mid-weight linen, cotton ikat, rayon blends, gabardine, flannel, silk noil, pinwale corduroy, and even fancy fabrics like silk velvet, bouclé and felted wool! (A note about plaid – using the notches to match plaid around the circumference is possible, but challenging. I would not recommend a plaid for your first Lichen duster, unless print matching isn’t important to you.)
Here are a few ideas for fabrics that would work fabulously as a Lichen duster:
- 6 oz Tencel Twill
- Washed Linen
- Wool Blend Coating
- Ikat
- Boro – Slub Canvas
- Tahoe Flannel
- Flannel Chambray
You will be using interfacing to stabilize stress points during the collar construction. If your fabric is lighter and has a soft hand, and you like the lived-in look, spot-interfacing is recommended. If your fabric is firmer, and you’re hoping for a crisp look to the collar, you may choose to fully interface the Front Facing pieces and the Back Facing piece. Choose a lightweight fusible interfacing that is good quality – the Lichen Duster is a special piece, and using good quality interfacing will preserve the hand of your fabric while providing support.
Here is an idea of what you’re looking for in interfacing:
If you are cutting it close on your available fabric, or have a belt in your closet already that you intend to wear with the duster, you can omit the belt. There are instructions below for seaming the belt, to help you make good use of your fabric.
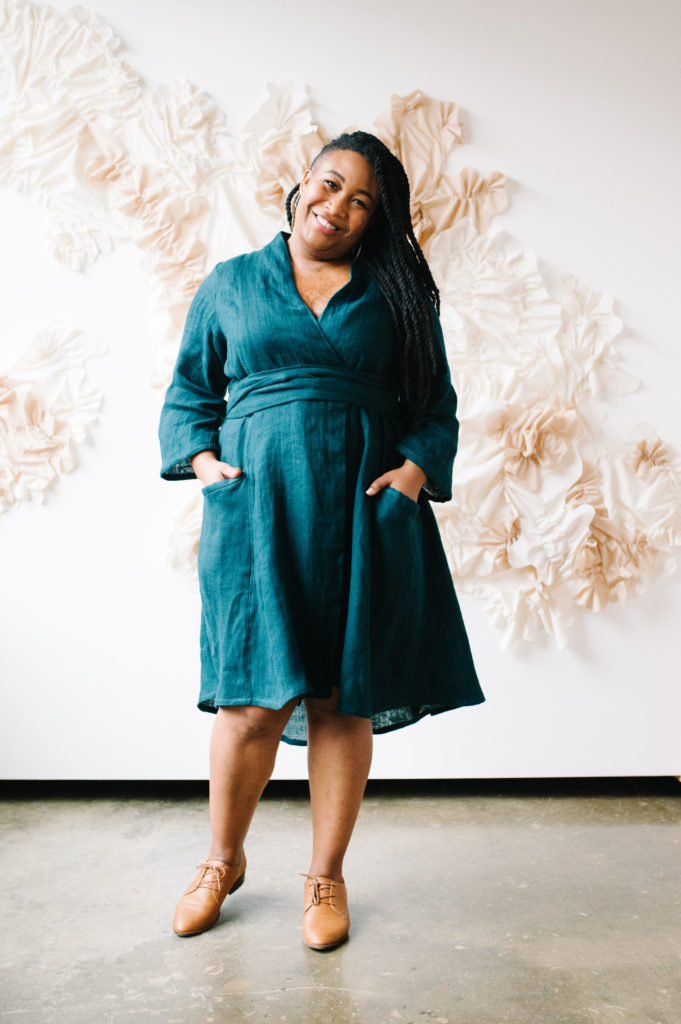
Before we get into layouts and cutting, it’s time to talk about sizing and fit. The first thing to do is take your measurements.
Choosing your size and preparing the pattern
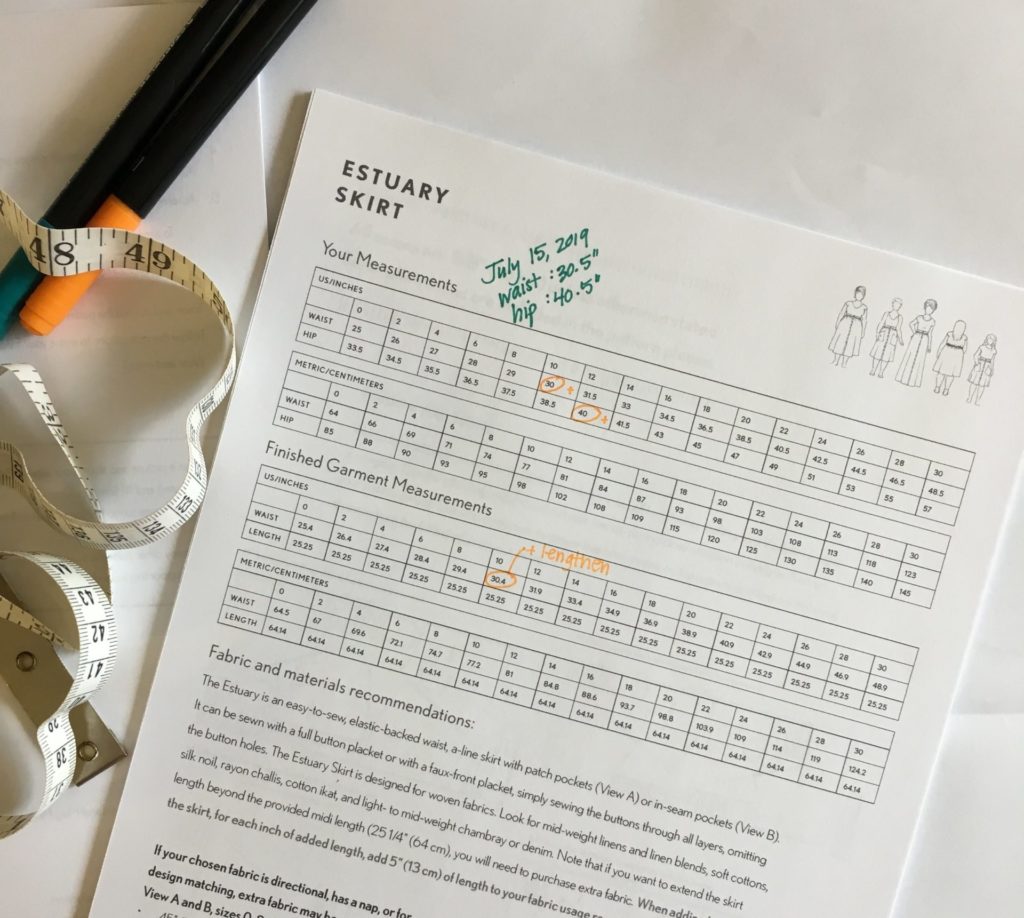
The size charts are on page 4 of the PDF instructions. I wrote my measurements right on the instruction page, included the date by my measurements, and made a few notes to myself. I want to be able to look back and see when and why I chose the size that I did, and where that fits in the finished size range. For this sew-along, I (Judith) will be sewing a size 8. We’ll also have two hypothetical guests, “Moxie” and “Jazz”. Between the three bodies (Judith, Moxie, and Jazz), I’ll share some pattern alterations that you may find helpful in your own process.
Everyone has a preferred method when beginning to use a pattern – you can either have it printed at a printshop and work directly with that print, trace your size off of that print and work with that, print at home and trace off that, or print at home and cut your size directly from your taped pattern. I recommend that whatever you choose, you maintain the ability to work backwards. If you run into a problem, or want to re-make the pattern in another way, being able to refer to the original is important. I’m working with a print-shop print, and I can re-print the file when I would like to, so I’m comfortable cutting the print that I have.
To make any pattern adjustments, you’ll need some extra paper or pattern tissue available (I often use examining table paper – I buy it by the roll at the local medical supply store), and a ruler, pencil, and some tape.
There is a lengthen/shorten line about ⅔ of the way down the skirt portion. Once you know the amount that you are lengthening or shortening, you can cut along this line. One thing to be sure of in your length adjustment is that the grainline remains intact in each piece – it is made longer with the added length, but stays straight and in line with itself. This is crucial to a successful length adjustment! To determine if you need a length adjustment, below you will find the finished garment length measurements by size:


Refer to your pattern instructions for the Bust/Waist/Hip Finished Measurements for the Lichen.
You may find yourself in between sizes on the chart. Not to worry! The size chart shows the regularly spaced intervals in which the pattern is drafted – it’s NOT an indicator of where you should fit, or if any of your measurements are “out of proportion”. When you’re working with a sizing chart, always remember that you are only using math to make the pattern work FOR your fabulous body.
Now we’re going to dive into our sets of measurements for the three bodies that we’re fitting for this sew-along. I’ll break them down and do the complete pattern adjustments for each person, in miniature.
* The patterns that you’ll see me working with are scaled down significantly, to make the demonstrations easier to capture on camera. *
When we consider our sizing choices, the Finished Measurements chart will help with the decisions. Take note of the ease amounts : The finished measurements are taken from center front finished edge around the garment to center front finished edge. Note that when the duster is worn belted, it should have a 4″ overlap at the front. The ease, taking into account the overlap, is 10.25″ at the waist, and 17″ at the hip.
Let’s start with Moxie. Her measurements are: bust: 33.5”, waist: 30”, hip: 36.5”. Moxie is 5’8” tall. These put her in a 4-10 range, so I’m going to reference the Finished Measurements chart. The bust is “free across the bust”. That means that the duster doesn’t close securely over the bust, so there’s no definitive finished measurement. Moxie’s waist is technically in size 10, and her hip is size 6. I see on the chart that there’s 10.5” of ease available in the waist, and 17” in the hip. Moxie wants enough waist ease for an appealing amount of gathering when the duster is worn belted, so I’ll choose size 6, with a blend to a size 8 waist. Then it will fit true to the pattern, without too significant of a jump between sizes. Moxie is 5’8”, so I’ll add 2” to the length as well.
Jazz is 5’ even, with bust: 46.5”, waist: 37”, hip: 45”. Jazz fits wonderfully into a size 18, with the exception of her bust measurement. I could blend between sizes to a size 22 bust, but Jazz has narrow shoulders, so size 22 at the shoulder would be too big. I could just allow the freedom across the bust to take up the difference in measurements, but because Jazz is not tall, she may end up with a gaping collar. I’ll choose a size 18 with a 1.5” Full Bust Adjustment for Jazz. I’m going to shorten the duster 1” (Jazz is okay with the extra length – she likes drama!), and add a bit of swing to the gores, to balance the extra fullness of the top.
My measurements (Judith) are bust: 36”, waist: 29.5”, hip 37”, and I’m 5’6” tall. My bust technically fits in a size 10, with waist and hips squarely in an 8. I will wear my duster open most of the time, and my shoulder width is slightly narrow, so I can make a straight size 8.
Moxie’s pattern is up first: The front pieces are on the table, roughly cut out. I didn’t cut them out fully, since we’re blending the sizes.
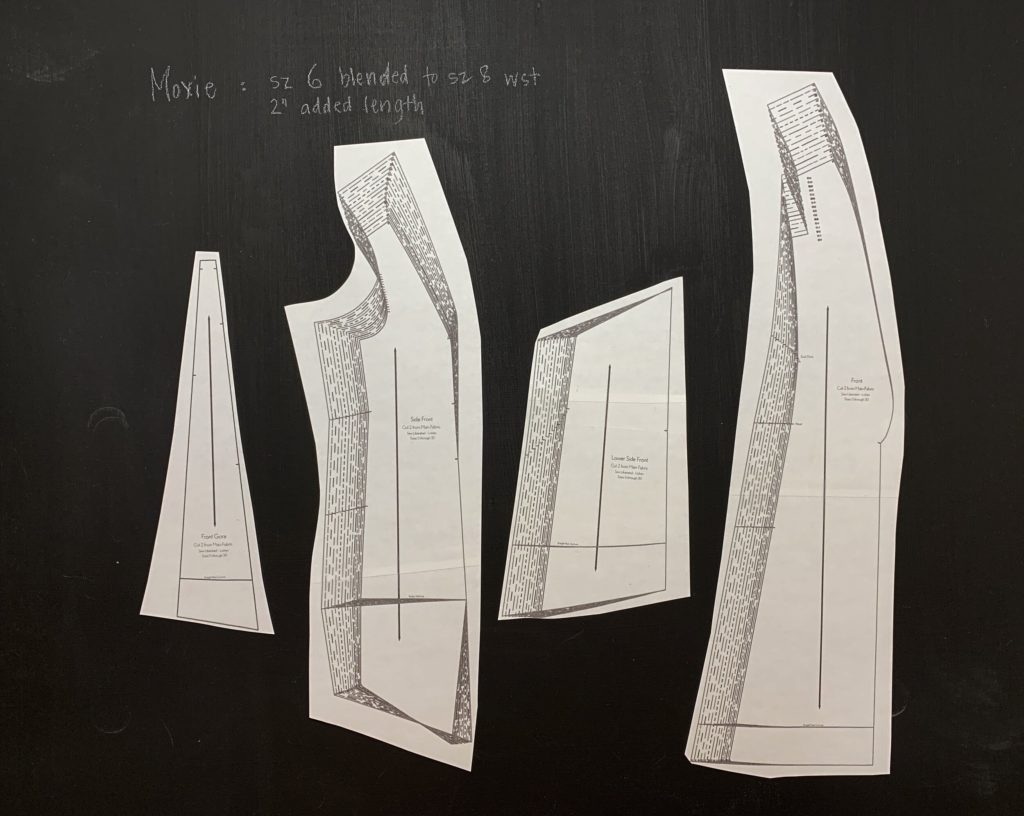
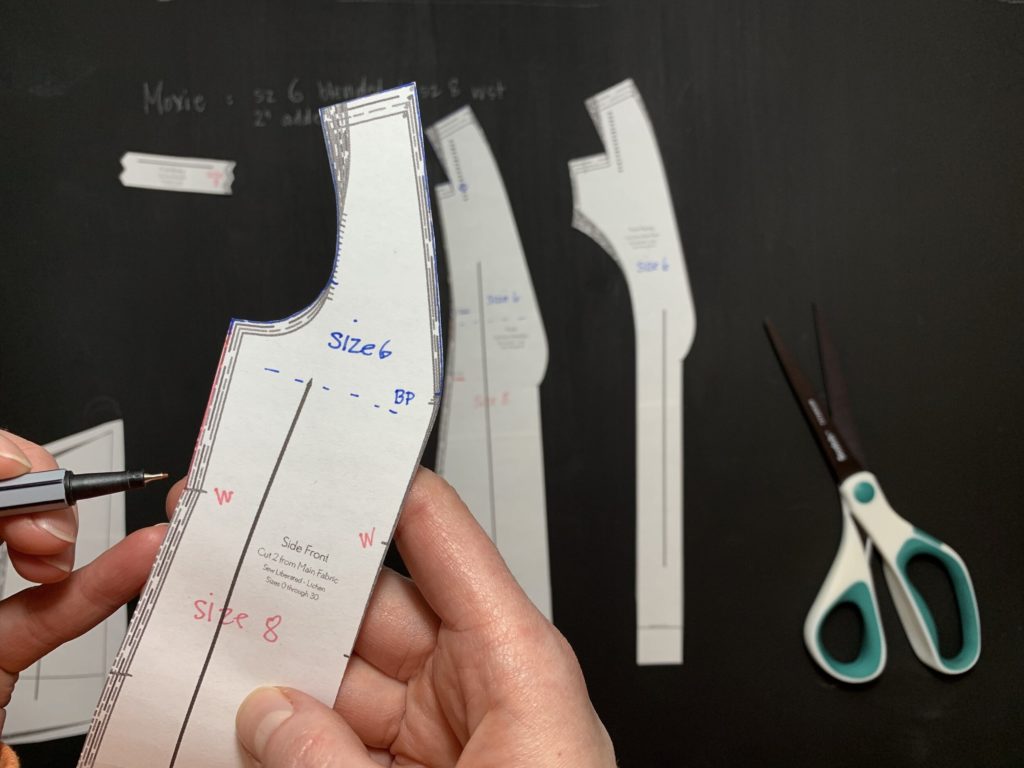
Next I use colored markers to start getting the sizes in order. From the bust point and above, I marked size 6 in blue, and size 8 in orange from the waist notch down.
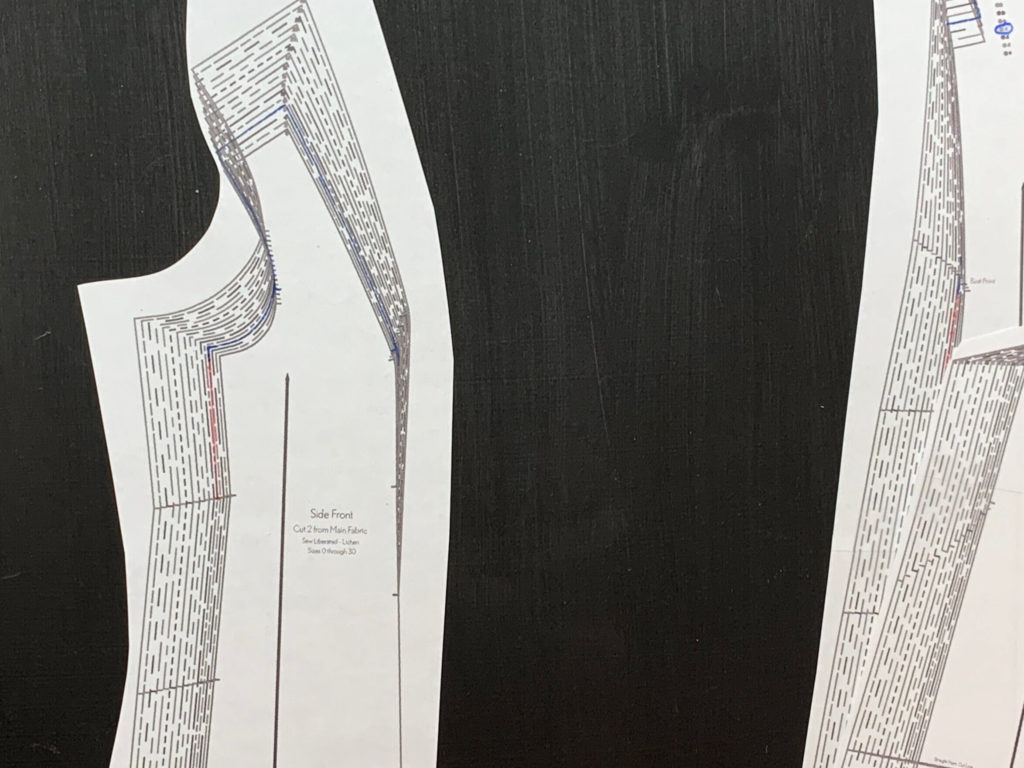
Then, in between the bust and the waist, I connect the sizes.
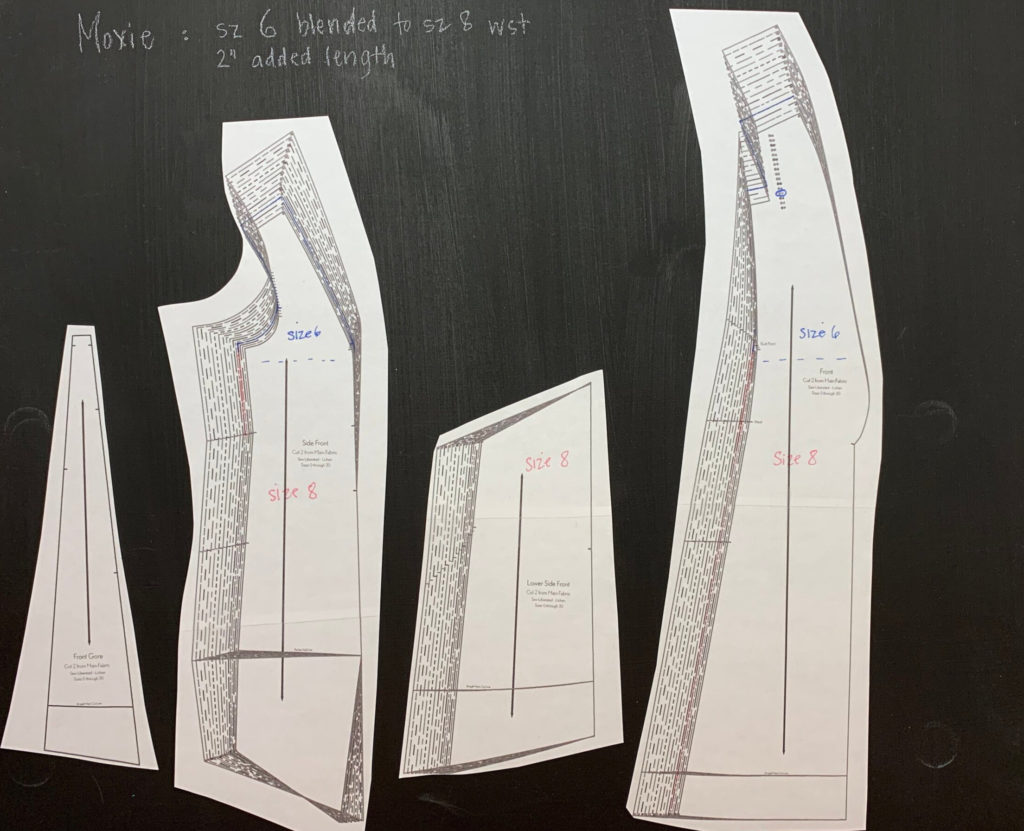
Take a look at the lines in the next photos. Notice how they angle between the size 6 and size 8.
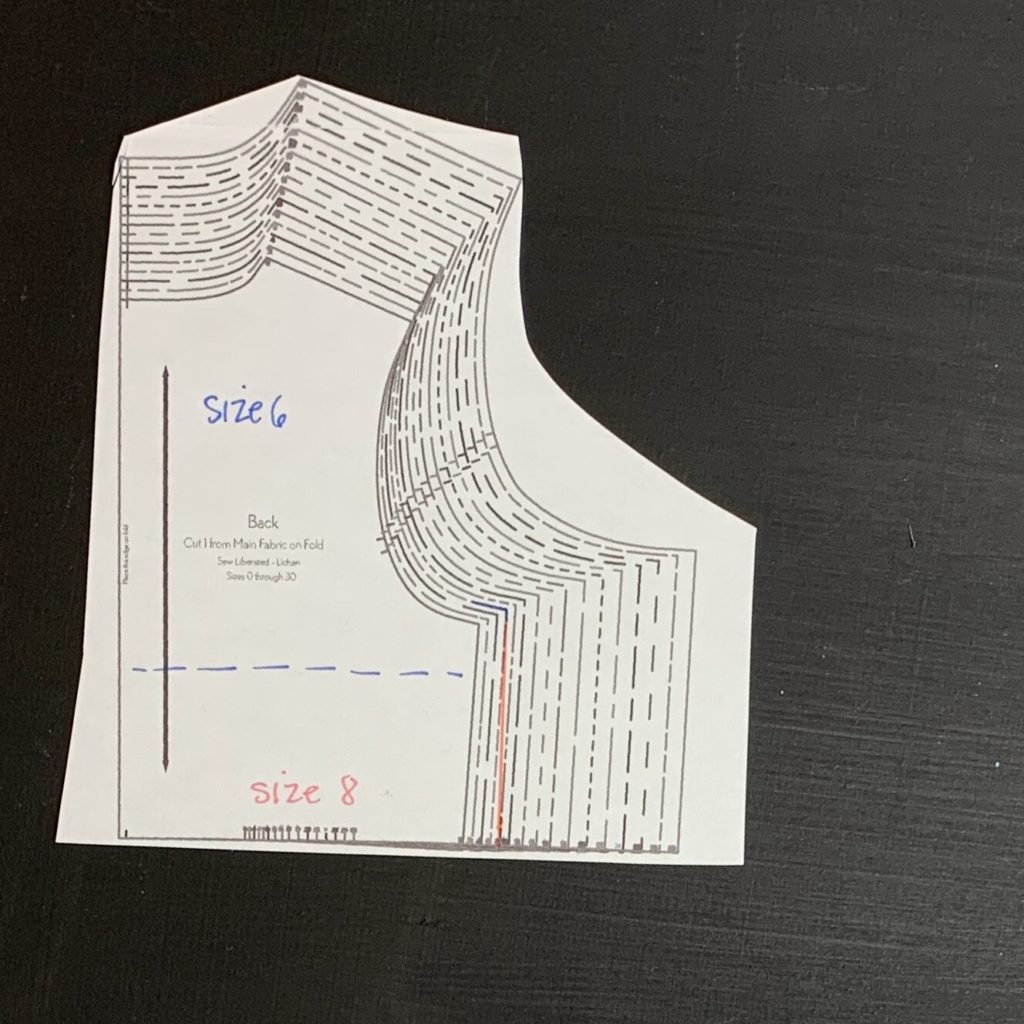
You can see all of the pieces, labelled with the sizes in their respective portions below.
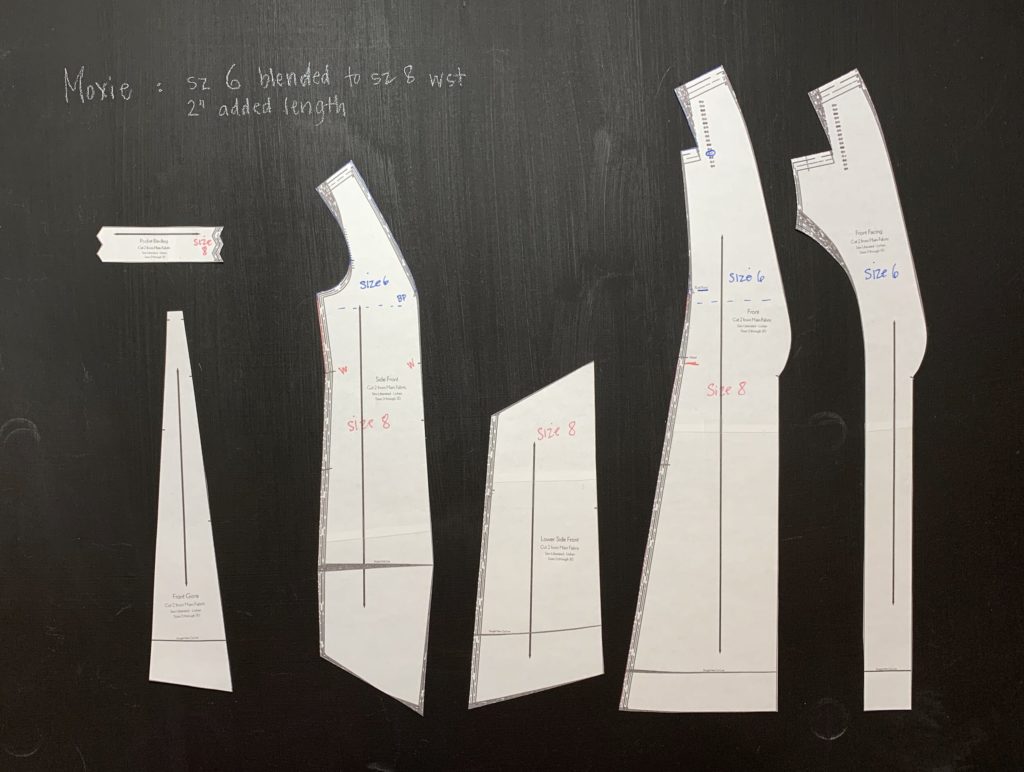
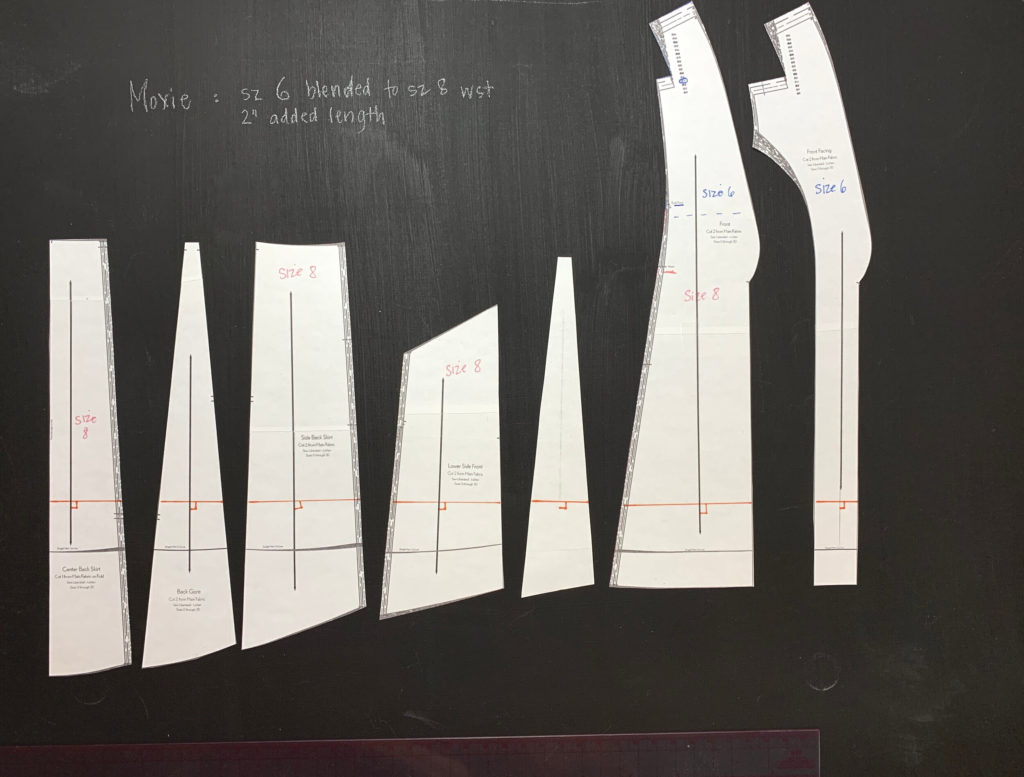
The other adjustment that Moxie needs is added length. We’ve decided to add two inches, so that begins with assembling all of the pieces to which length is added.
- Center back Skirt
- Back Gore
Side Back Skirt
- Lower Side Front
- Front Gore
- Front
- Front Facing
Squaring off of the grainline, and an equivalent distance from the Straight Hem cutting line, I’ve drawn a line horizontally across each of these pieces.
The next step is to cut along each line and add paper. I prefer to draw in a grainline and guidelines before taping the paper in place – it helps me line up the pieces evenly.
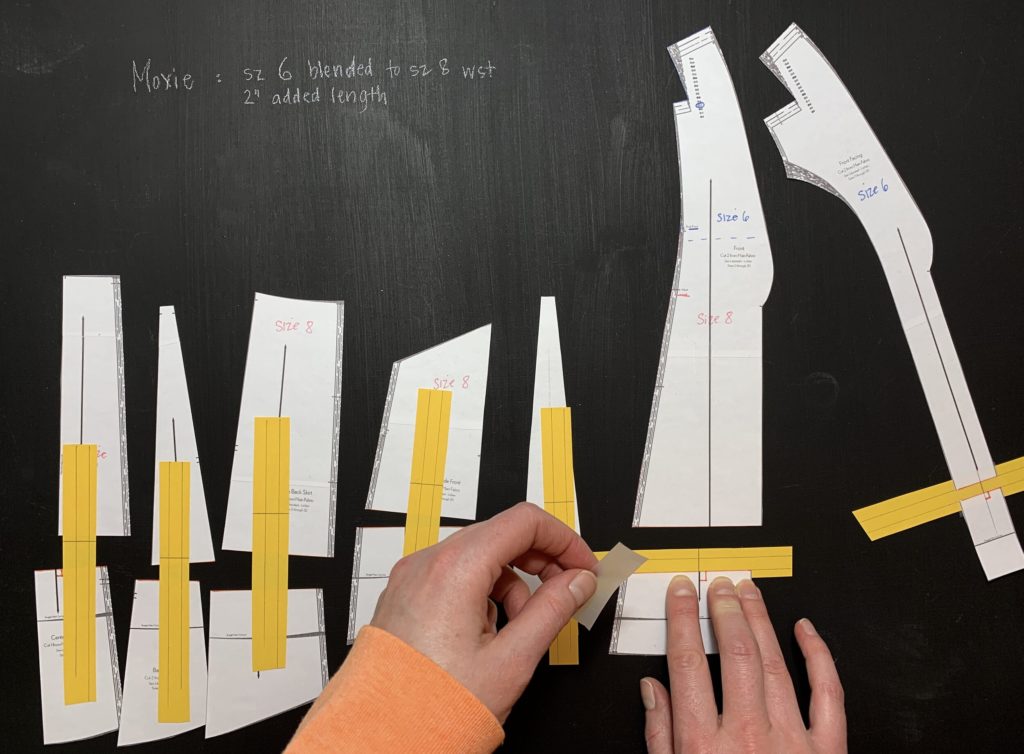
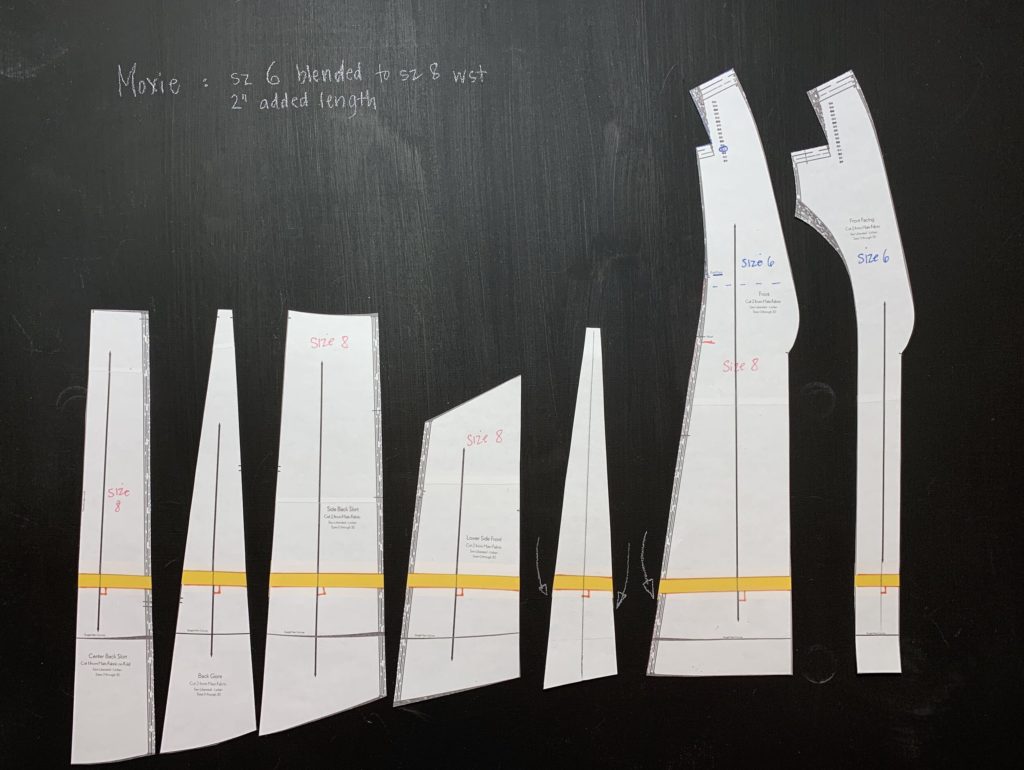
In the next image, you can see the added length taped into place. The arrows show where the cut lines need to be blended to be smooth. And Moxie is all set to lay out her fabric and get her pattern pieces laid out!
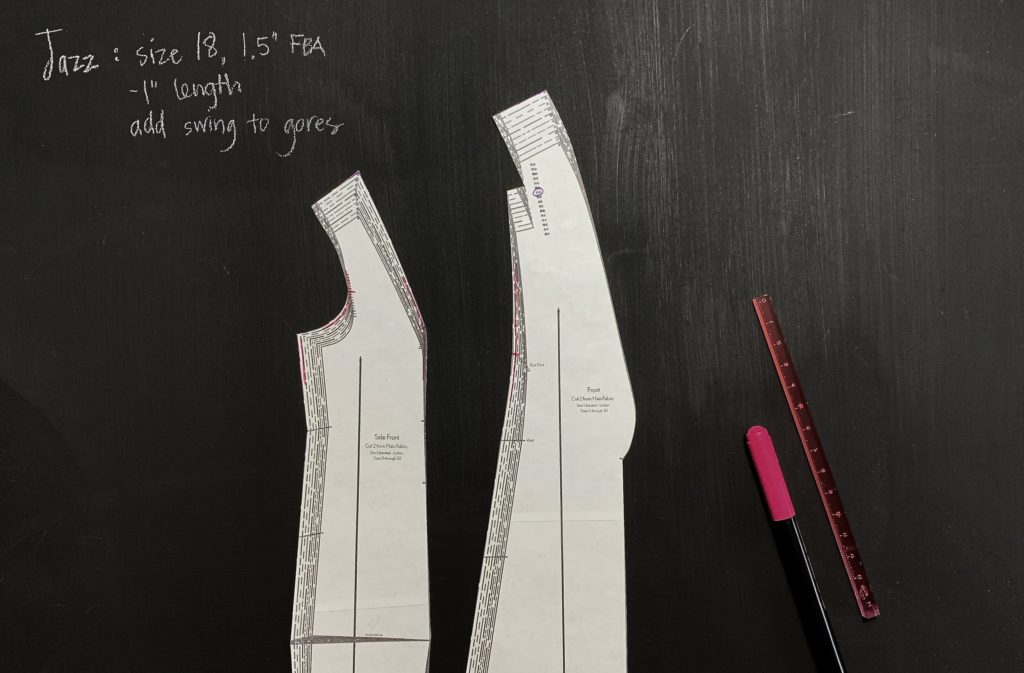
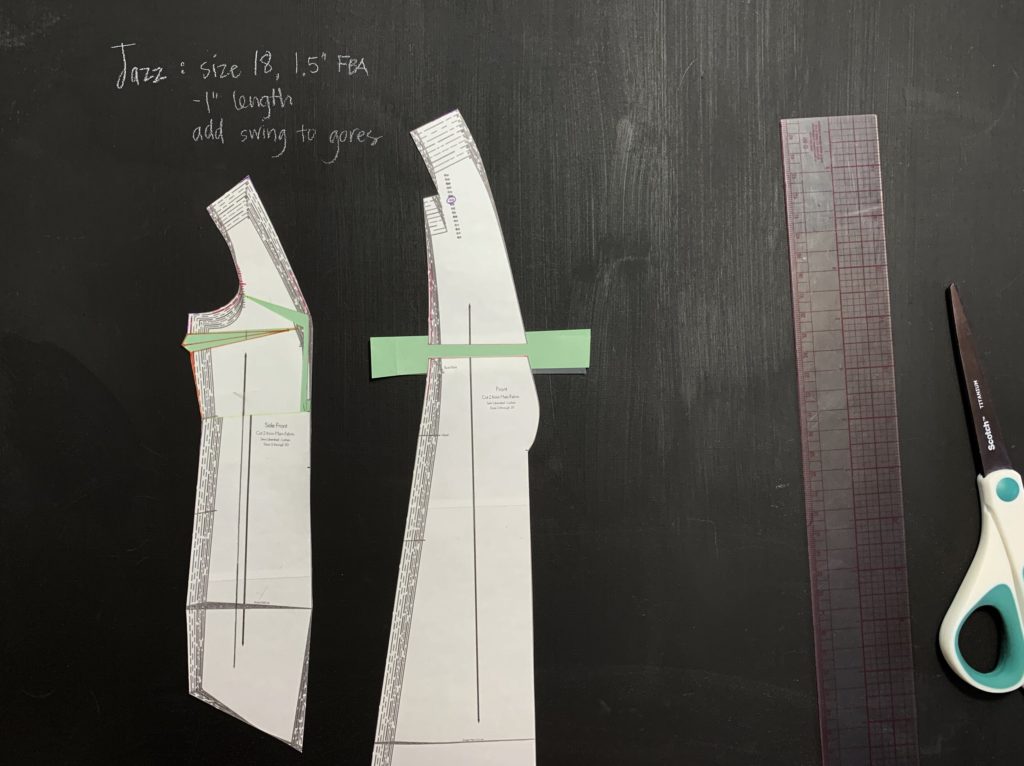
Jazz’s pattern will be a size 18 with a 1.5” Full Bust Adjustment (FBA), 1” reduced length, and added swing to the gores. I cut out all the pieces in size 18. I’m starting with the FBA, so I have the Front and Side Front on the table in front of me. I have marked the seam allowances and notches with pink so that they’re easy to work with.
I’ve marked lines in green on the side front, from the side seam to the bust notch, and from the armscye notch to the bust notch. These are slash lines where the fullness will be added. The line from the side seam to the bust notch will open into a new bust dart.
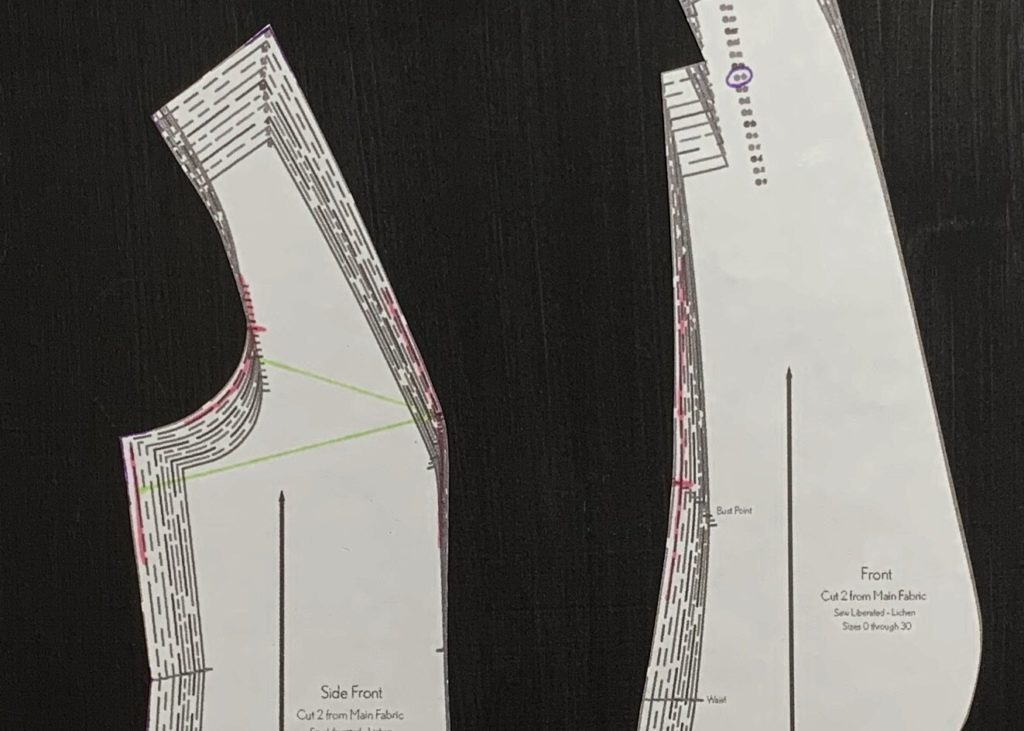
On a typical FBA, I would also draw a line vertically, from the waist to the bust point, but since we’re working with a princess seam, I’ll use the seam line instead. The first cut I need to make is from waist notch to waist notch, to free the bodice from the skirt. I can set aside the lower portion of the side front, and I’ll re-attach it later.
Starting at the waist, I cut up the stitching line to the bust notch (this is why I drew in my seam allowances!), and then over to the armscye notch, to but not through the stitching line.
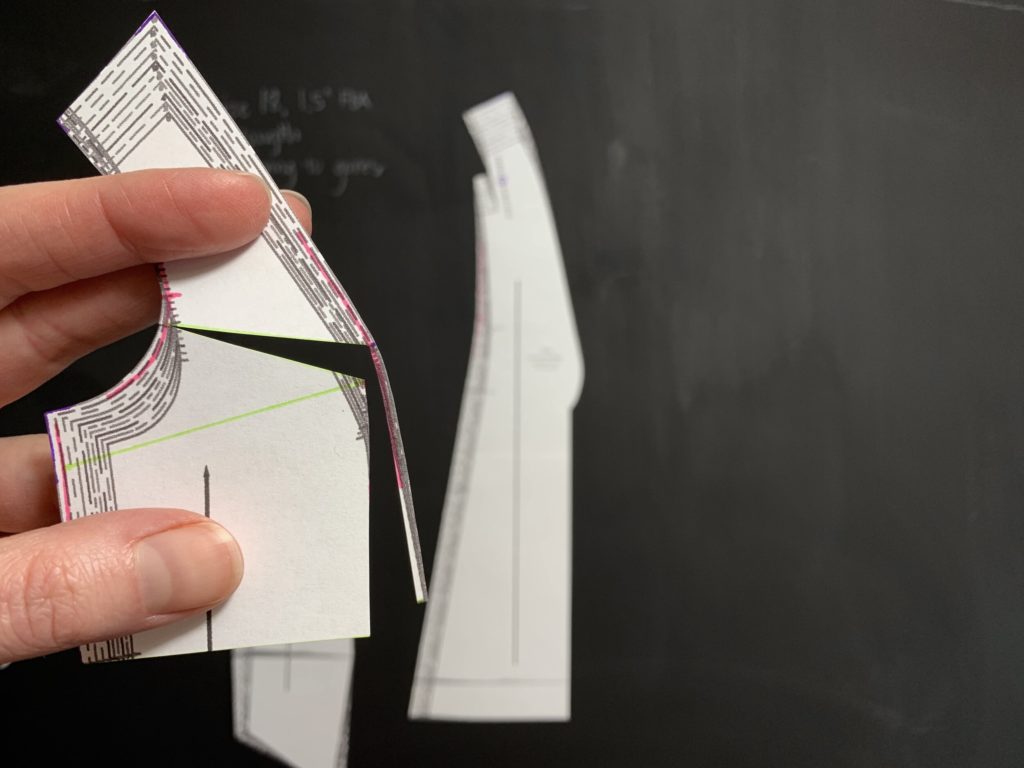
Then snip into the seam allowance at the armscye notch, to but not through the stitching line, creating a hinge. Then one last cut from the side seam to but not through the bust point, as shown.
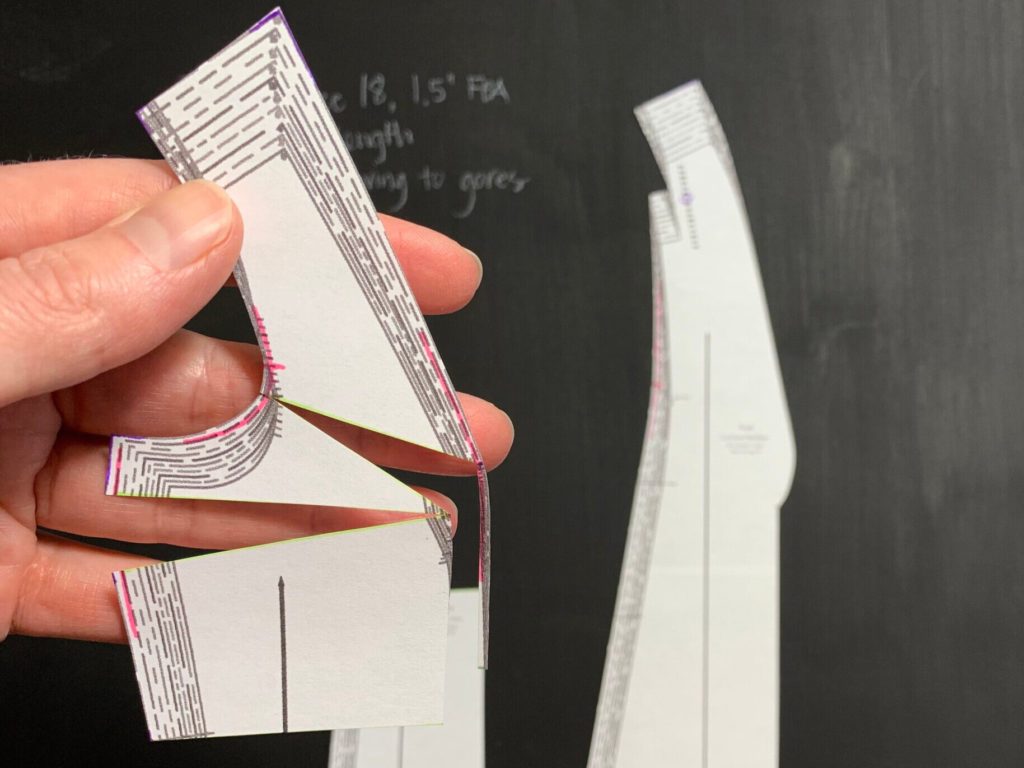
Now I’m moving over to the paper that I’ll need to tape the pattern to. I always draw my grainline in place first, then secure the waistline to the paper with tape. I draw in a vertical line parallel to the seam line that I cut free. The distance between the seam line and my vertical line is HALF of the total bust adjustment, so 1.5” divided by 2 is .75”. Now I can slide the upper portion of the bodice into place, allowing the new bust dart to open and carefully lining up the seam allowance the I cut free to be even with the adjustment line.
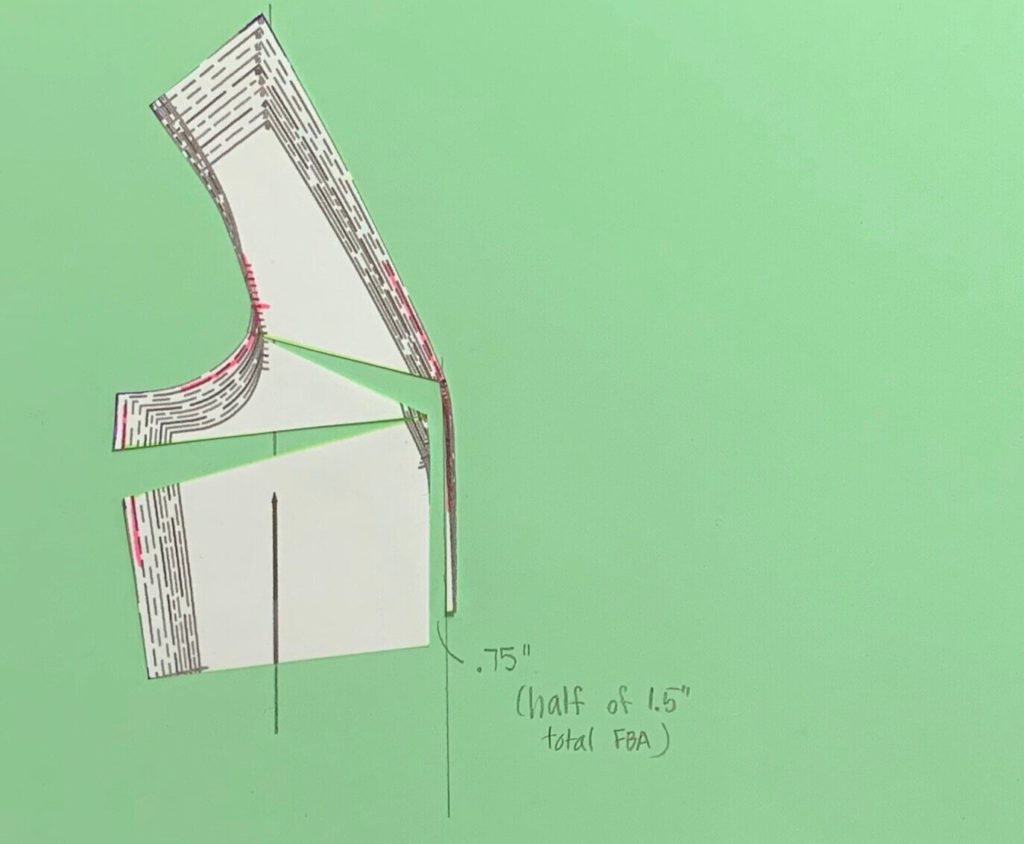
I can tape this upper portion of the bodice into place.
The bust dart may be drawn in, with a 2” distance between the dart tip and the bust point. And because we’ve opened up a space at the waist, we need to reduce the side seam by the same amount.
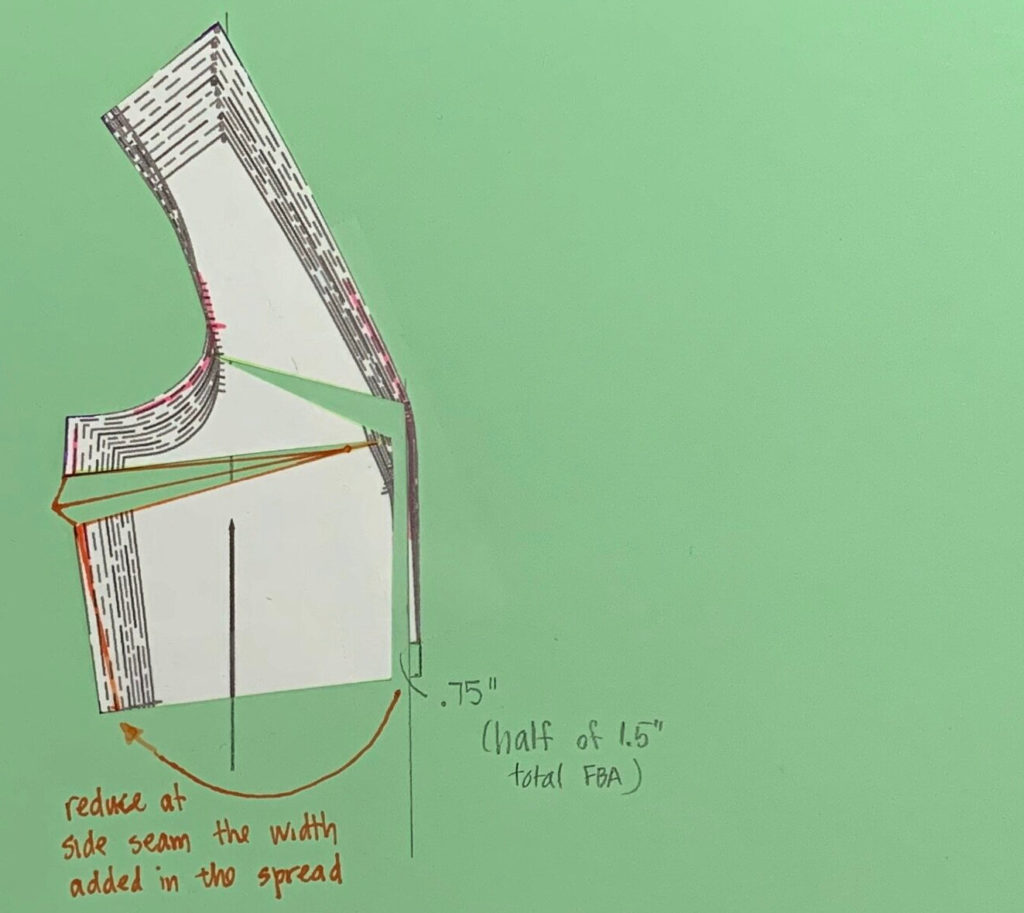
Now I can tape the lower half of the Side Front back into place!
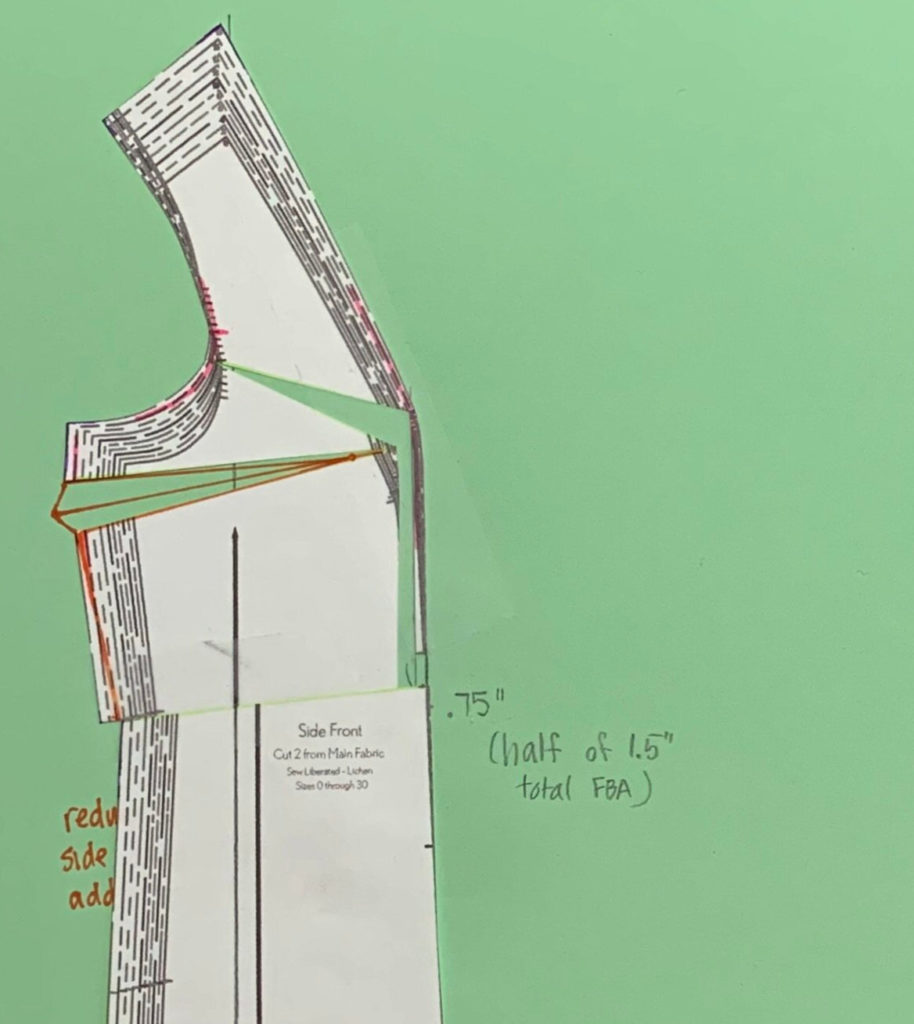
The last thing to complete the FBA is to add length to the Front and Front Facing. I measure the gap in the seam allowance on the Side Front princess seam.
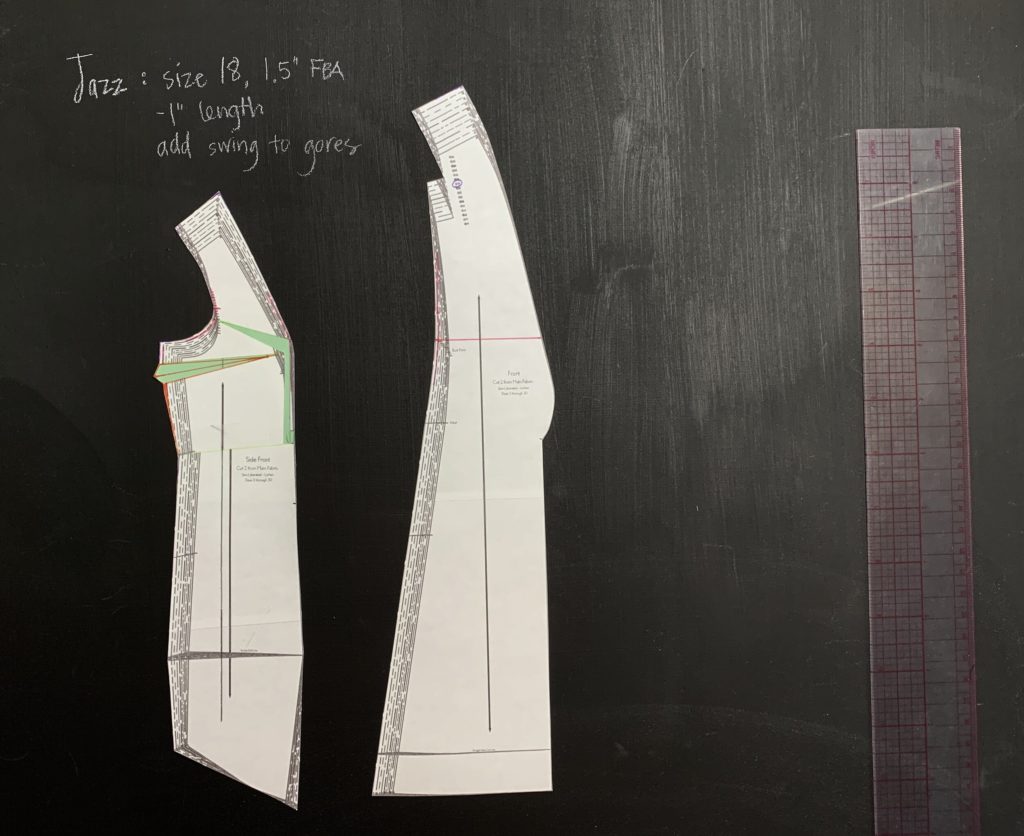
I draw a horizontal line, squared off of the grainline level with the bust notch. I add in paper and blend the seam.
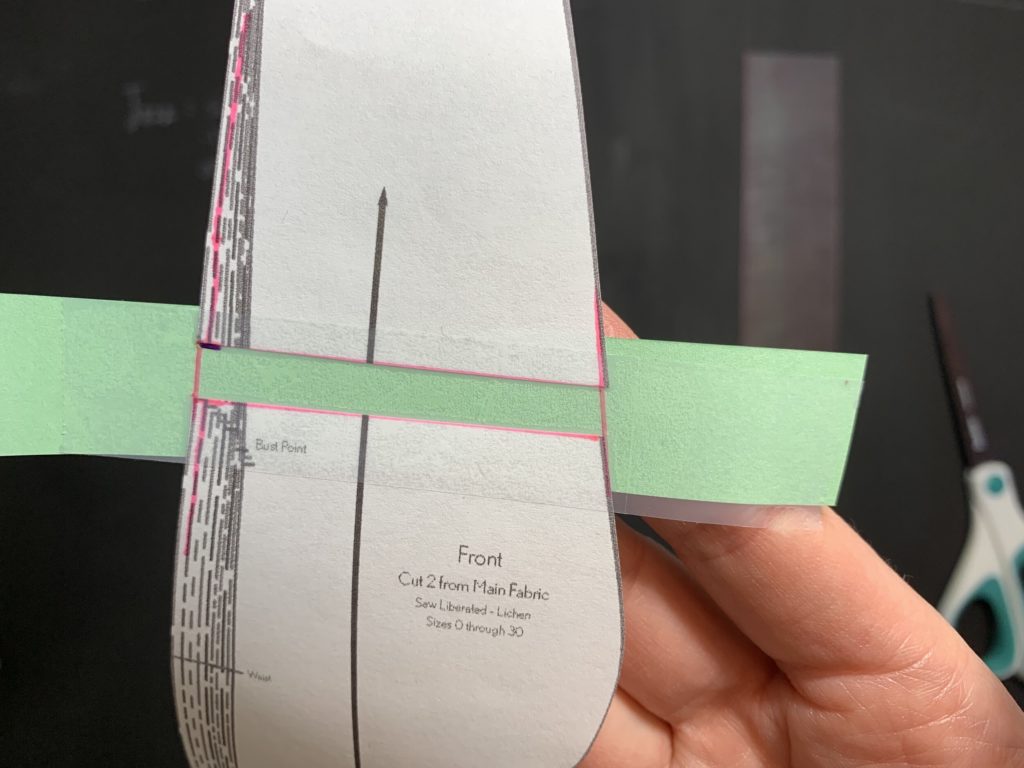
I repeat this process on the Front facing, and make sure that the lapel edges are blended identically.
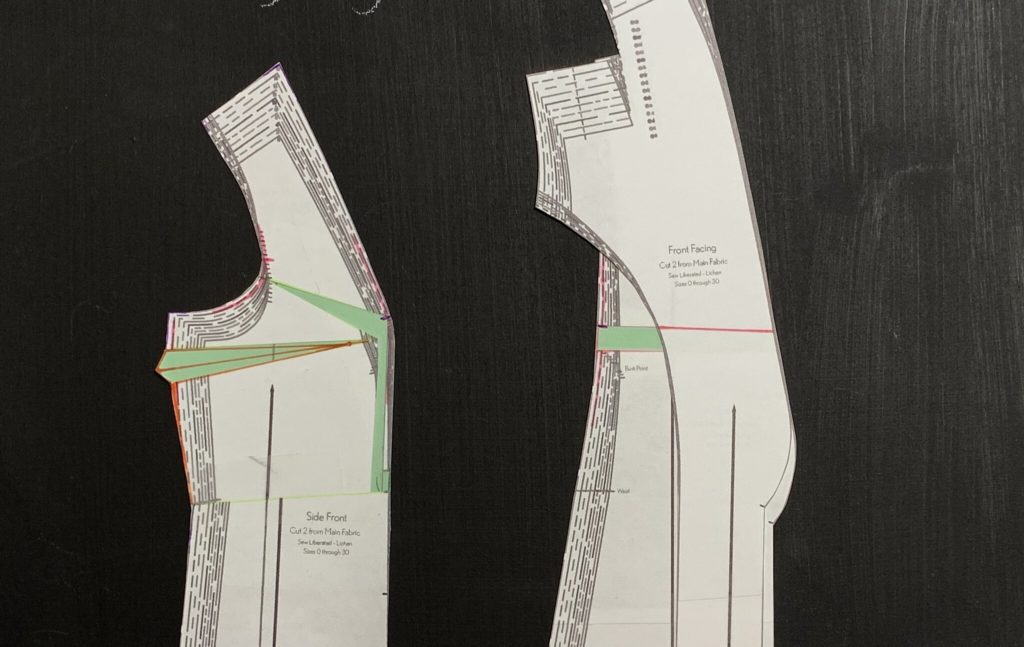
The FBA for Jazz’s Lichen is complete!
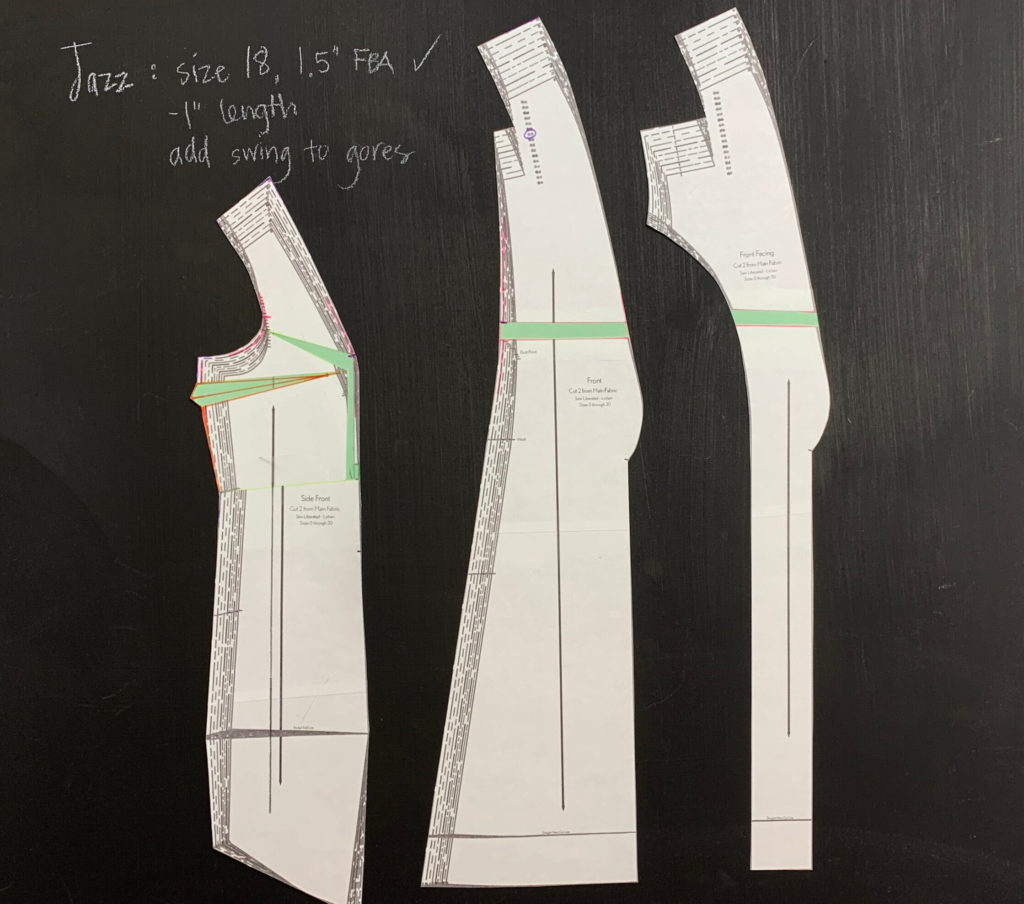
Moving on to the length reduction of 1”, I need to assemble all of the pieces to which length is removed.
- Center back Skirt
- Back Gore
- Side Back Skirt
- Lower Side Front
- Front Gore
- Front
- Front Facing
On each of these pieces, I’ve drawn a horizontal line, squared off of the grainline, and an equivalent distance from the Straight Hem cutting line, measured at the grainline.
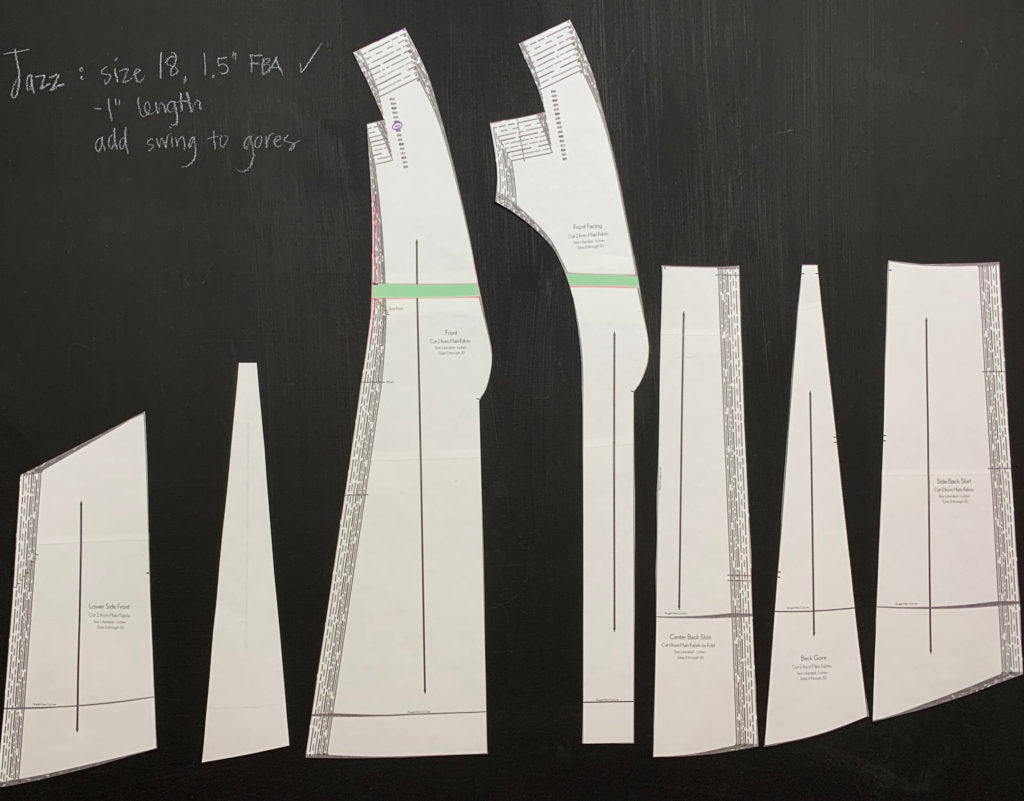
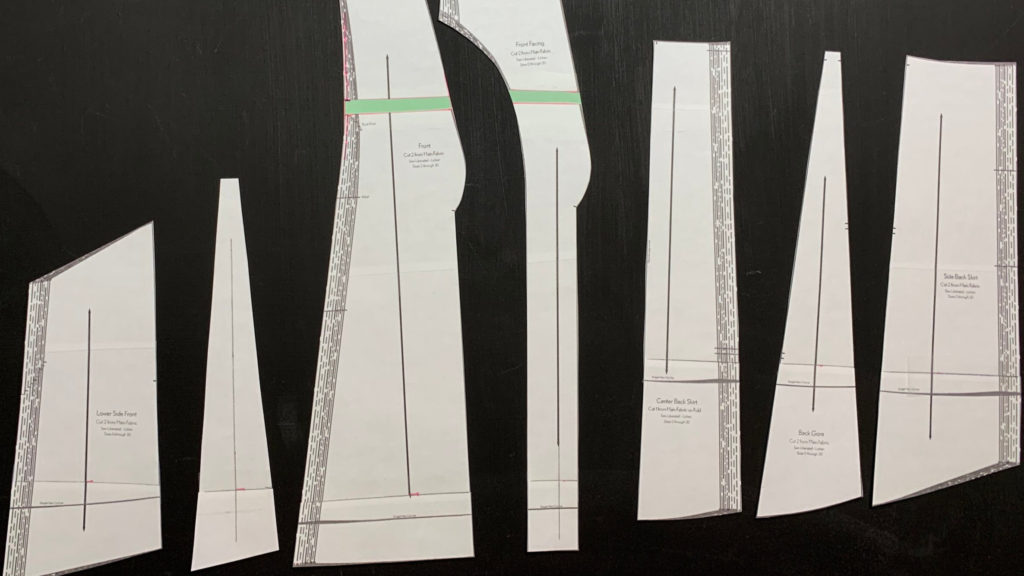
I then draw another horizontal line 1” above the first (the amount of my adjustment), and cut along the first horizontal line on all of the pieces that I’m working on. I move each lower portion up to the second horizontal line, keeping the grainline straight, and tape the adjustment in place.
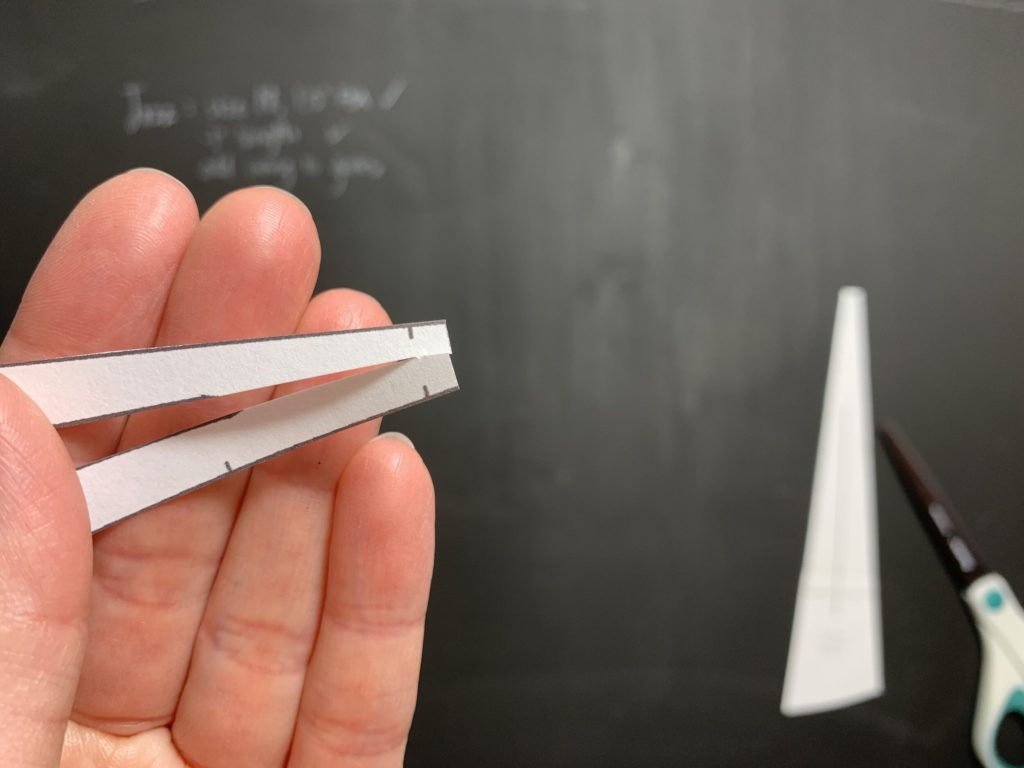
The last adjustment to be made to Jazz’s pattern is to add swing to the gores. I’m adding at the hipline, which is, on average, 9” below the waistline. The first thing to do is extend the grainline all the way to the top and bottom of the Front Gore and Back Gore. Now cut all the way from the hem to the waist seam (not the cutting line), and then down from the waist cutting line to the waist seam, creating a small hinge.
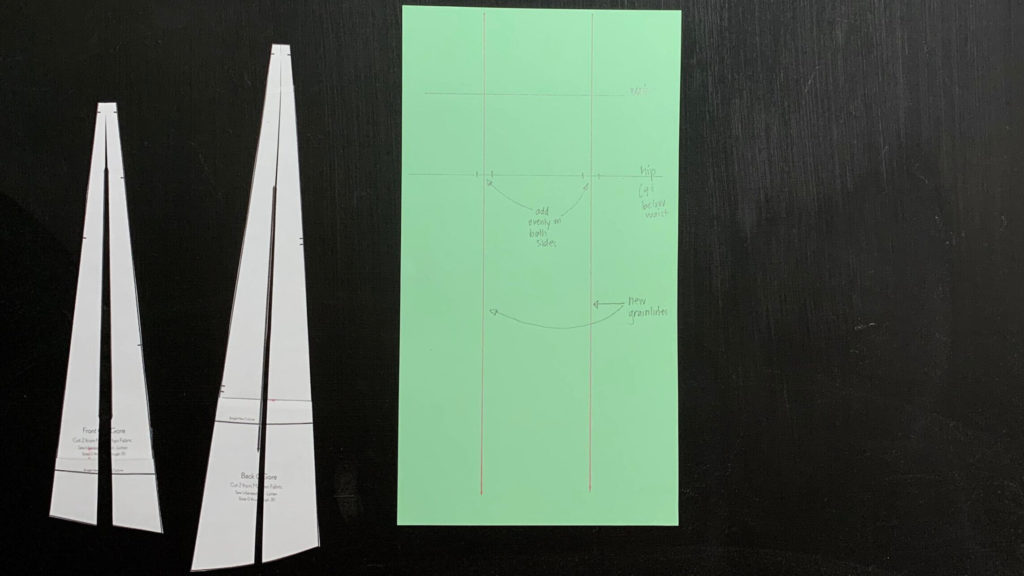
I then prepare the paper that I want to add to the gore’s width. Adding to the center of the gore rather than to the seam lines maintains the balance of the piece, and doesn’t compromise any notch positions. On the paper, I’ve drawn in two grain lines, a waistline to which I’ll line up the pieces, and a hip line 9” down from the waist. On each side of the new grainline, at the hip, I have marked an equal distance for addition to the hip. (When you’re deciding on this number, keep in mind that you’ll be adding a significant amount to the hem sweep, and you’ll need quite a bit more fabric than the usage chart calls for. )
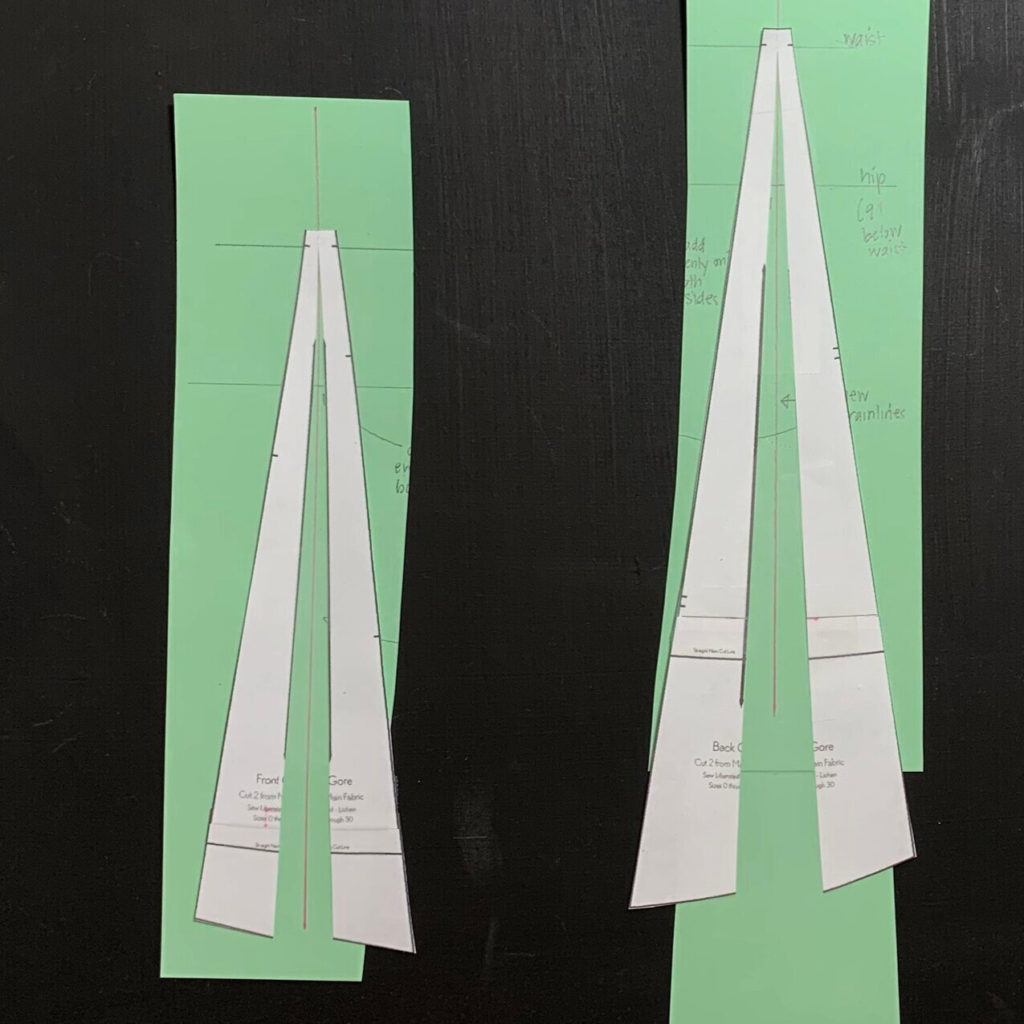
Place your pieces on the paper, lining up grainlines and waistlines, then open up the slash and tape in place, lining up the hip to the new markings.
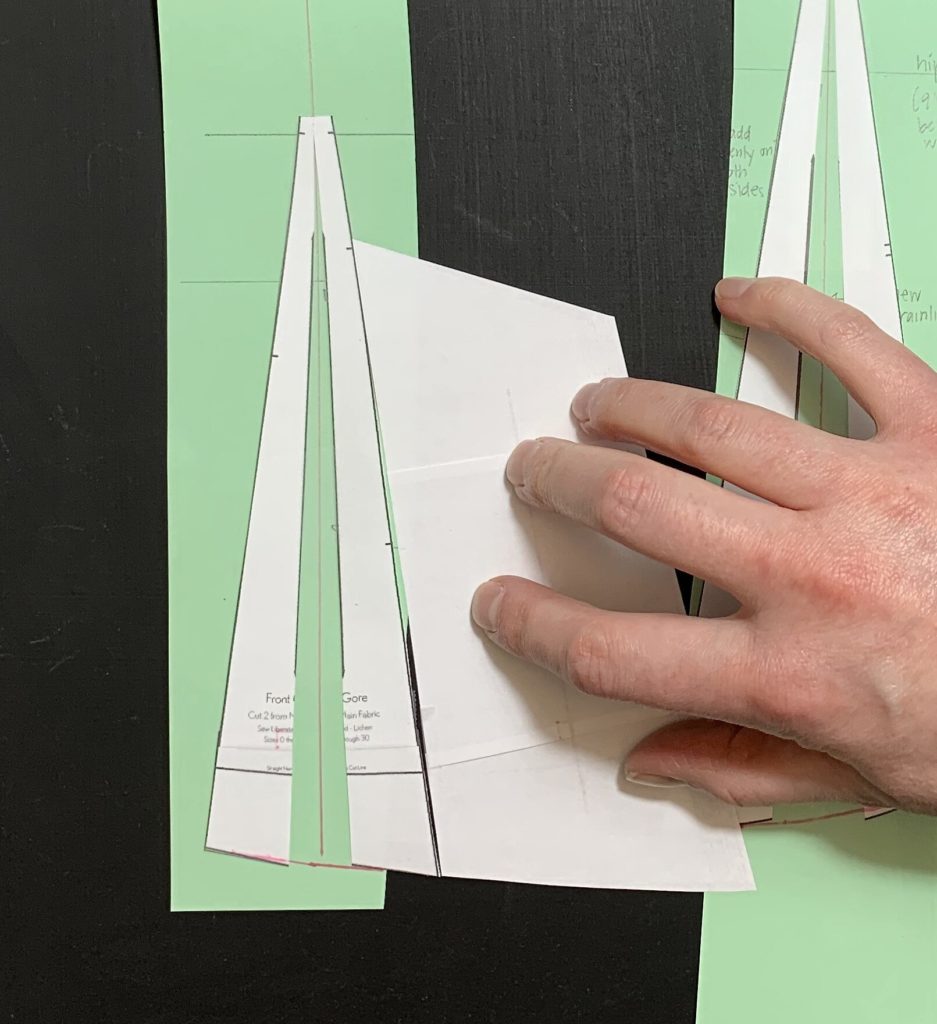
Using the Lower Side Front against the Front Gore, re-shape the hemline.
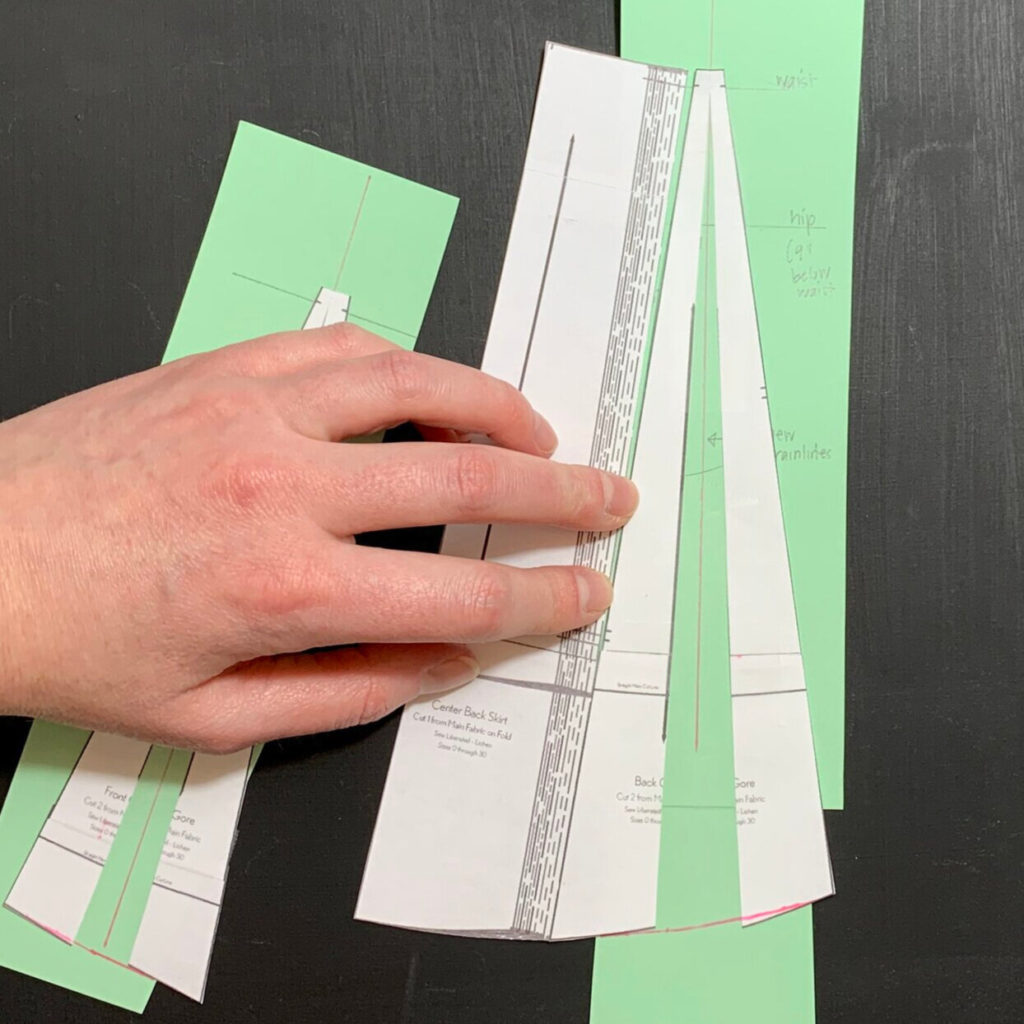
Using the Center Back Skirt against the Back Gore, re-shape the hemline.
And that’s it for Jazz’s pattern alterations! You can see the completed back pieces and front pieces below.
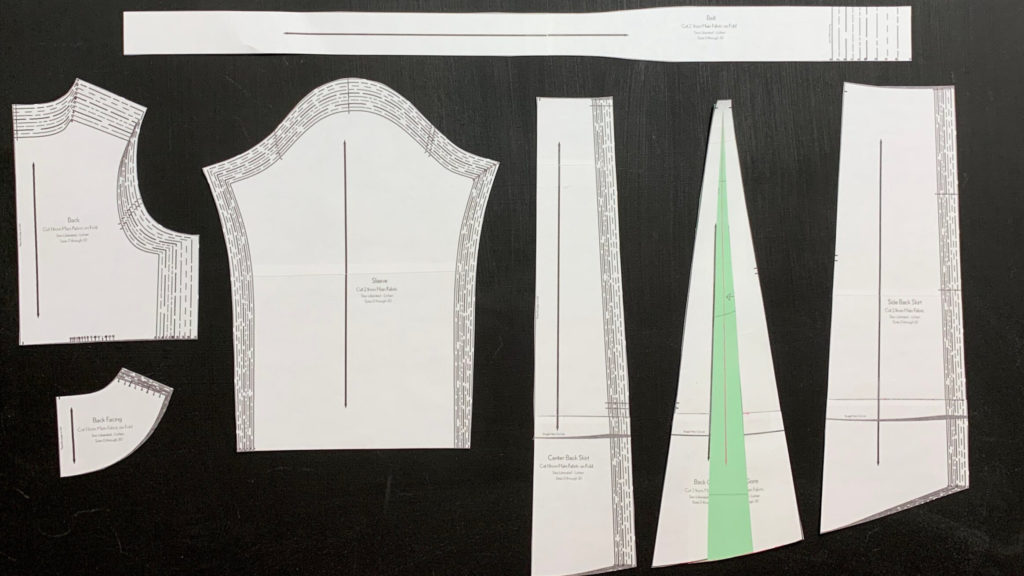
Now that I have completed these hypothetical sewist’s patterns, you have some resources to prepare your own Lichen pattern to fit you!
Once you have prepared your pattern, refer to pages 6, 7, and 8 of the Lichen Duster Instructions for detailed steps for laying out and cutting out your pieces. As always, take it slow and check your work before you cut.
That’s it for Day 1 of the Lichen Sew Along. I’ll be back for Day 2 with tips for interfacing, reviewing the Glossary, and getting the pieces prepared.


Hi,
Such a lovely pattern! Can you identify the warm goldish/brown fabric on one of your three models?
Thank you kindly,
Susan
It is Woolsey fabric. I purchased from Gather Here, but the link Kathrine provided will also work.
@susan – I’m pretty sure its this one – https://merchantandmills.com/store/cloth/woolsey-boston-fall/
I ordered the teal for myself!
That’s right!
I am short and have an incredibly short torso. I typically shorten the torso of most patterns a minimum of 1". I can see how to shorten overall length, but any suggestions of where/what pieces to shorten the torso portion? (my bust point is a good 2" above where the marked bust point is! eek)
Hi Robyn! You could divide your length reduction above and below the bust point, but you’d have to keep in mind that the amrscye will get shorter with that adjustment, so you’d also shorten the sleeve cap. If your arm is also smaller, then that could work, but if you don’t usually have to take in the sleeve, then shortening the torso below the armscye and shifting the bust point up after that would probably be a better option.
These two links might help you with that:
https://closetcasepatterns.com/fitting-princess-seams-fiona-sundress/
https://www.mybluprint.com/article/fitting-princess-seams
And I encourage you make a muslin to check your work! (Even a partial muslin will do the trick if all of your adjustments are above the waist… )
What wonderful follow up instructions…..can’t wait to start….thank you.
Julie
Hi, I’m really looking forward to making the duster coat, I’ve just bought the pattern and read through the instruction booklet. Thank you so much for that and all the help here, it makes it so much more fun and I’ll learn new skills properly. I’m also already thinking about how I can make different versions for coat/dress summer/winter casual/smart etc A good value pattern.
Thanks for this! It’s super useful. I’m just starting out on the Lichen Duster. My query is – whereabouts am I taking the hip measurement, or bust measurement? Are we talking full hip or high hip; apex bust or high bust?! I have about a 3″ difference between each.
Hi Sophie! The hip and bust measurements are full hip (at the widest point, about 9″ below your waist) and full bust (at the apex level). Note that the bust is “free” on this pattern, meaning it doesn’t complete the circumference of the body and is not secured, so it has some flexibility. You’re welcome to email for support if you’d like to send your more detailed measurements and talk through your sizing decision! I’d be happy to help you figure it out.