Guide to Taking Your Measurements
Measurements matter!
Learning to take your measurements accurately is an essential skill to have in your pattern fitting toolbox. Your sizing decisions, alteration plan, and final fit are dependent on an accurate measurement session, so it’s really worth the time!
But it can also be a big emotional hurdle to face – following body changes, illness, recovery, personal history, and the like, standing with a mirror and a measuring tape can be intimidating and difficult.
Remember, they are points of data, NOT points of value
I’d like to encourage you to take a breath and express gratitude for the body that you have today, and remind yourself that you’re gathering points of data, not points of value. Just as an accurate road map supports a successful trip to a destination, your measurements will support your fitting process.
Take your measurements before every project
Taking your measurements at the beginning of every project (you can sigh and roll your eyes, I can handle it!) will provide even more data to support you. Do you have a regular range of measurements? Do you have enough of a shift throughout the course of a few weeks or months that you want to intentionally make more than one size (totally normal!)? Do you want to incorporate room to shift in your fitting, or are your measurements pretty consistent (also absolutely okay!)?
Once you get in the habit of starting each project with taking measurements, and even find a convenient place to regularly record them, it will get easier and less intimidating.
What to wear to take accurate measurements
When you’re getting ready to start, put on the undergarments that you’ll wear with your final garment. If it’s something that you’ll wear with a particular pair or style of shoe, wearing those is a good idea. Shoes impact your posture, so you’ll be one step closer to accuracy. Ha ha, one step!
This post covers circumference measurements
One last comment about these measurements – these are circumference measurements. They don’t indicate posture or length, so you’ll need to consider those as well! Check the size charts on the pattern to see the height specifications, and make length adjustments if needed. If you want to get really specific with length measurements, you can, but you’ll need a fit buddy to help you with these. Side seam length, bodice length, shoulder slope and width, and bust point height are pretty tricky to take on your own. We’ll keep this conversation to circumference measurements.
Tools needed to take proper measurements
You’ll need an accurate measuring tape (calibrate it against your ruler to check that it hasn’t stretched over time!), a pencil/pen, and somewhere to record your measurements. You can use a sticky note, your bullet journal, or we’ve made you a handy Personal Measurements download below . A mirror is really helpful to check the tape positioning across your back, and if you have an available fit buddy to help, all the better!
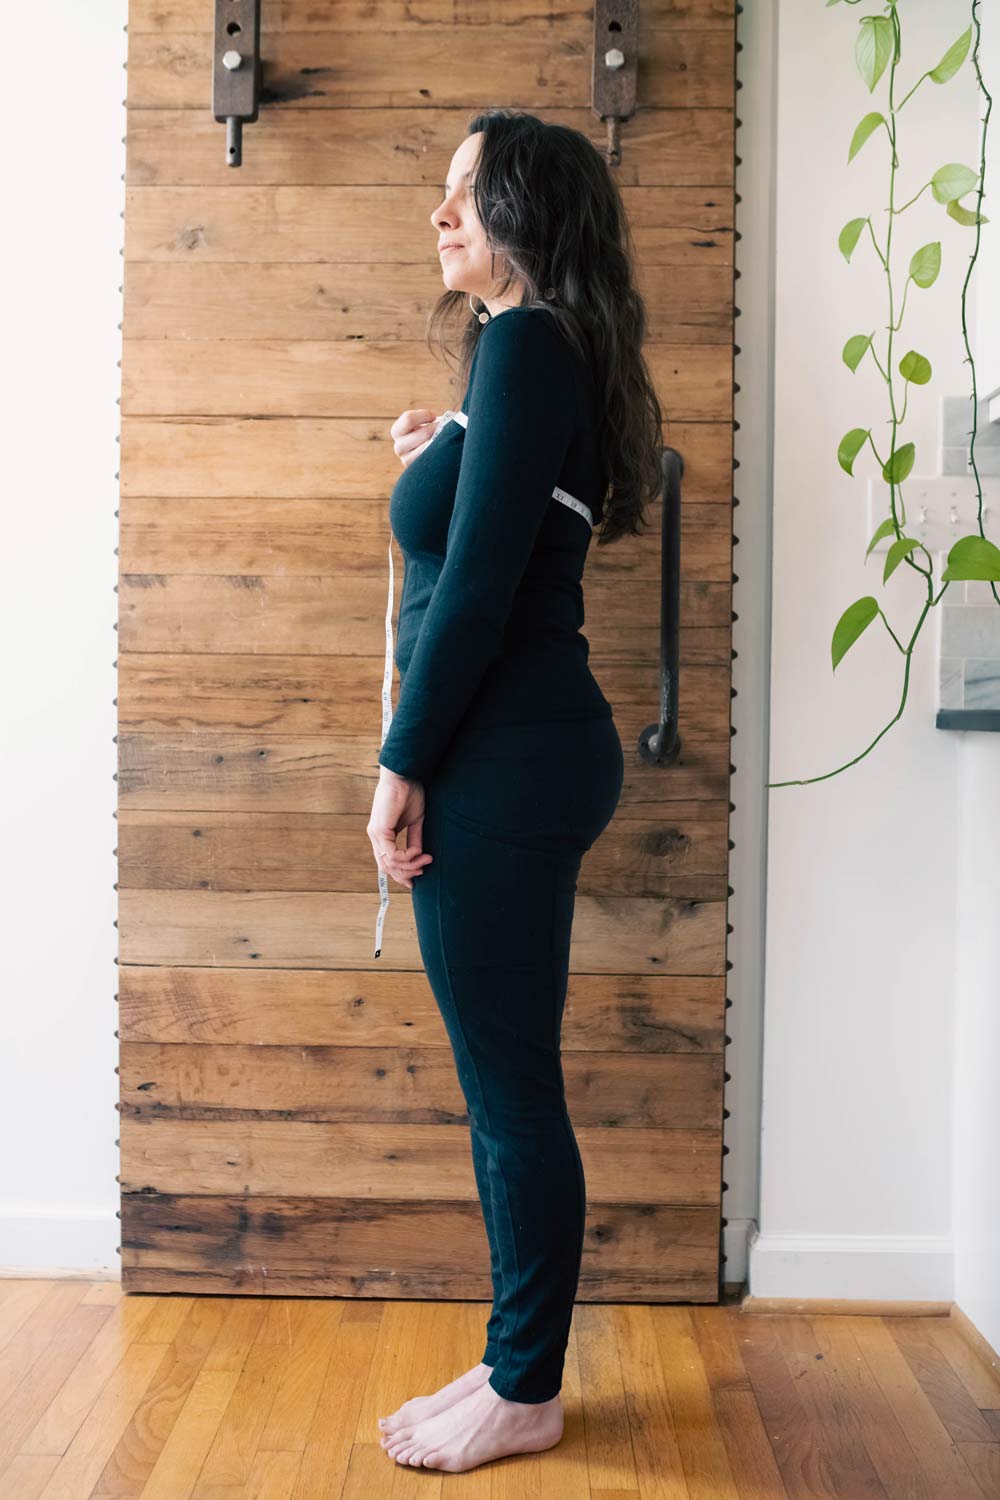
High bust
This measurement is taken high under the arms, across the widest part of the back, and above the full bust. Your tape probably won’t be level with the floor, and that’s okay. On a fuller bust, it will likely angle up frontwards of the underarms, and on a smaller or lower bust the tape may be more level. Make sure your arms are down and your shoulders are relaxed.
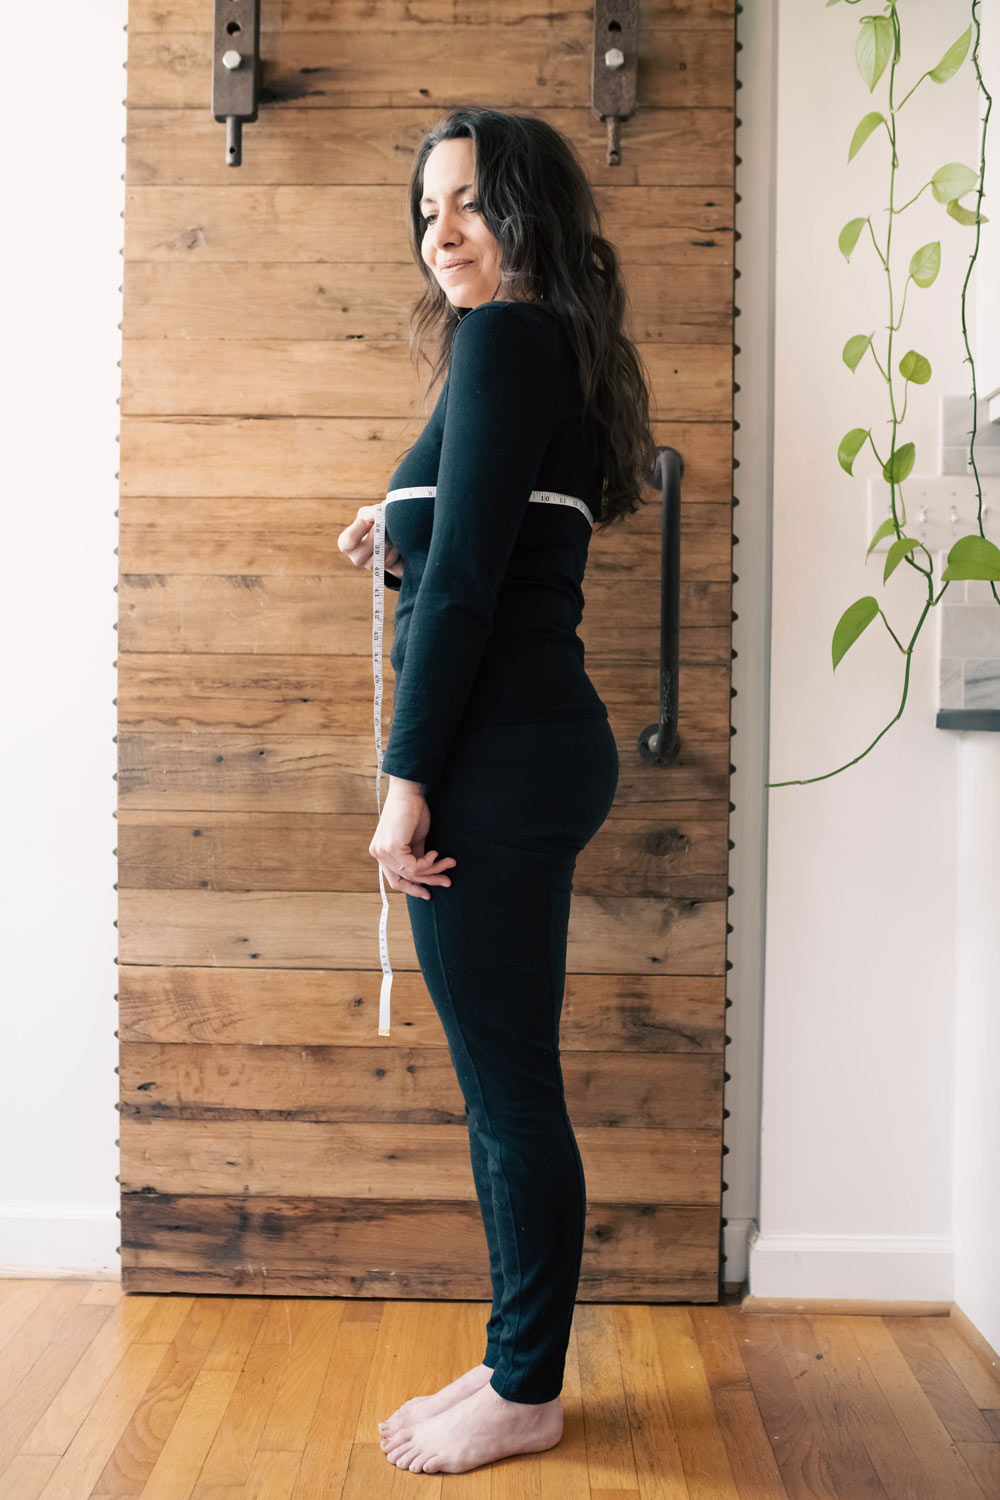
Full bust
With the tape parallel to the floor and not too snug, measure around your body at the fullest part of your bust.
Waist
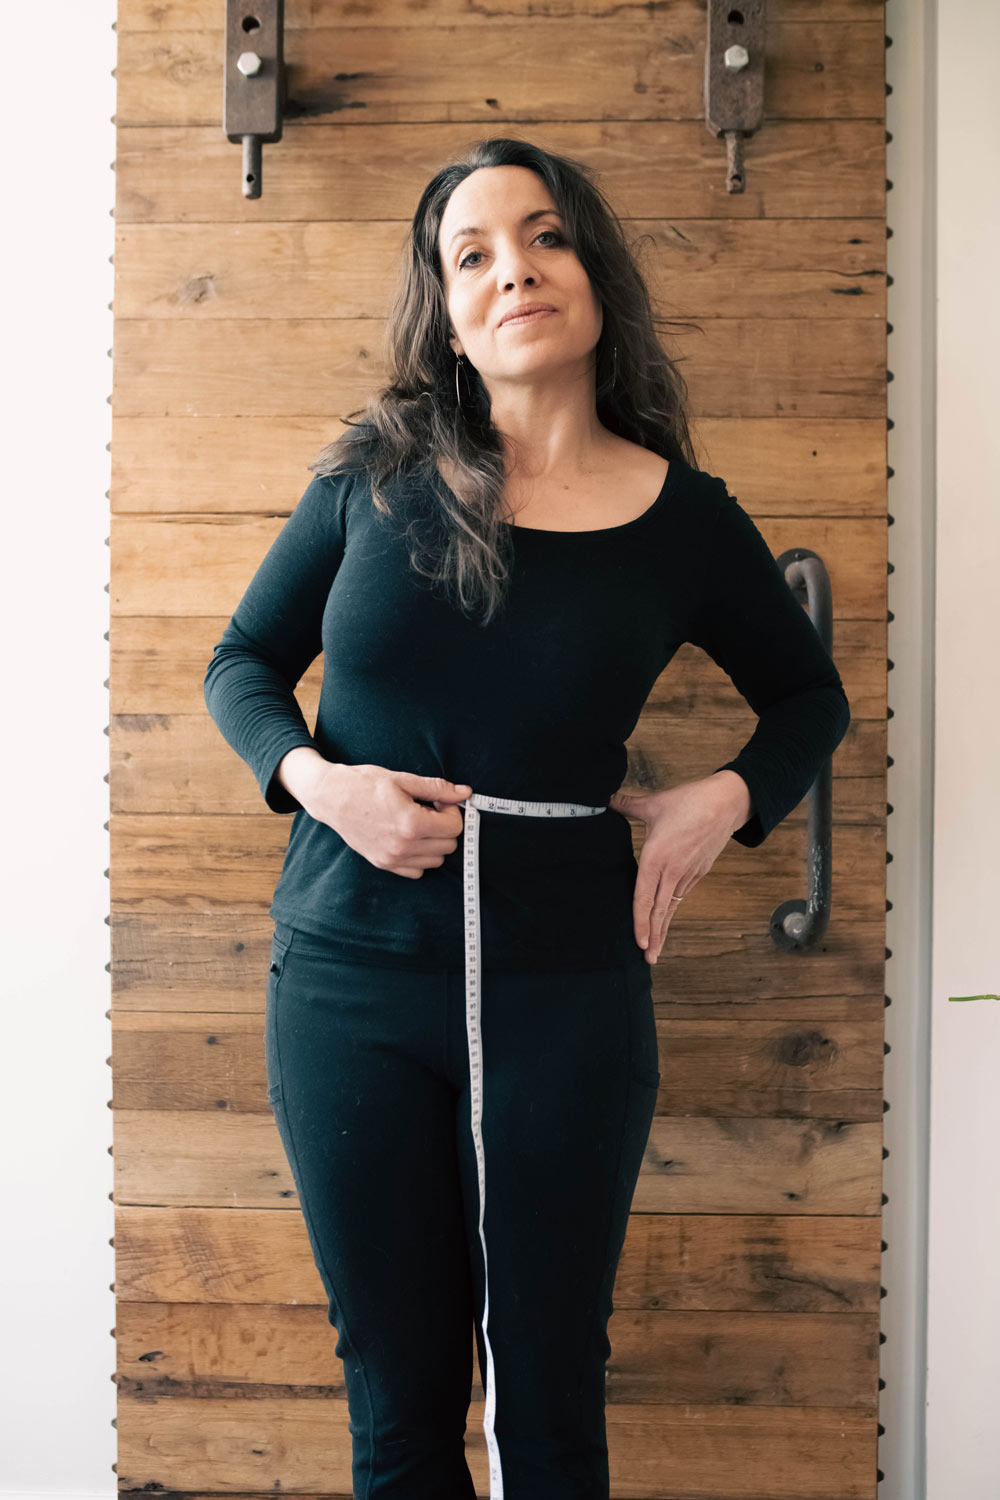
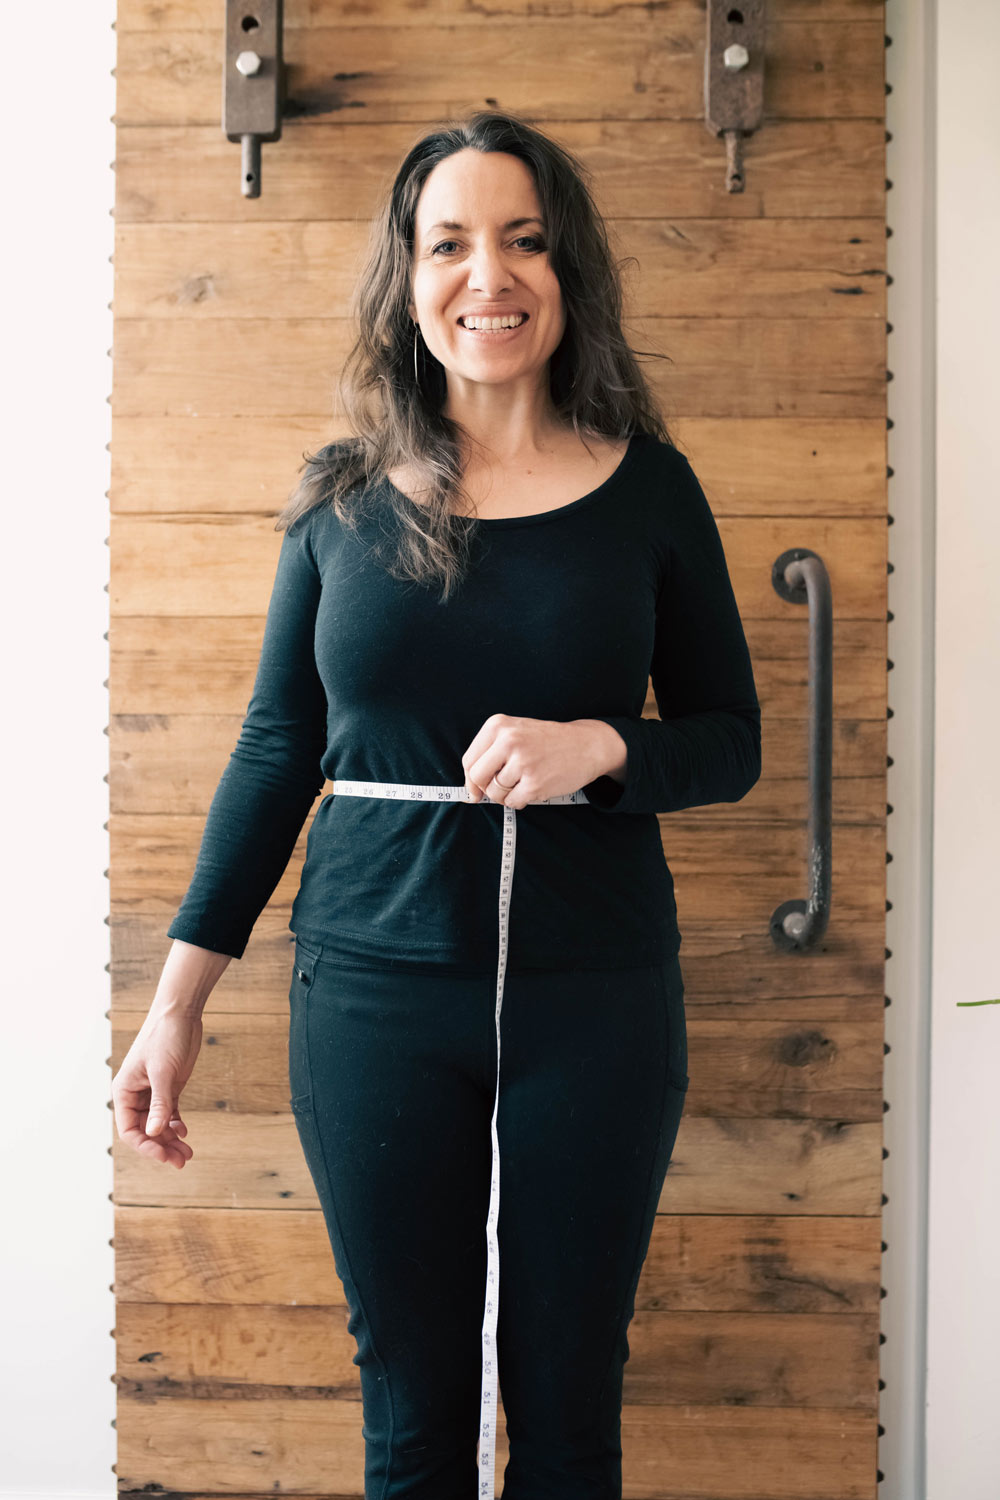
With the tape parallel to the floor, and snug but loose enough to slide, measure around your body at waist height.
Identifying your waist can cause some confusion, since the narrowest part of your torso may or may not be near your belly button level. If you’re really not sure how to locate your waist, tip from side to side as if you’re singing “I’m a Little Teapot”. When you’re at the “tip me over” part, feel where your side is folding between your ribs and hips. If that’s not your narrowest part, that’s okay! It’s where your waistband will most likely want to settle anyways, if it’s designed to sit at the natural waist. That fold is a great place to start with your waist circumference. Some sewists are already aware of their ideal waistband level, so if that’s you, choose that location for your waist circumference.
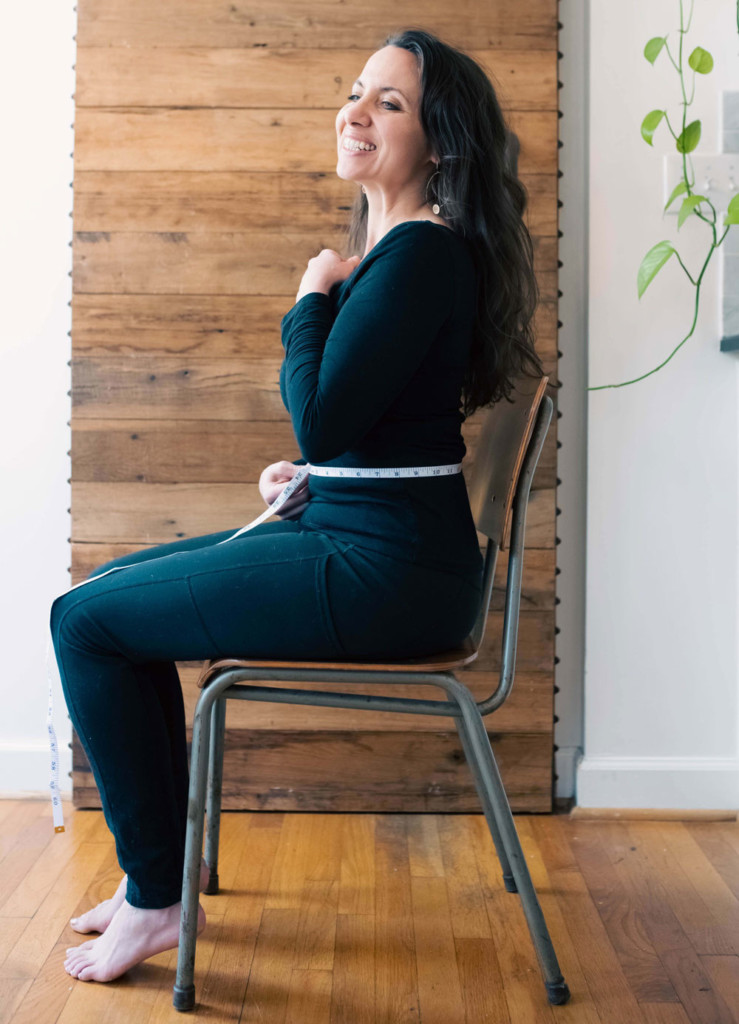
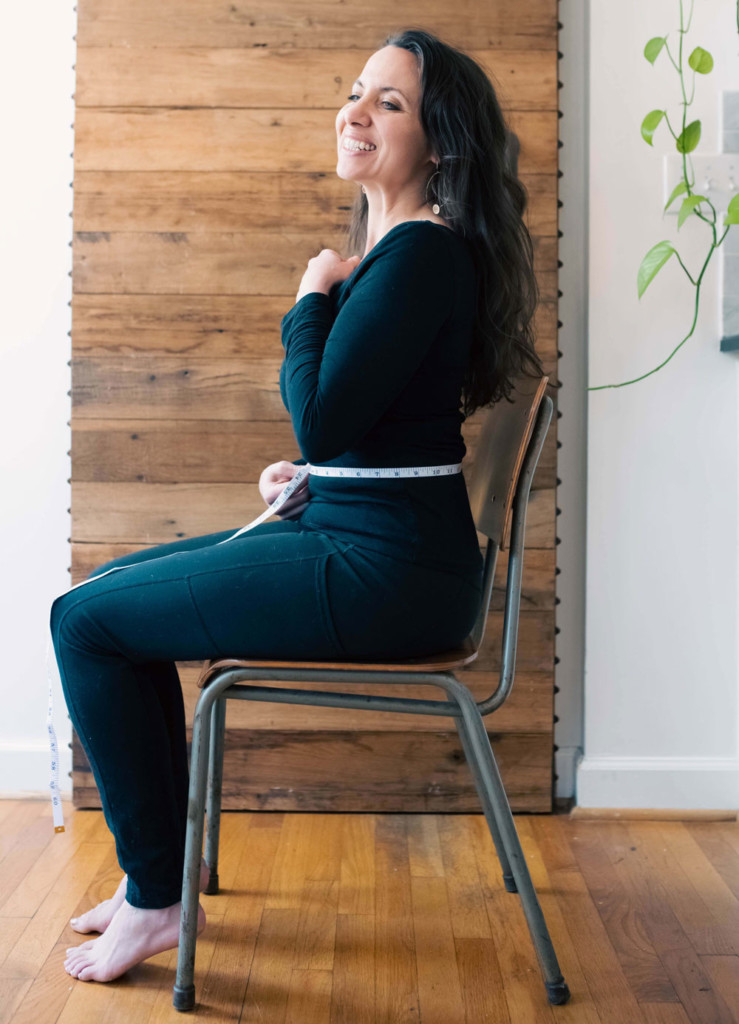
Waist, seated

Holding the tape in place after the standing waist measurement, gently sit down, allowing the tape to slide between your fingers but keeping it at the same level. Sit on a flat chair, not the sofa for this one! Your measurement will increase a little as you sit.
This measurement is really helpful when you’re making a garment with a fixed waist (and hip) measurement like a fitted skirt or pants, or a shift dress. Your body shifts outwards when you sit, even more at the hip than the waist, and taking the seated waist and hip measurements means that you’ll be able to include enough ease to do all of your activities comfortably, not just standing!
Hip
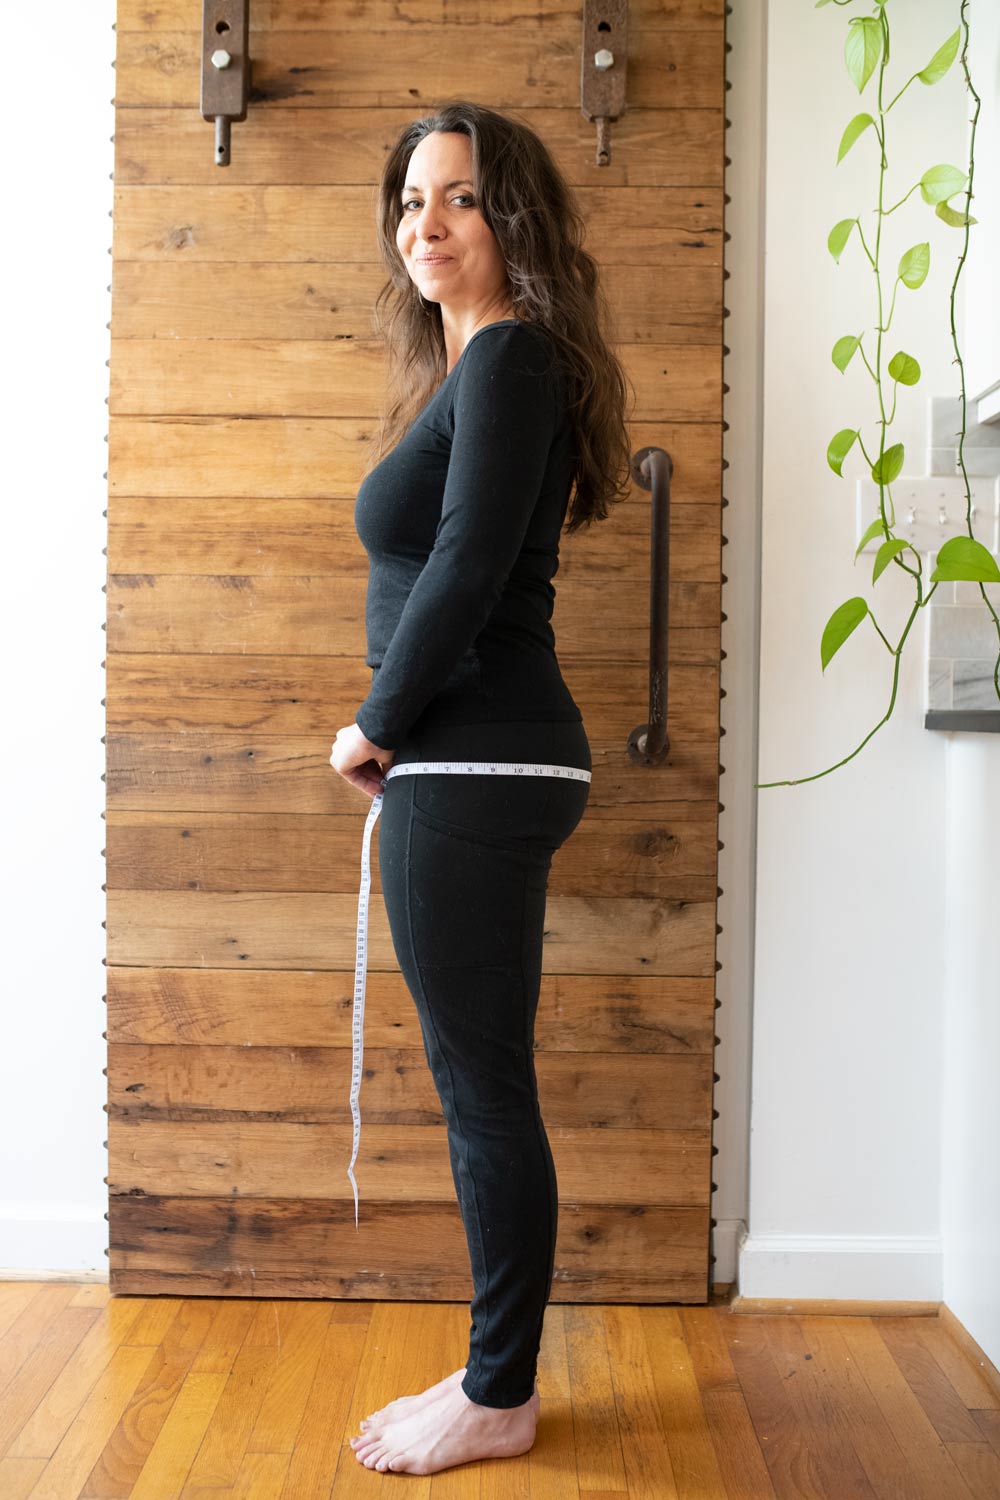
Holding the tape parallel to the floor, measure around your body at hip height. This is usually about 7-10” (18 – 25 cm) below waist height. Don’t worry about where your hip bones are, and instead measure around the fullest circumference through the hip area. It can be very helpful to record the vertical distance between your waist and hip, if you want to level up a bit!
Hip, seated
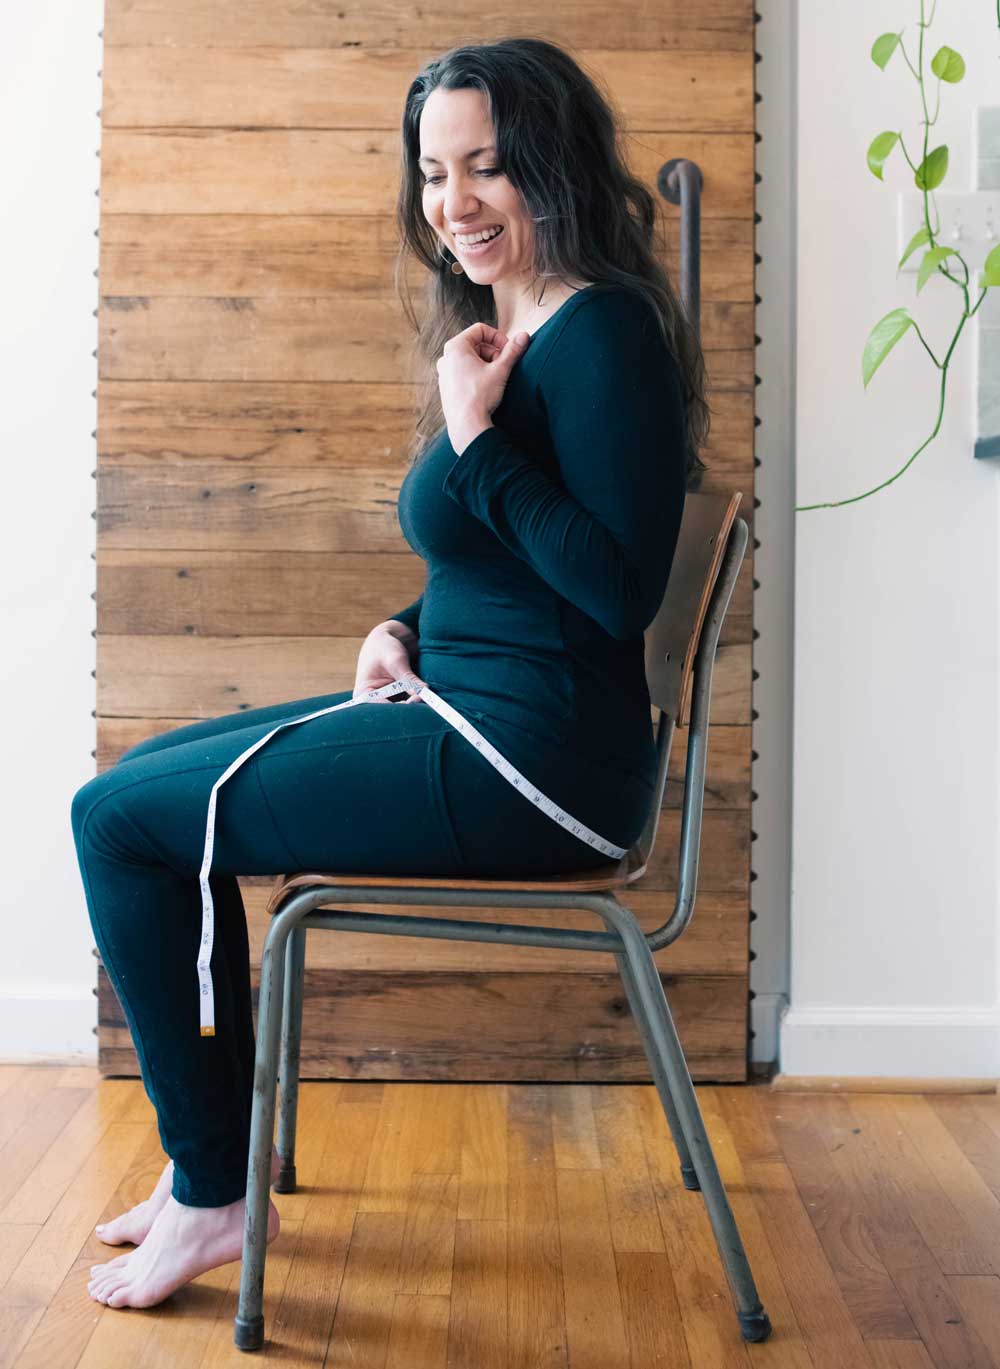
Holding the tape in place after the standing hip measurement, gently sit down, allowing the tape to slide between your fingers but keeping it at the same level. Sit on a flat chair, not the sofa for this one! Your measurement will increase a little as you sit, maybe by 1 or 2 inches (2.5 – 5 cm), or maybe by 4” (10 cm) or more. This is totally normal, and very helpful to know when you’re evaluating ease!
Other helpful circumference measurements
Bicep: measure around the fullest point of your bicep, likely with the tape sung under your arm, with your arm down and relaxed, and the tape parallel to the floor.
Thigh, standing: measure around the fullest point of your thigh, with the tape parallel to the floor.
Thigh, seated: Holding the tape in place after the standing thigh measurement, gently sit down, allowing the tape to shift between your fingers but keeping it in the same position as the standing measurement.
Three cheers for you, you’re ready to start choosing your size, empowered with accurate data, and a nursery rhyme stuck in your head.
Quick tips for choosing your size
First, if the size on the chart is completely different than the size you bought most recently at the store or online, don’t fear! The size numbers on the chart are just a way for the pattern to be divided into logical breaks in size, so you have a starting point to get your fabric from 2D to 3D. You have official permission to ignore all of the size labels in your garments and choose a size exclusively based on your shiny new data – your measurements.
Reference the sizing chart
Using your measurements, find where they fit on the body measurements chart. It’s okay if they’re in more than one size! There’s more information on grading between sizes here, if that’s what you need to do, or you can choose a size based on a key measurement and considering garment type and ease. Choosing a size based on your shoulder, high bust, and bicep, and adjusting the full bust is usually much easier than choosing a size for your bust and then needing to re-work the fit through the entire shoulder and sleeve.
The garment you’re making determines which measurements take priority
If you’re making a top, dress, jacket… anything where the bodice is the main thing, choose a size based on your high bust and bust measurements. On Sew Liberated patterns, the dressmaker’s cup size is C, with a 3” difference between high bust and full bust.
If you’re making pants or a fitted skirt, or choosing a size for the bottom of a sheath dress, choose the size based on the hip measurement and consider both standing and seated measurements.
If you’re making a gathered or pleated skirt, like the Estuary Skirt, let the waist measurement determine your sizing.
If you’re making looser-fit pants or a skirt with an elastic waist, your hip measurements will take priority, unless your waist measurement is larger than your hip measurement, in which case you can use your waist measurement. This applies to the Arthur Pants, Arenite Pants, and the Otis Overalls, for example.
Make a muslin! No, really!
Lastly, and if you have ever emailed me about fitting issues, you know what I’m about to say… I strongly encourage you to make a muslin/toile/fitting sample. It’s a crucial step in evaluating and correcting the fit before you cut into your precious final fabric!
Happy fitting, friends!
Taking your Measurements – Further reading
Our Guide to Grading Between Sizes
Jenny Rushmore’s Ahead of the Curve. A gorgeous book written for curvy sewists, I love the real sewists who are models throughout!
If you want to take comparing your measurements to the pattern to a whole new level, take a look at Fitting and Pattern Alteration, by Leichty, Rasband, and Pottberg-Steineckert. It’s a Serious Book, but wow, it is ever thorough.
The beloved Reader’s Digest Complete Guide to Sewing has a simple but helpful chapter on fitting. It’s not exhaustive, but it’s a nice, manageable start.
One vintage book that I really enjoy is The Perfect Fit, from Singer. It has some vintage language, but it’s one of the few books that include some pants fitting, and the alterations are demonstrated really clearly.


I have been sewing for years, and never realized I should be including seated measurements. This is my first time hearing it, and it makes beautiful sense. Thank you for these wonderful instructions!
You’re welcome! It’s such a helpful perspective to think about seated measurements. It’s been something that I’ve considered regularly only for the past few years, and it never came up in school – one thing I really love about fitting is the potential to learn something new and interesting after any number of years! 🙂
The best guide to taking measurements I have seen. Thank you very much for this.
I love the seated measurement. Never heard of it, but no doubt this is valuable measure. Appreciate your blog re: sadness. I identify with your process. There are have been Seasons of my life, I had to silo my suffer so to not drown in it. My process has been similar in that a day or week comes where I open the silo. Thank you for your open sharing as it touched & validated me. Appreciate you ~
Thank you for this guide! Just a heads up, in the section “reference the sizing chart” you have the parenthetical (blog post link) but I think you forgot to include the actual link. It’s down below so no big deal but thought you might want to know.
Thank you! It is updated 🙂