Shoulder adjustments for knit tee patterns
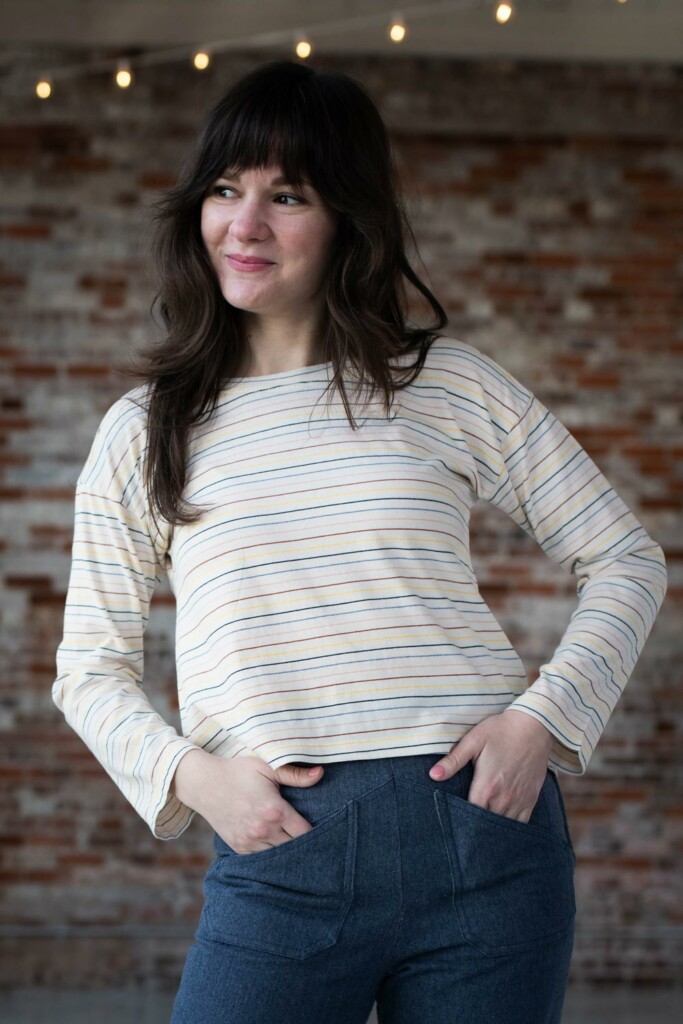
Even though t shirts like the Bedrock Tee are pretty flexible in fitting, shoulders are an area where changes might be needed to make the pattern suit your frame. Small changes make a big difference for comfort, especially when making a forward shoulder adjustment! If your tees are always crawling backwards and the neckline pushes against your throat, this adjustment may be for you.
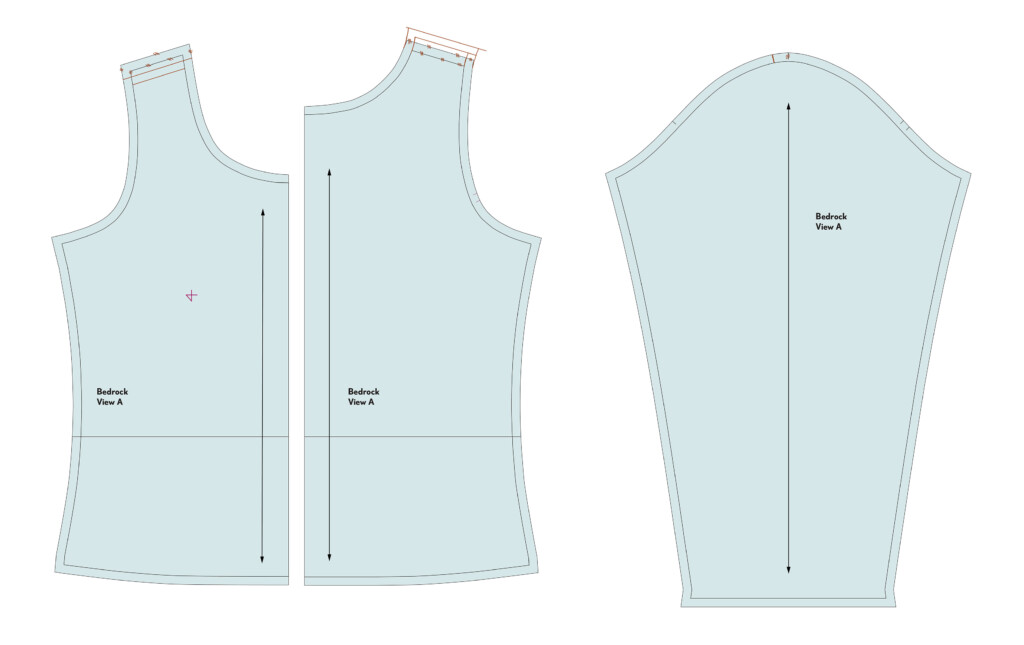
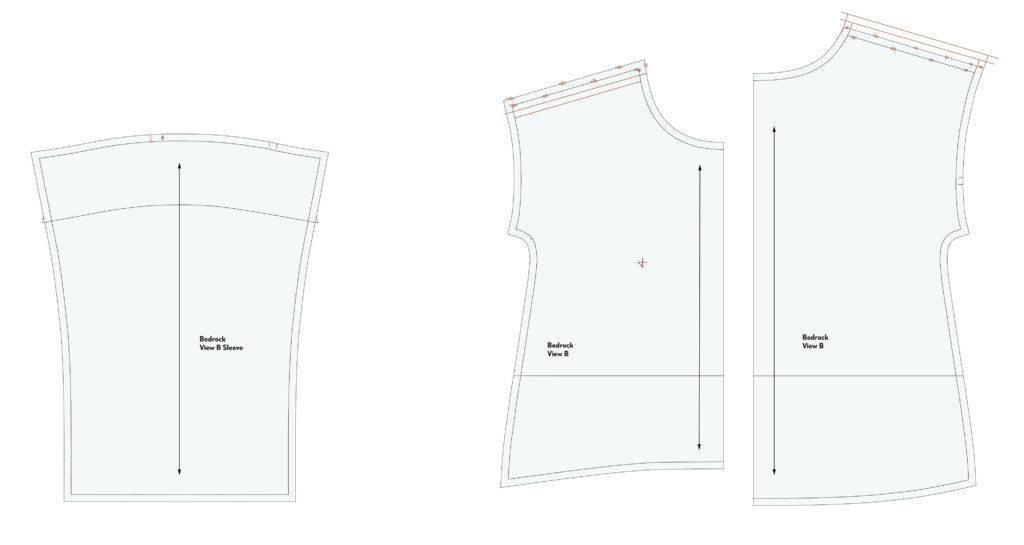
Forward Shoulder Adjustment
To shift the entire shoulder seam towards the front, determine the amount that the seam needs to move by referring to your muslin or estimating based on experience. (I know, that sounds vague! But without a muslin of the tee on your body, you’ll have to estimate.) The seam should follow the highest point of your shoulder, from neck to armscye. You may need to move the seam evenly, or you may have a different amount at the neckline than the shoulder. To shift the seam, on the Front piece mark inwards from your shoulder seam the required amount at the neckline and the shoulder point and draw in a new shoulder seam. On the Back, mark outwards the required amount and draw in a new shoulder seam. Recreate the seam allowances and align the shoulder seams to check the neckline and armhole shaping.
On the sleeve, shift the notch forward the equivalent amount to the change at the shoulder point.
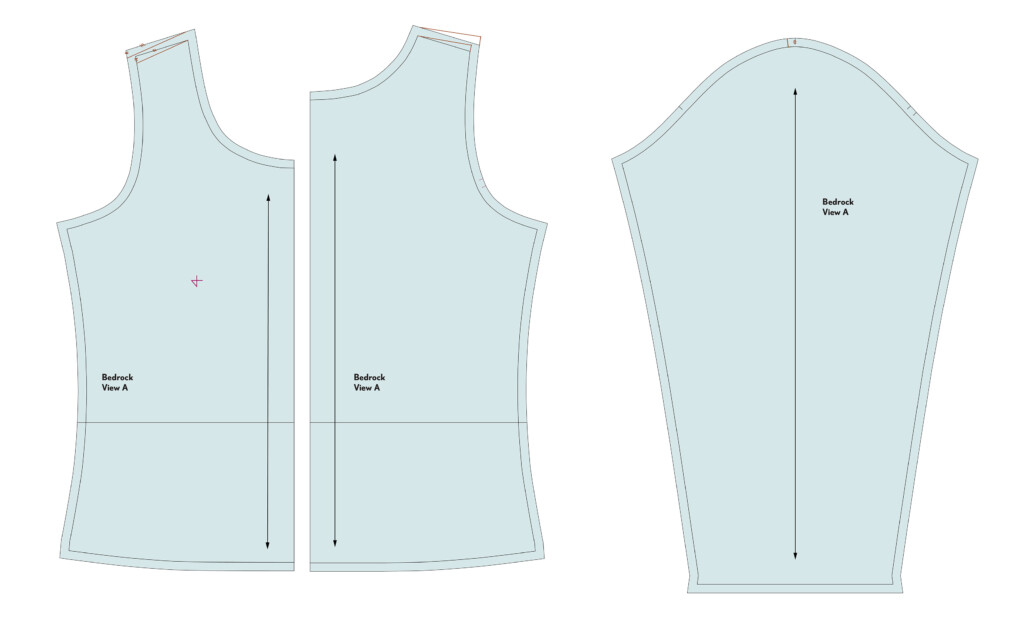
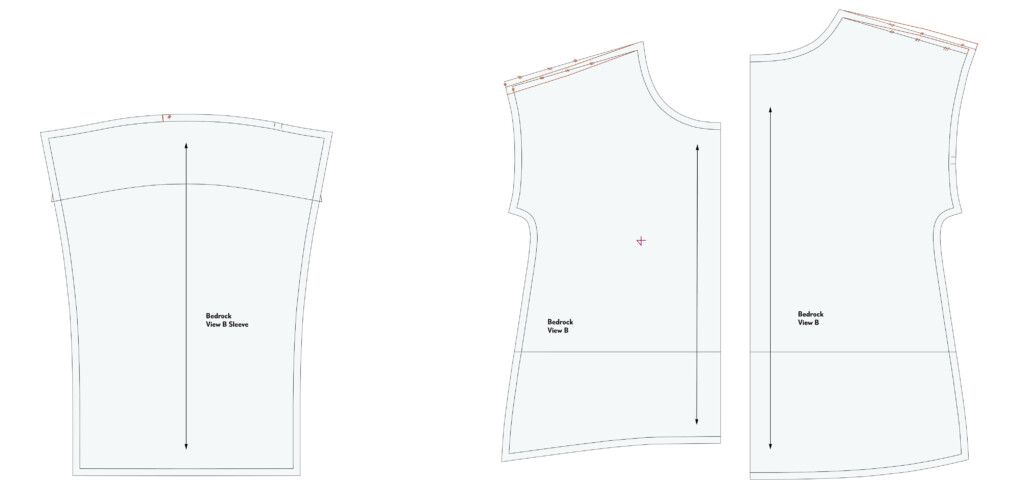
For a forward shoulder rotation, you could move just the shoulder end of the seam (by up to about 3/8” (1 cm)) by moving the low point of the shoulder seam down on the Front Bodice, and up on the back bodice. The notch on the sleeve is moved forward along the seam an equivalent amount.
Broad Shoulder Adjustment
Sometimes your shoulders are broader than the pattern is drifted for. Broad shoulders, when the shoulder seam is too short for the body, are indicated by shoulders extending beyond the armscye into the sleeve. The sleeve feels tight at the shoulder and sometimes the underarm, since the shoulder is borrowing fabric from the sleeve. This issue is isolated to the shoulder and does not impact the chest breadth or back breadth. You can do a broad shoulder adjustment on tees like Bedrock View A, and the Stasia Dress and Tee in a very similar manner to the way a broad shoulder adjustment is done on wovens.
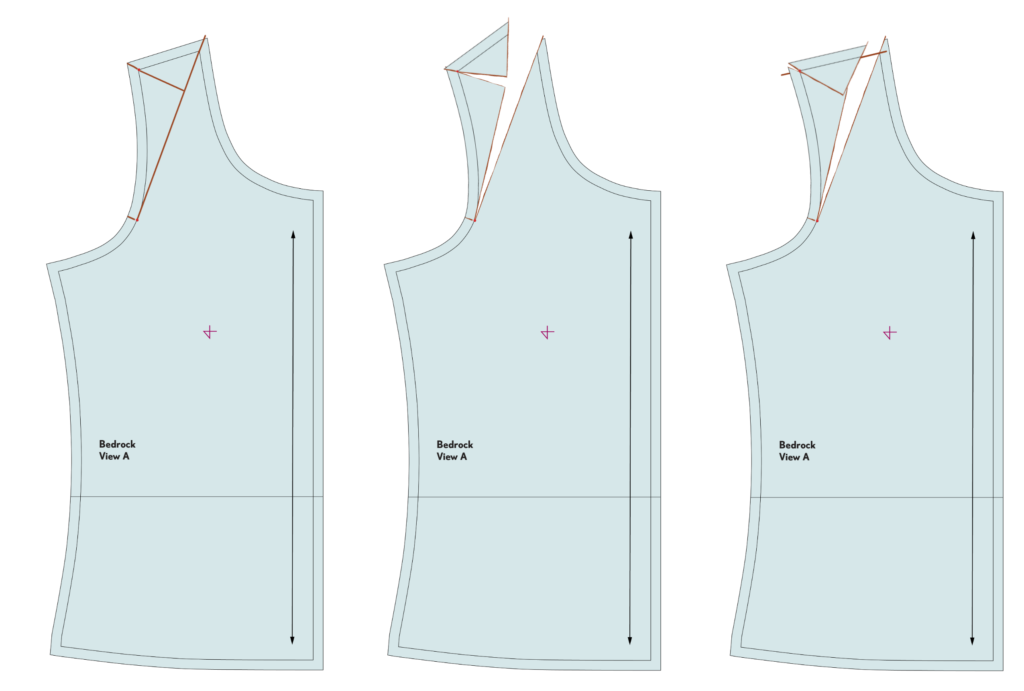
Draw an adjustment line from just above the notch in the armscye to the midpoint of the shoulder seam. Draw a second line squared off from the first, to meet the shoulder point. Cut from the shoulder seam to the armscye, leaving a hinge at the seam, and along the second line from the first cut towards the shoulder point, leaving a hinge at the shoulder. Cut into the seam allowances towards the hinge points to allow the pieces to pivot.
Slide the outer shoulder outwards, away from the neckline, allowing the pattern pieces to open along the first cut line, and overlap along the second. Maintaining the shoulder slope, open along the shoulder seam the required amount. Add paper where needed and tape the pieces in place.Repeat the process for the Back Bodice piece.
Narrow Shoulder Adjustment
If you need to narrow the shoulders, the process looks very similar. The difference is that rather than sliding the shoulder outwards after cutting on the lines, you’ll overlap the pieces by the amount that the shoulder should be narrowed.
Square Shoulder Adjustment
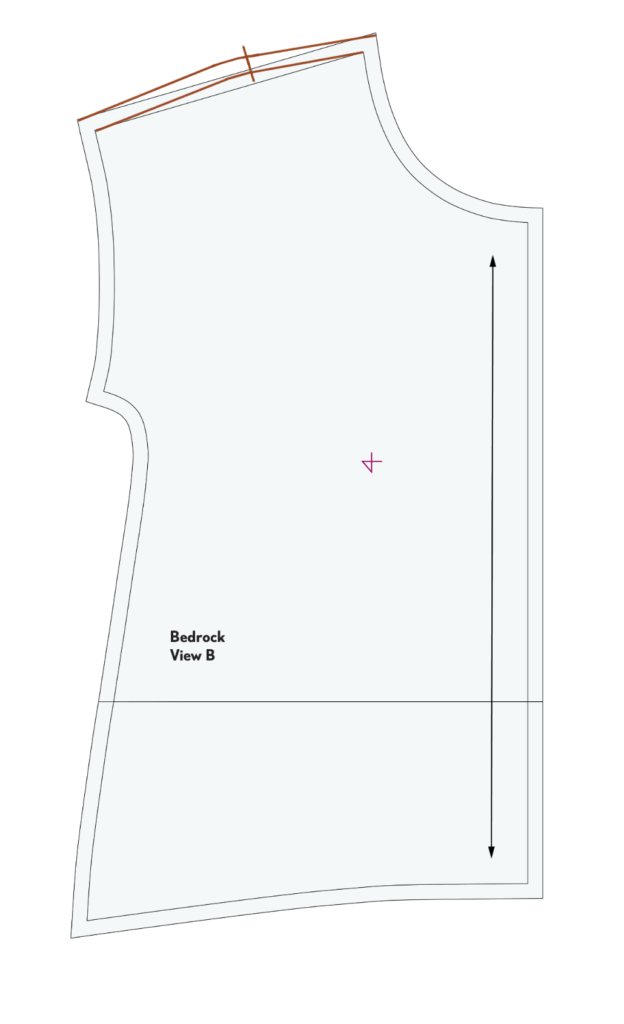
For View B of the Bedrock, making a broad shoulder adjustment doesn’t work as well due to the dropped shoulder. It’s also unlikely that you’ll even need to adjust for a broad shoulder for Bedrock View B. One thing that you may need to do, though, is adjust the shape of the shoulder seam if your shoulders are more square. Very simply, you make a marking at the shoulder on the Front bodice, extending upwards by the amount that you’d like to raise the shoulder. Re-draw the shoulder line, starting at the neck, touching the raised shoulder point, and meeting the sleeve end of the shoulder seam. Use a slightly curved line if needed. Repeat the change for the Back bodice.
Looking for more help fitting the Bedrock Tee or any t-shirt pattern? Check out our post on bust adjustments for t-shirts.



Responses