Arenite Pants Slim Hack Tutorial
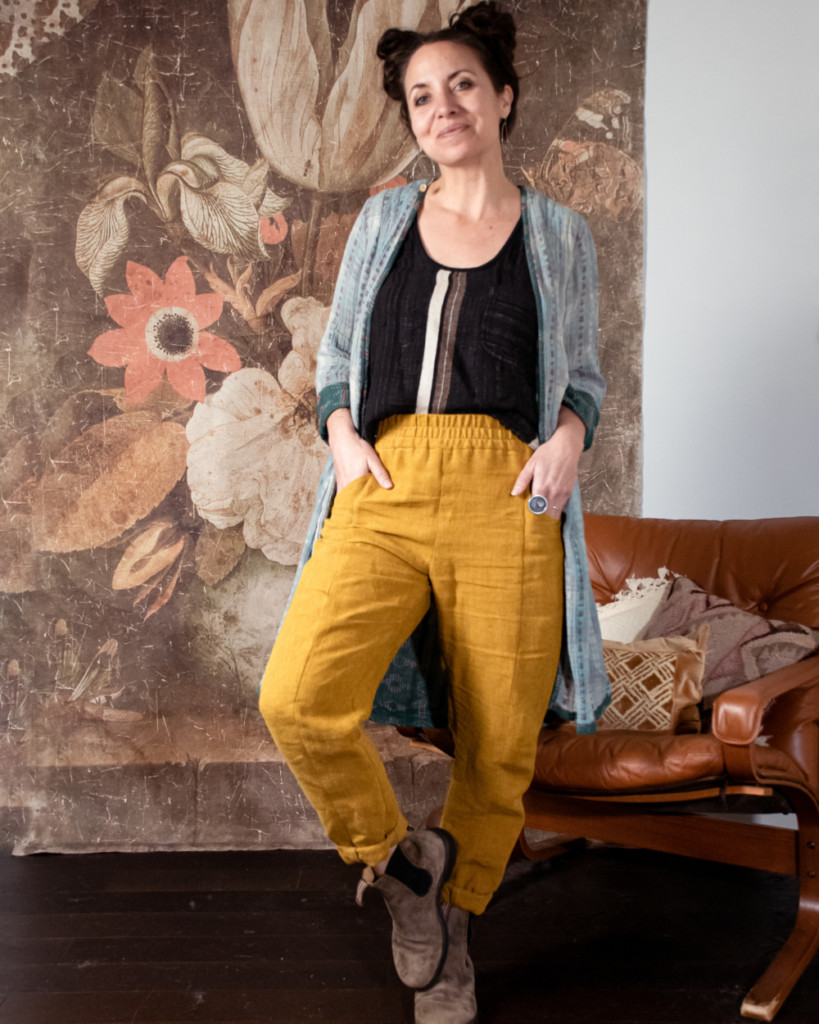
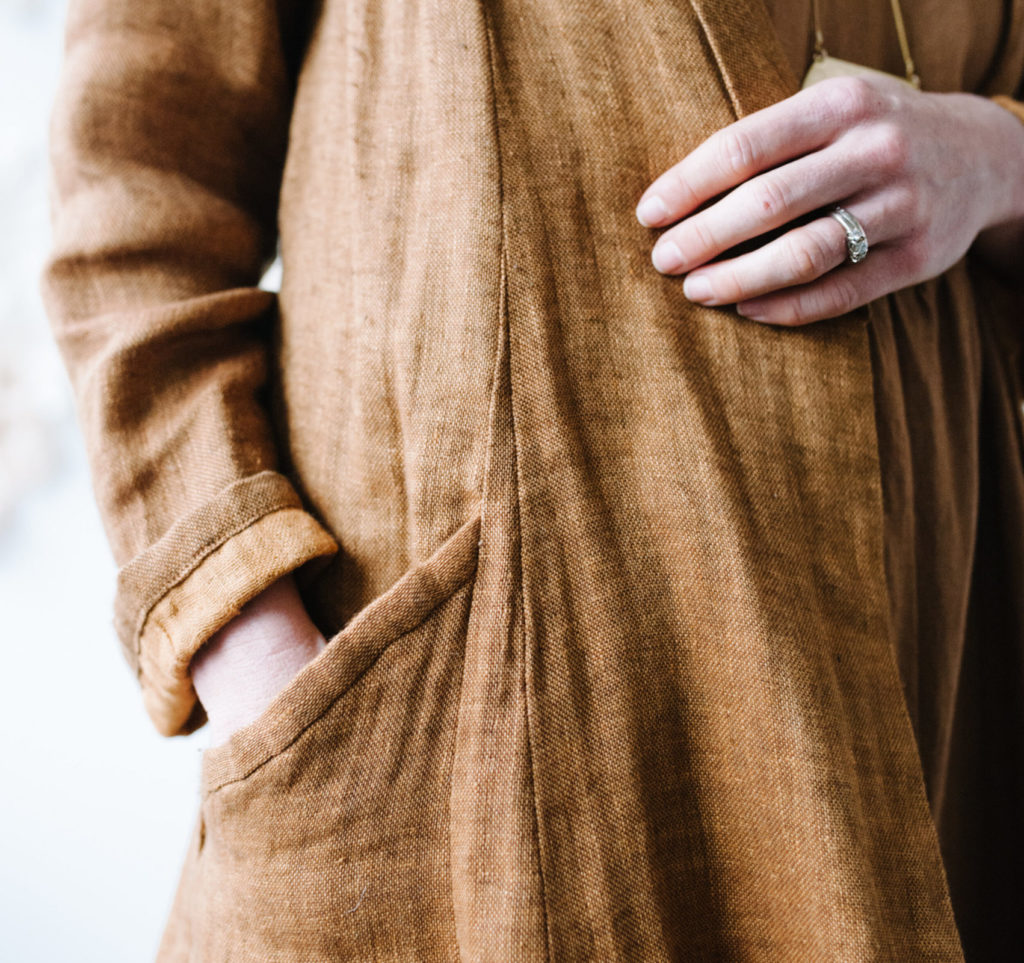
The original Arenite Pants have a roomy fit and draping crescent-shaped pockets, best made in a rayon challis fabric.
One hack that many sewists have been doing is slimming them down and making the pockets fit flatter against the body. This is the perfect hack for a more structured linen or cotton fabric. Meg has a video tutorial for this hack in Sew Liberated’s Instagram Highlights and on YouTube, and it’s been so popular that we’re putting the tutorial into written steps!

Get your Arenite Pants pattern and pick a fabric

You can grab the pants pattern here – note that we’ll be hacking the woven version, not View B which is designed for knit fabrics.
If you’re looking for a good fabric for your Arenite Pants, check out this lovely curated collection from EWE Fine Fibers.
This is a really fun pattern adjustment, so gather up your pattern, some extra paper, tape, scissors, ruler and a pencil, and let’s start!
Video tutorial for the Arenite Pants Slim Hack
If video learning is your jam, here’s the compilation of the Instagram Stories highlight. If you prefer some more details, read on for the an easy-to-reference written version.
Please note that the pattern pieces shown in the tutorial are in 1/3 scale.
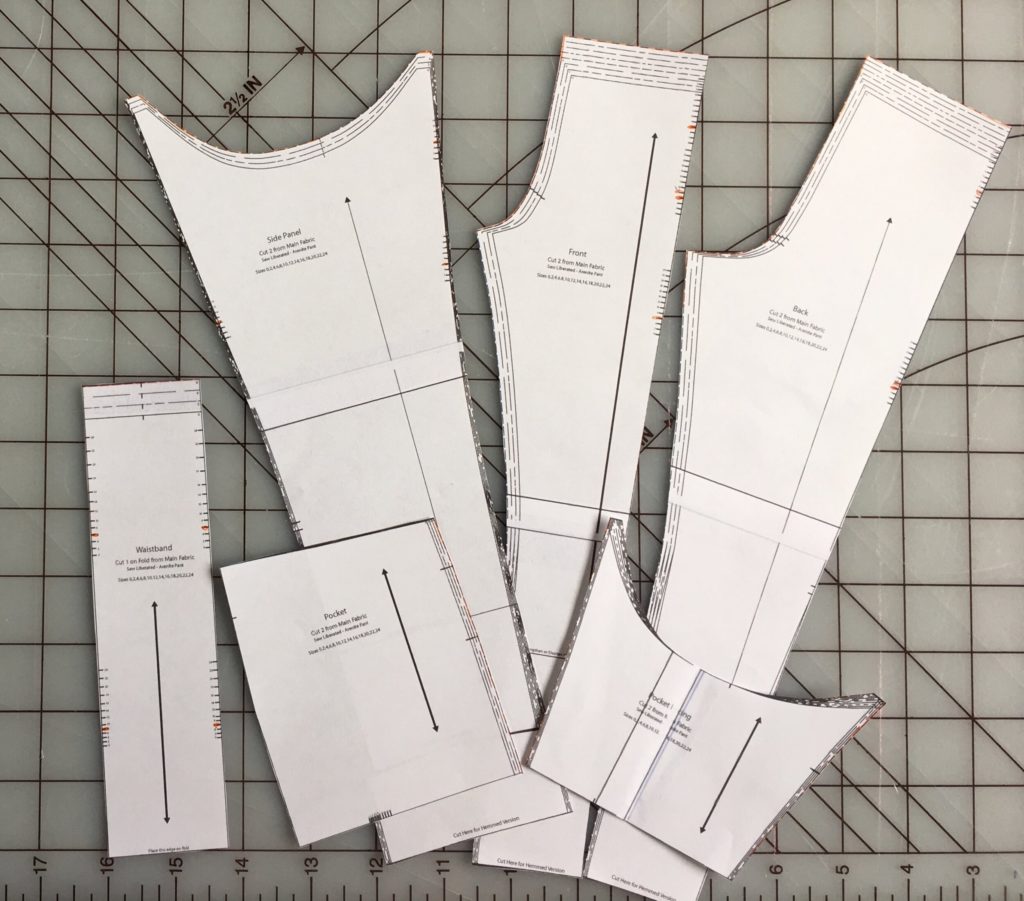
To get started, gather up your pattern pieces. You’ll need:
- Back (Hemmed Version)
- Front (Hemmed Version)
- Side panel (Hemmed Version)
- Waistband
- Pocket Facing
Step 1
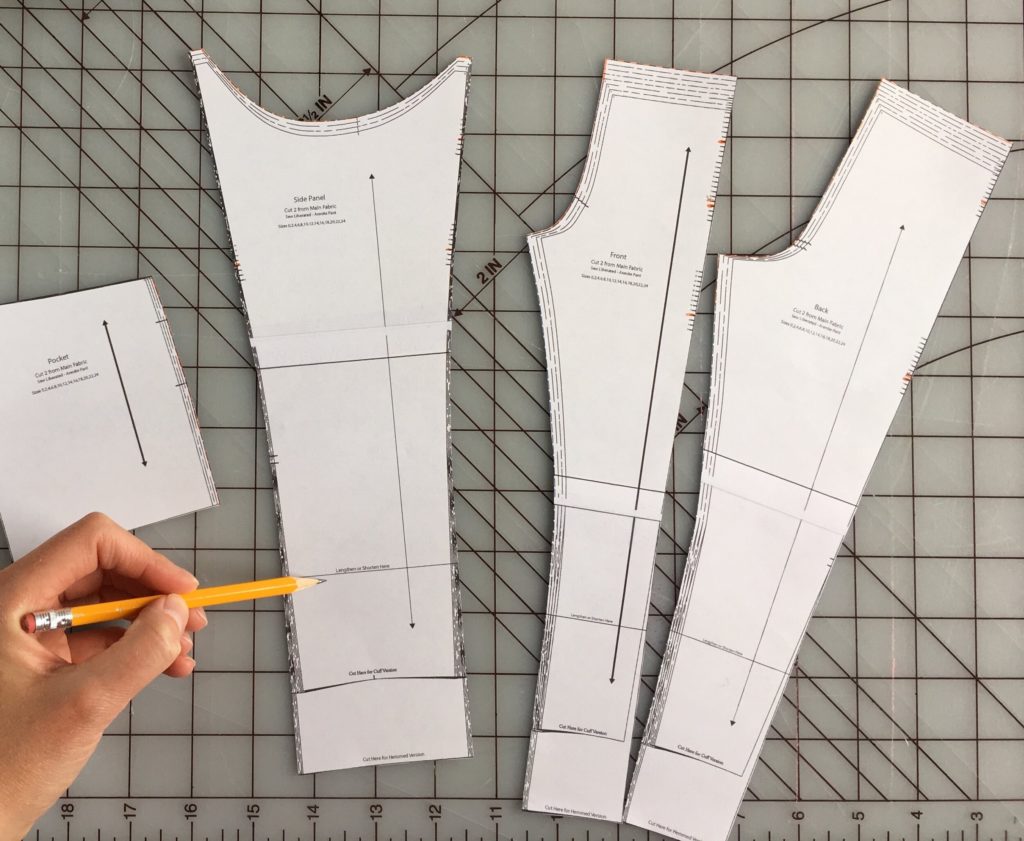
Add or remove length. Since you’ll be making a hemmed (uncuffed) version, you’ll need to decide how long you want the finished pant to be. Measure your inseam length. Check your inseam measurement against the pattern, and on the Back, Front, and Side Panel, add/remove length at the Lengthen/Shorten line (Figure 1), remembering to leave a hem allowance. The pattern is written with a ½” plus ¾” hem allowance.
Step 2
Size: Size down approximately 4 sizes, using the measurement chart to make sure that you’ll have enough room for your hips. BUT in the rise, cut your normal size. (EDIT: for Arenite 2.0, size down 3 sizes rather than 4.) So along the waist on the Front and Back, you’d cut your normal size, and on all of the other cut lines, you’ll cut your chosen smaller size. Figure 2 (Meg usually cuts an 8, and went to a 0 for her sample, but cut the waistline on those three pieces at an 8.) (EDIT: In Arenite 2.0, released in early 2021, Meg would usually cut an 8, and choose size 2 for her slim hack.)
Step 3
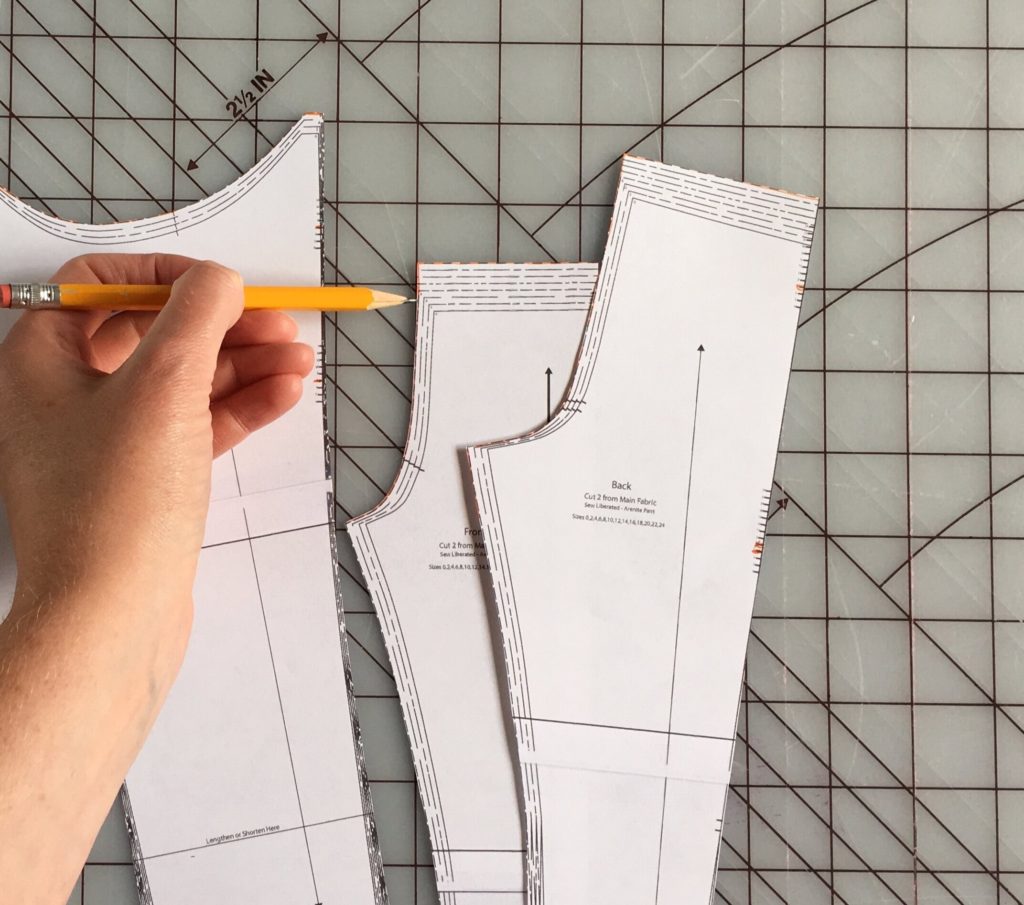
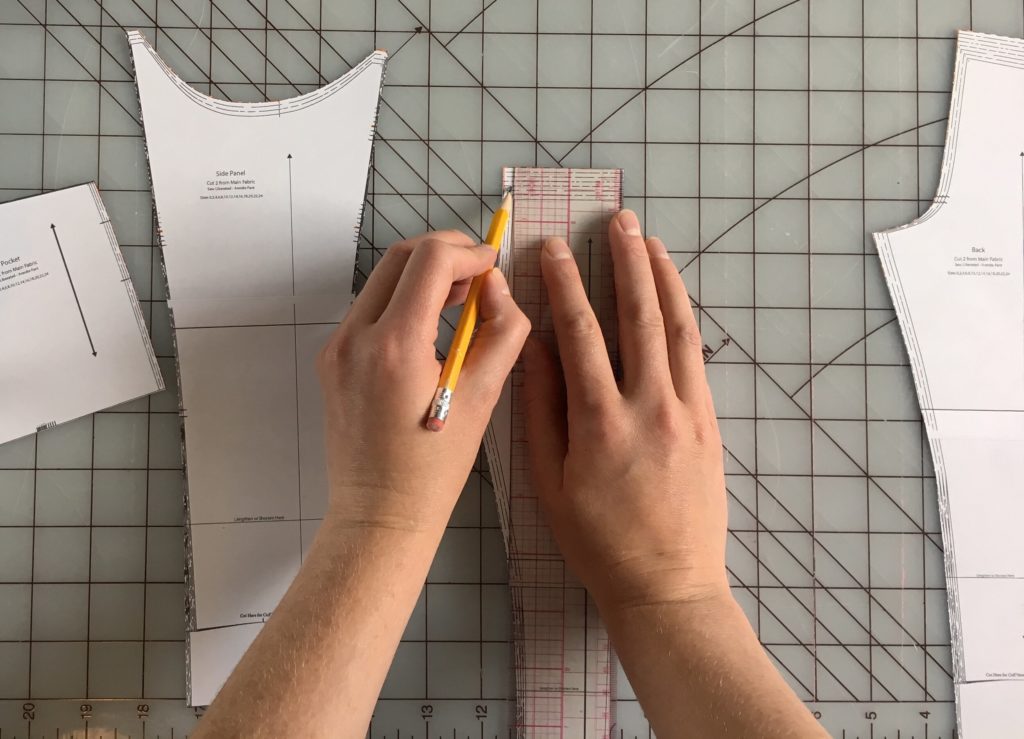
Add length to the pocket piece. Measure the difference between your circumference size and your rise height size either at the waist or at the pocket notches. Figure 3
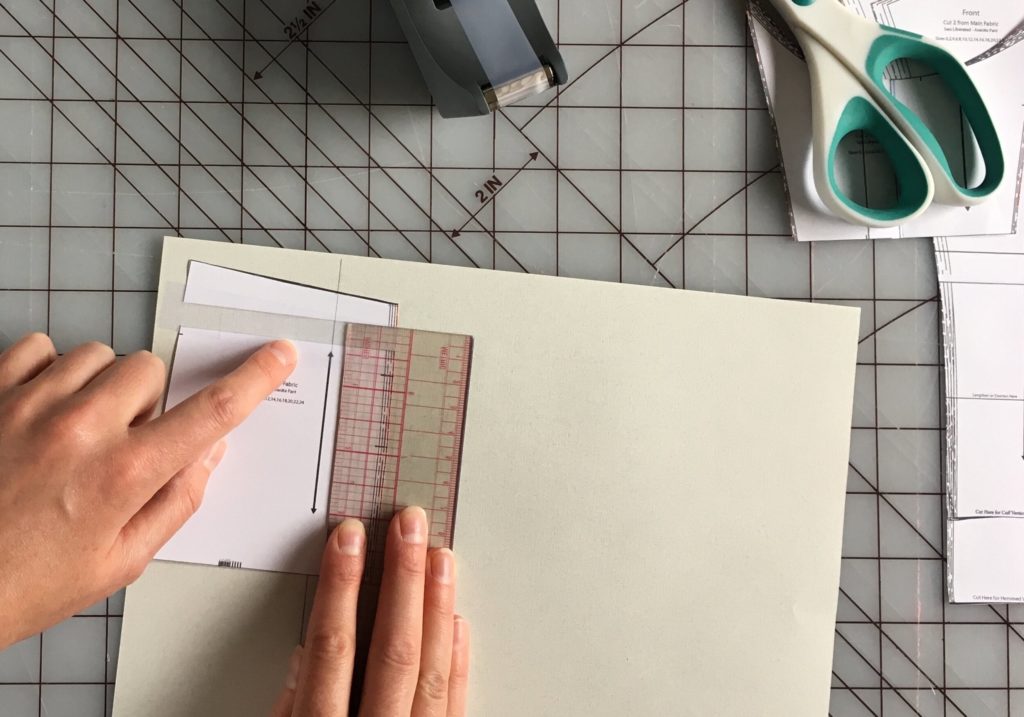
Add that measurement to the length of the pocket piece by making a horizontal line above the notches (see the diagram), spreading the pieces apart the amount of your measurement, and taping tissue in to fill the gap. Figure 4
Step 4
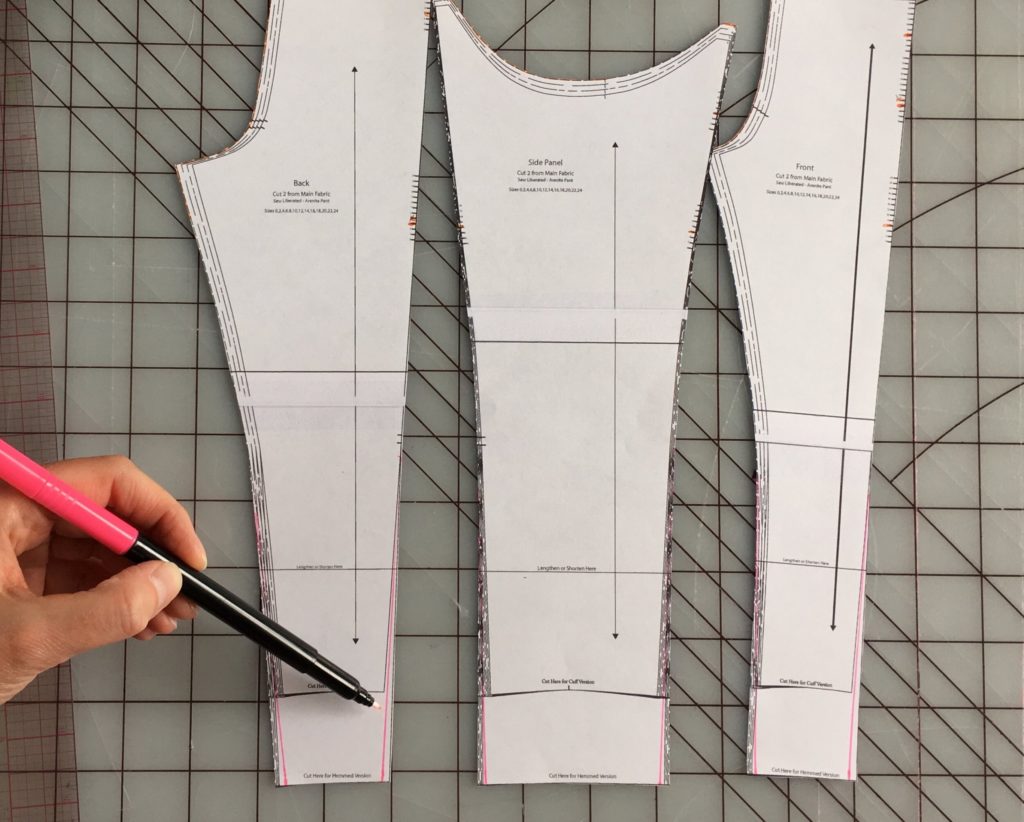
Taper the leg a bit more: ¼” off the width of the side panel, the front, and the back. Mark ¼” in from the edge at the hem, and taper it up to the double notch. Taper up to the same height measurement on each side seam. Trim to the new cut line. Figure 5
Step 5
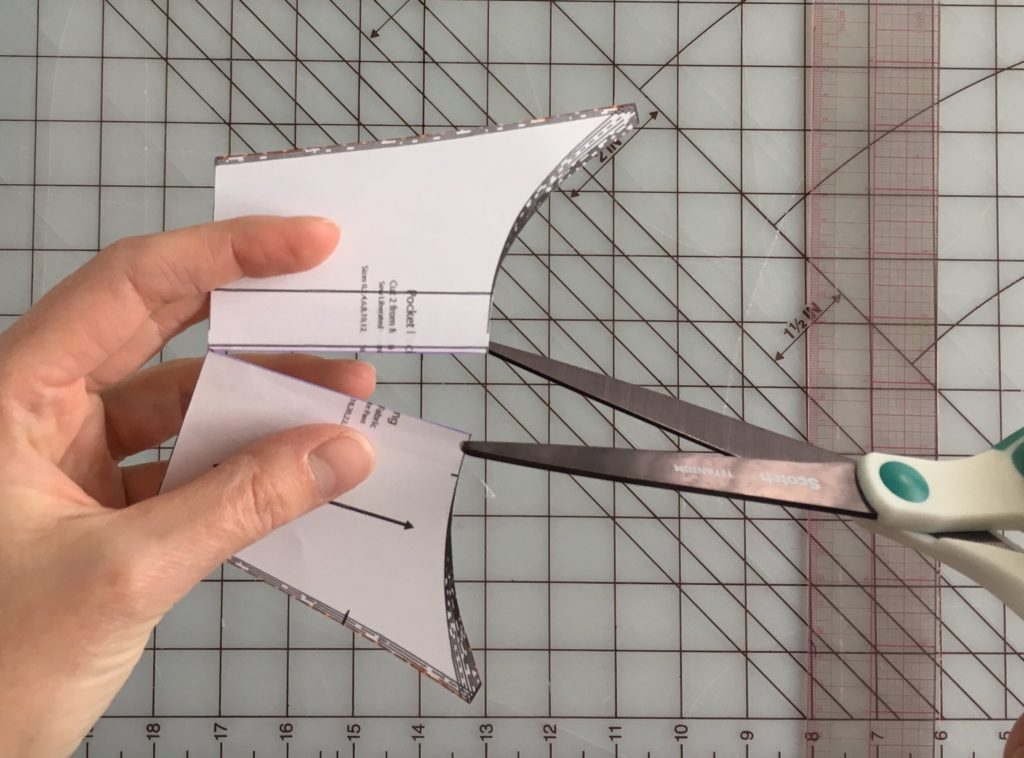
Parallel to the grainline, mark a vertical line in the middle of the pocket facing. Figure 6
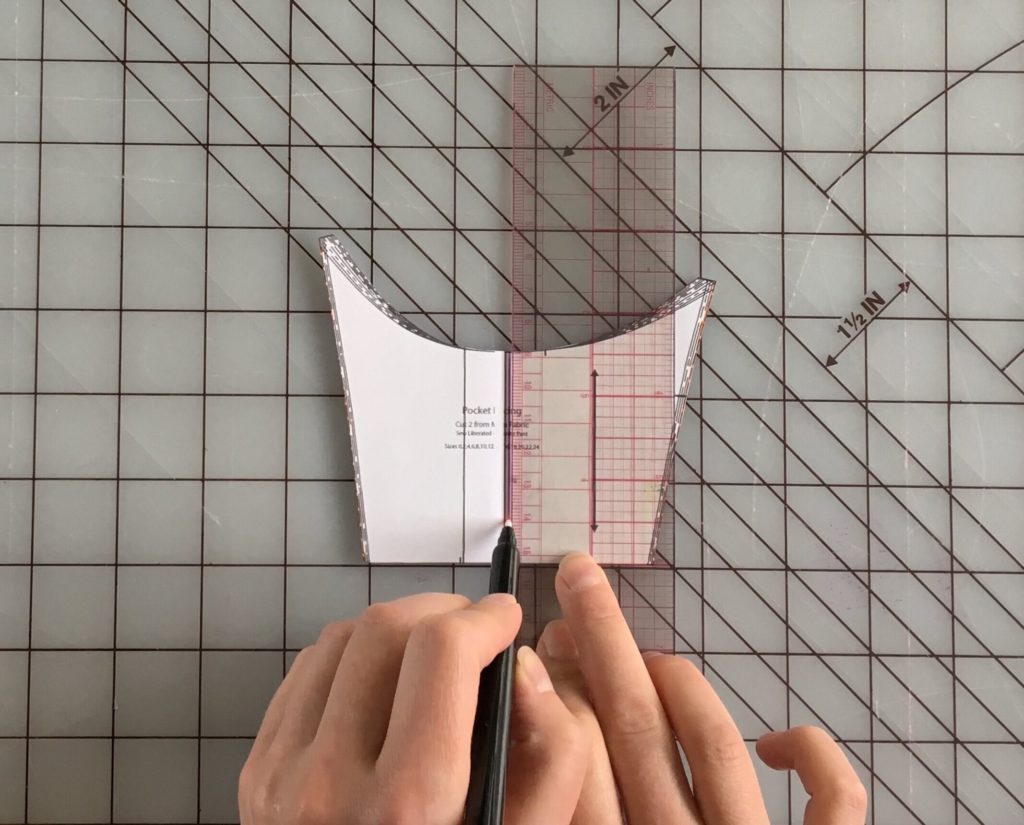
Cut along the line, leaving a hinge point at the bottom. Figure 7
Step 6
Lay the Pocket facing on top of the pocket, and overlap the top edges so the pocket facing is the same width as the pocket piece.
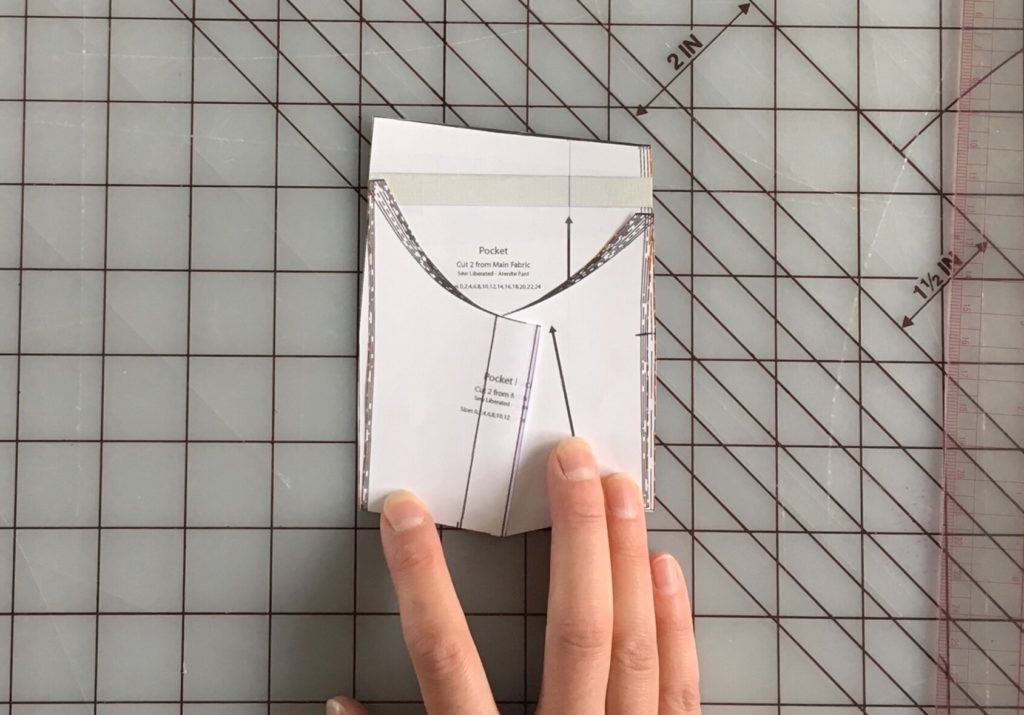
Since the side seams of the pocket panel have a slight hip curve, you have a choice here. The first option is to allow the top edges of the crescent to extend very slightly past the Pocket piece, lining up the sides of the pocket as far as possible. This will allow the slightest bit of room for your hand to be in the pocket with less strain on the seam, but may not be perfectly flush when your hand isn’t in the pocket. Figure 8
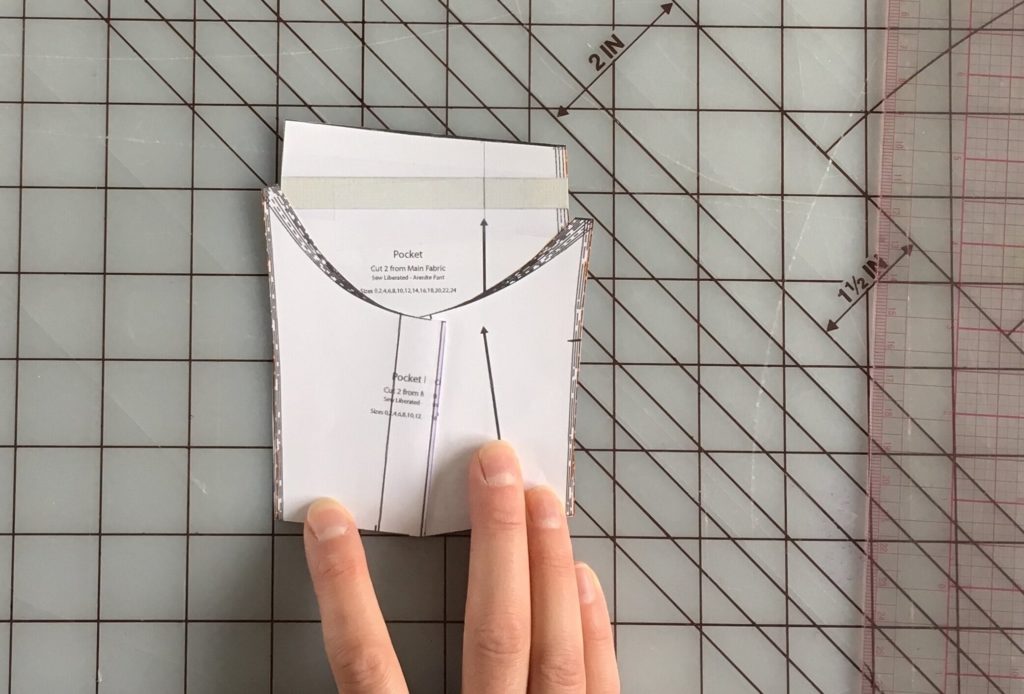
The second option is to line up the top corners of the crescent edge perfectly with the Pocket edge, and add a bit of paper to the sides of the Pocket Facing to accommodate the hip curve (Figure 9).
Tape the adjustment into place.
Step 7
Measure the length of the vertical line from the Pocket Facing adjustment to have an adjustment point for the Side Panel, so that you can duplicate the adjustment on the Side Panel. Mark this length vertically on the Side Panel, as shown in Figure 10.
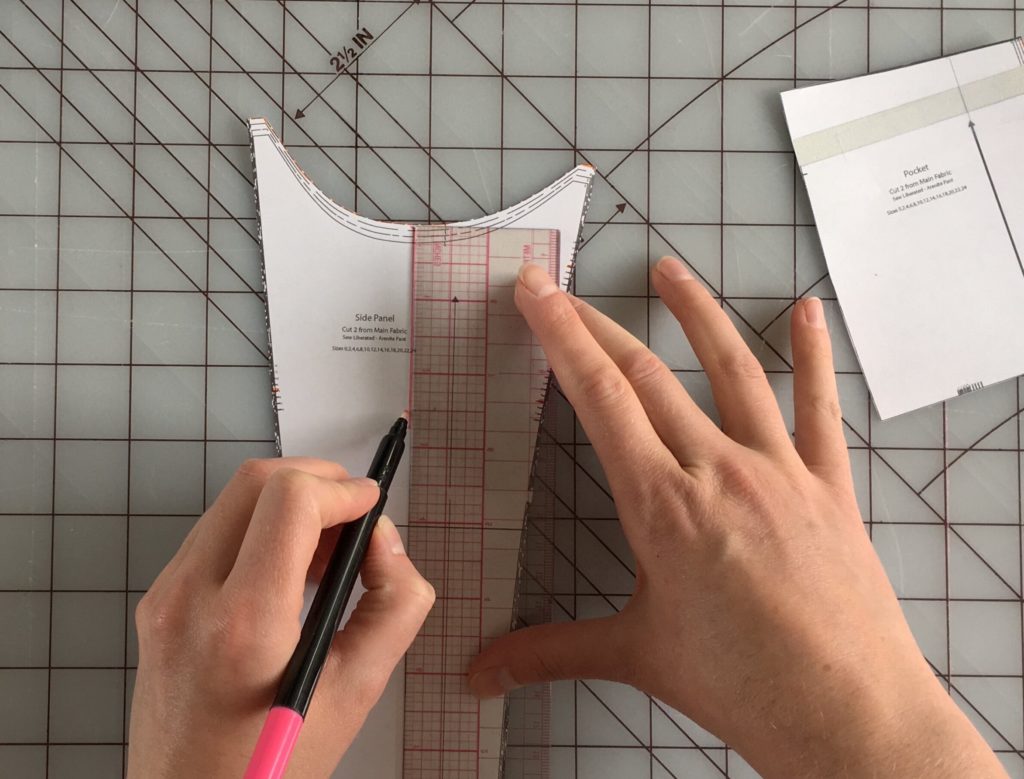
Mark the same cut line as the pocket facing, and cut horizontally to the side seams as well, leaving hinge points at the side seams (Figure 11).
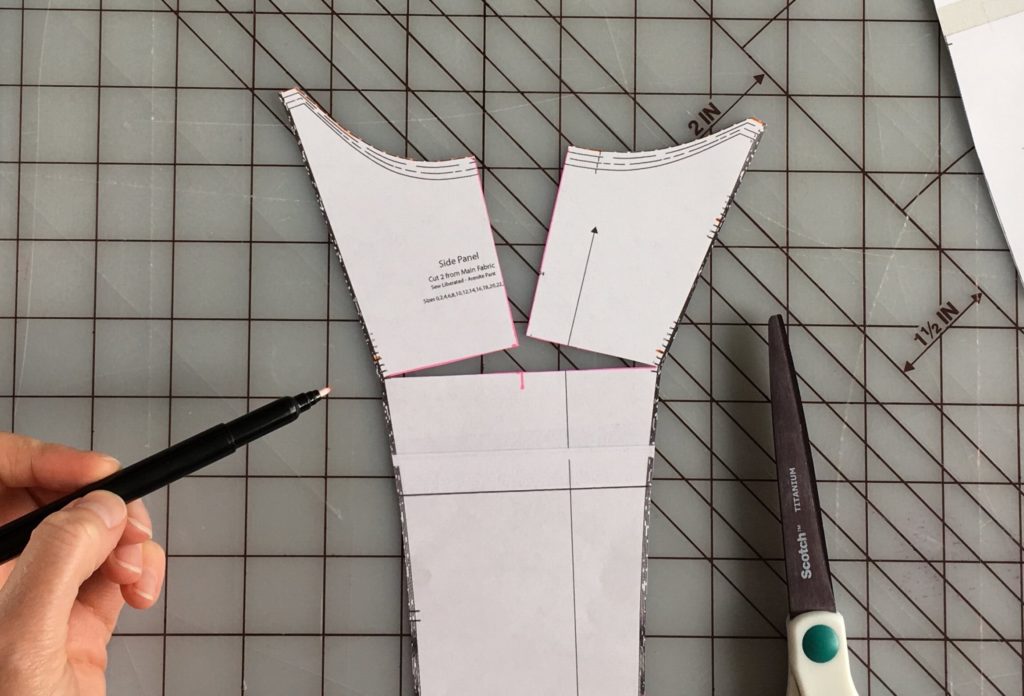
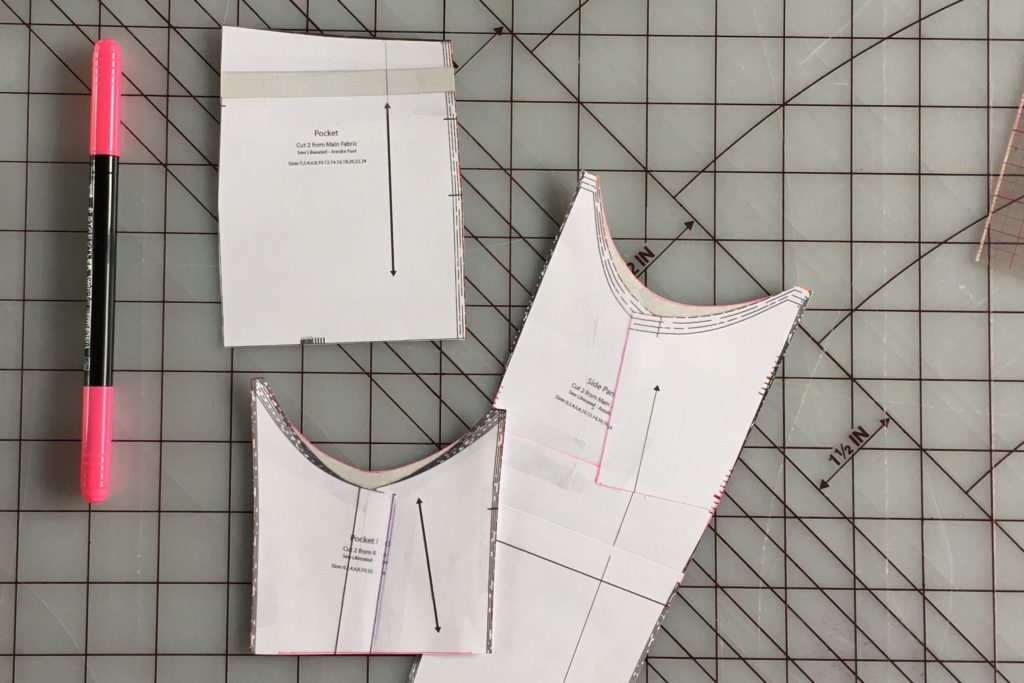
Using the adjusted Pocket Facing as your guide, pivot the pieces of the Side Panel until they match the Pocket Facing, and tape into place to secure. (Figure 12) You may have a slightly pointed bit in the side seams after this adjustment. Go ahead and blend the side seams, making sure you keep the notches in the correct position and don’t trim them off!
Bonus tip: I usually mark notches with a brightly coloured marker as I work, so that I don’t miss them when I’m cutting my fabric.
Step 8
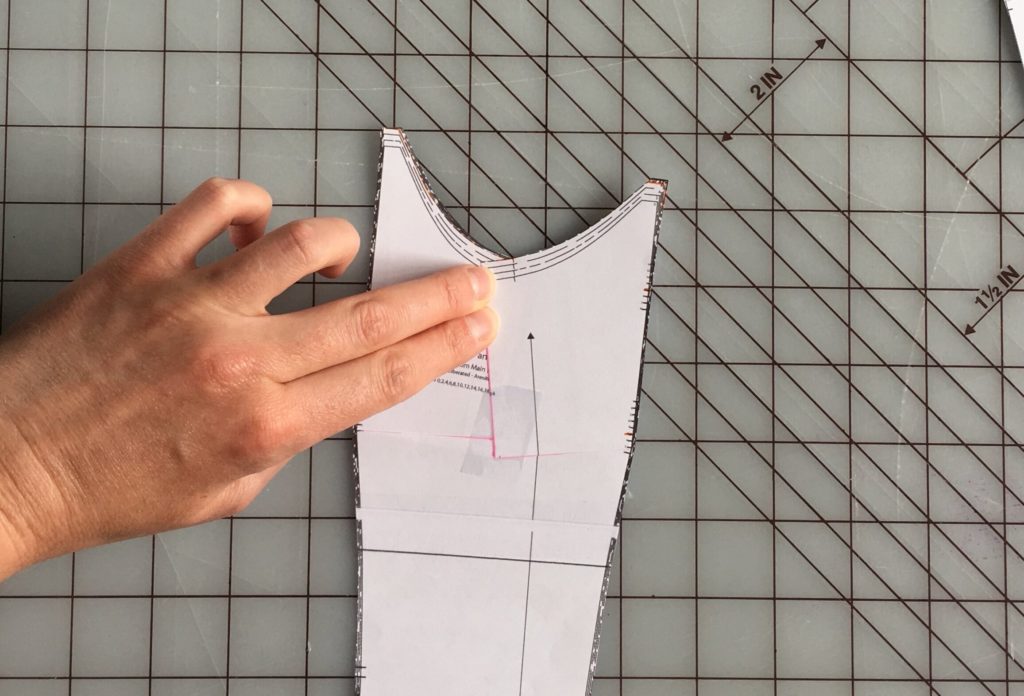
Straighten out the bottom edge of the Pocket Facing piece by drawing a new cut line from corner to corner, and trimming off the triangular-shaped piece that you created during your Pocket Facing adjustment (Figure 13).
Step 9
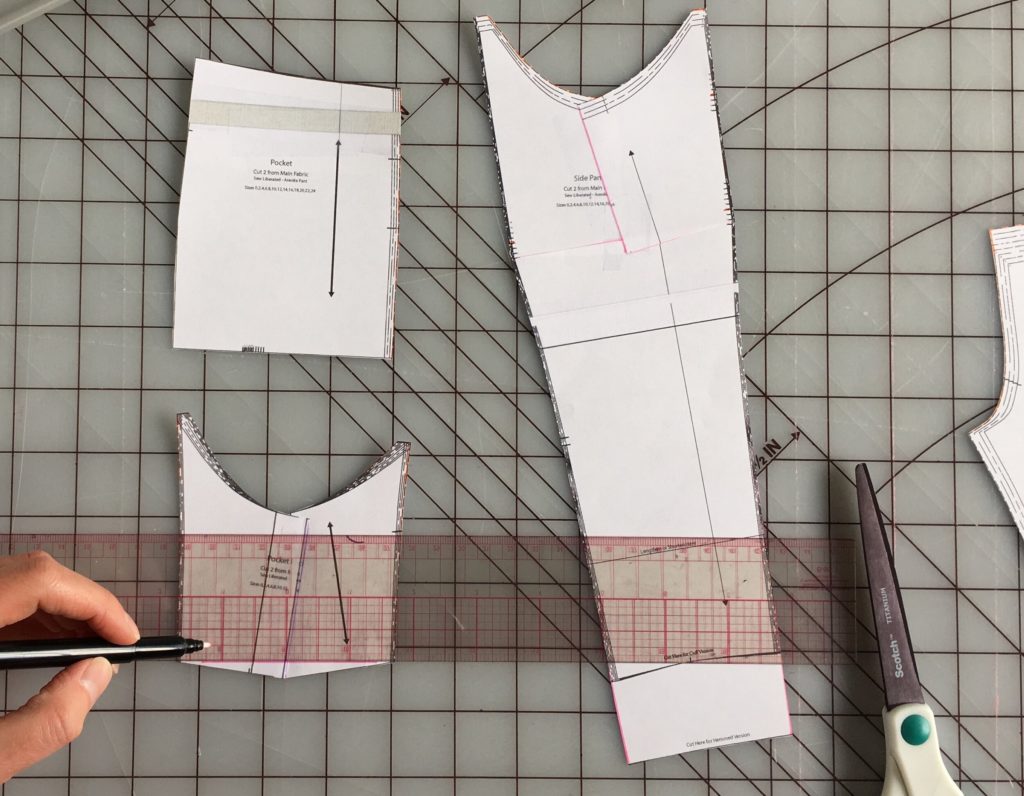
Re-draw the curve on the pocket facing and the side panel to be a smooth curve, making sure the curves on the two pieces match. To maintain the original pocket depth, bring the new curve up from the old cut line at least the same amount that you just trimmed off of the bottom of the Pocket Facing piece (Figure 14).
Step 10
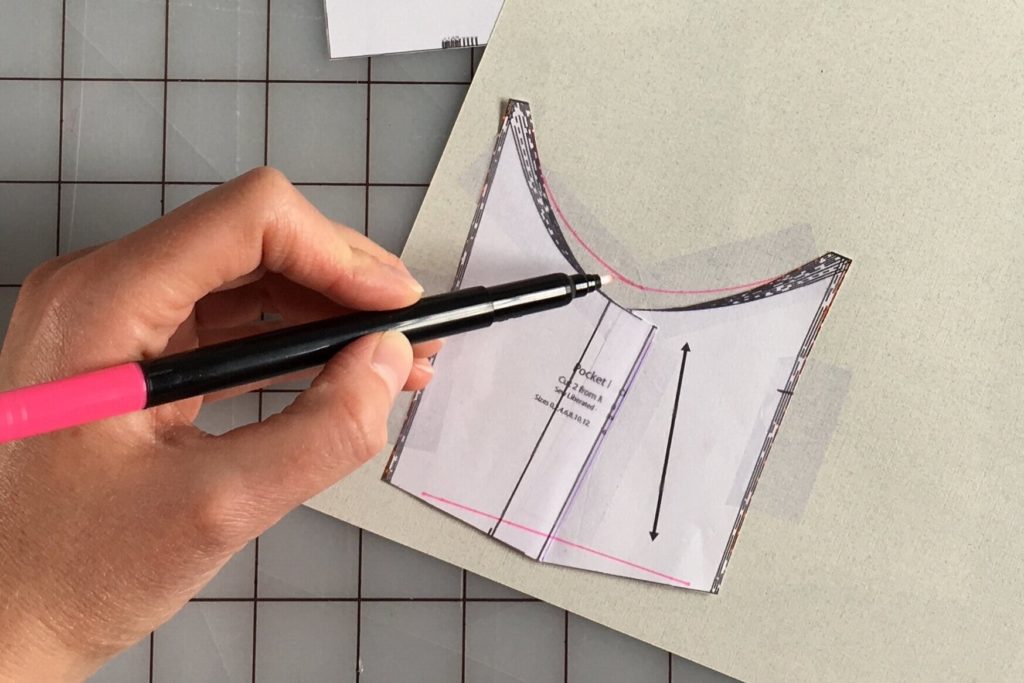
To double check your work before you cut your fabric, lay your pieces out together to check that the notches still line up.
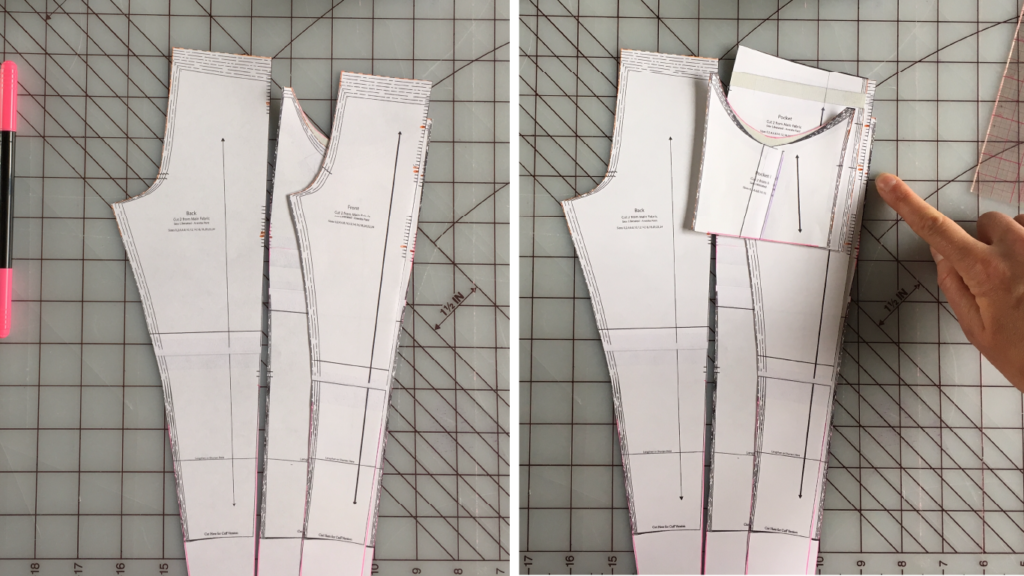
Check that the Pocket Facing And Side Panels have the same curve on the pocket opening.
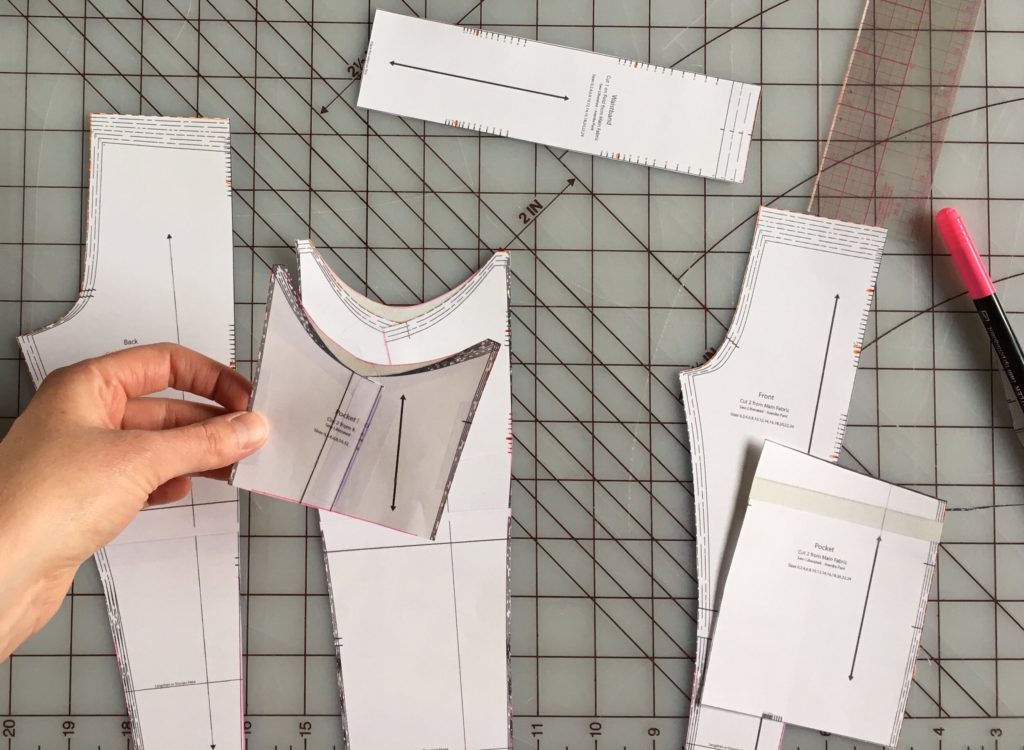
You’re all set! Now you can sew up your Arenite Pants using the hemmed version of the instructions.
You can use the tag #hackyourarenites or #slimhackarenites on social media to share your in-progress work and finished project.


Thank you for this Arenite pang hack, I’m giving it a go for the first time!
It’s helpful to have both the original video from IG and the written instructions for the hack, however there are a few discrepancies that have me second guessing which one to follow. Do you suggest following the written instructions since they appear to be an updated version of the hack?
I’m so exciting to work on this, thank you very much!
-Gabrielle
Hi Gabrielle! Thanks for the question. Yes, the written instructions are more recent, so I recommend following those for any small discrepencies. I hope that helps! Patrick
I want to make the pants with the hack and just read the written instructions. I am wondering: with the hack what would the built in ease for the pants, for instance in the one that Meg is wearing above. I know that one can have as much ease as one wants but i haven’t made them before. I have a 39" hip, so I am wondering what size I should make. Is there something like "finished measurements?" Thank you.
Hi Asmita,
There’s an extensive finished measurements chart in the pattern, so that will give you a good start. The regular view A (in Arenite 2.0) has 5.5" hip ease, and you’ll probably want around 2.5-3" of hip ease for your slim hack.
Happy sewing!
Judith
I’ve been sitting on the Arenite pattern in my "to make" pile for about a year! I’m excited to finally dive in. I’ve got my pattern printed, and I’ve been trying to decide about the slim hack. My question is, how do I make an elasticated cuff with the slim hack? Do I cut the size cuff for the slim size? do I need to modify that pattern piece since I’m modifying the leg pieces to be more tapered?
Hi Stephanie!
Great question. To use the elasticated cuff, I suggest that you go ahead with the hack as written, and once you’re finished, measure the circumference of your hem (not on the the cut edges but on the actual stitching lines – you’ll have to draw them in and then measure) to find the hem circumference. Add 1.25" (for two seam 5/8" seam allowances) and that’s the length of the cuff pattern piece that will match your hacked pattern! Adjust the elasticated cuff to match this measurement, and you’re ready to go.
Happy sewing 🙂
Judith
I want to learn a slim hack but I am always using one of the two smallest sizes… :/
Hi
Im in the process of altering my Arenite pattern for the slim hack. My question:
When altered, should the pocket facing and the side panel match at the top, bottom and sides?
I’m a bit confused as the instructions say ‘use the facing as a guide (when altering), however, before any alterations the bottom of the facing is not as wide as the side panel when placed on top of it? I’m probably being very thick here but I think I’m missing something. Jane
Hi Jane! Nope, you’re not being thick at all 🙂 One of the things that the slim hack does is tuck the pocket opening closer to the body. On the original pattern, the pocket stands away from the leg a bit, exaggerating the curved opening. Once you’ve followed the hacking steps, your pocket will sit flush with the side panel, making the effect a bit more subtle along with the slimmer leg. So yes, the top and sides of the Pocket Facing and the Side Panel will match, and the bottom and sides of the Pocket Facing and Pocket will line up. (Feel free to send an email or use the contact link below if you need a bit more support or want to share a photo of your pattern pieces so far – I’m happy to help! ☺️)
Happy sewing!
my waist measurement is 31″ which puts me just under a size 12 (31.5″). My hip measurement is 43.5″, which puts me just over size 16 (43″). according to the finished garment measurement chart, if I size down 3 sizes in the hip, this would only give me half and inch of ease, so I think I would just size down 2 sizes and cut the hip at a size 12 which would give me 2 inches of ease at the hip. Is that enough? should I also then just size down 2 sizes at the waist as well, or should I still size down 3 sizes at the waist? Im worried if I size down 3 sizes at the waist I won’t be able to get the pants over my hips to put them on! Thanks for your help!
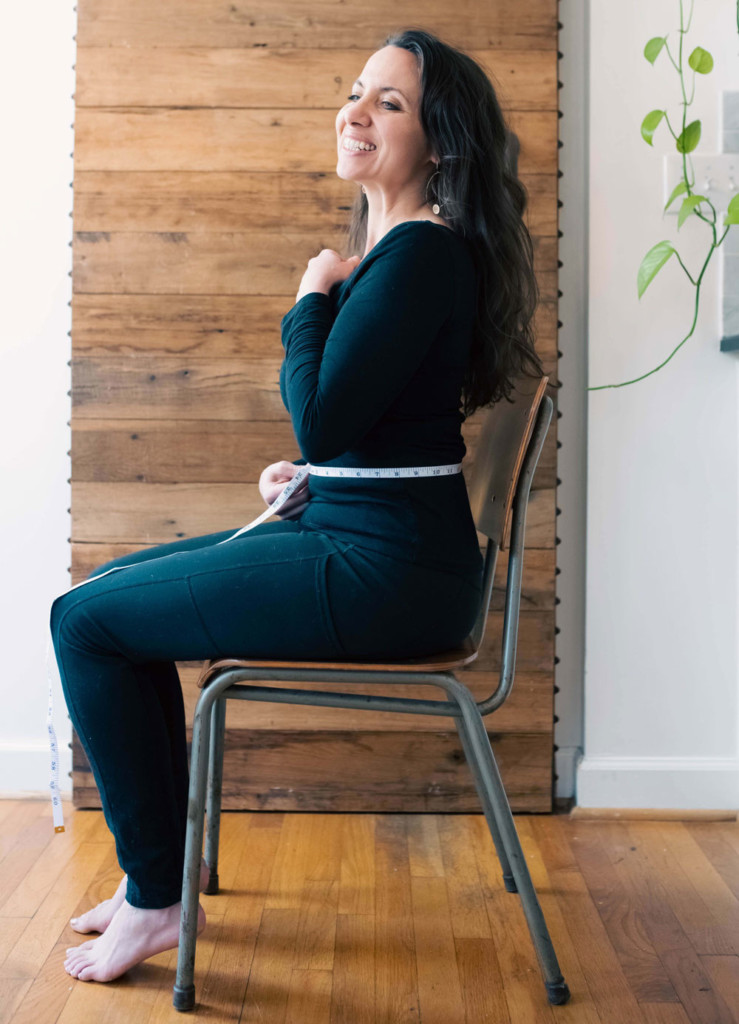
I totally agree with you, Adria, that size 12 fits the math, but has the possibility of maybe being too tight. You could double check this decision by measuring your seated hip, and if it measures greater than the Finished Hip on size 12, you’ll probably find that too snug. You can see a photo of how to take your seated hip here: https://sewliberated.com/blog/sew-liberateds-guide-to-taking-your-measurements
Happy sewing!
Do you think this hack would work for the Gypsum skirt?
To flatten out the pocket’s outward edge? I’d anticipate that it would work really well! I would definitely recommend making a muslin to check your work before cutting into the good fabric 🙂