Quilted Vest Hinterland Hack
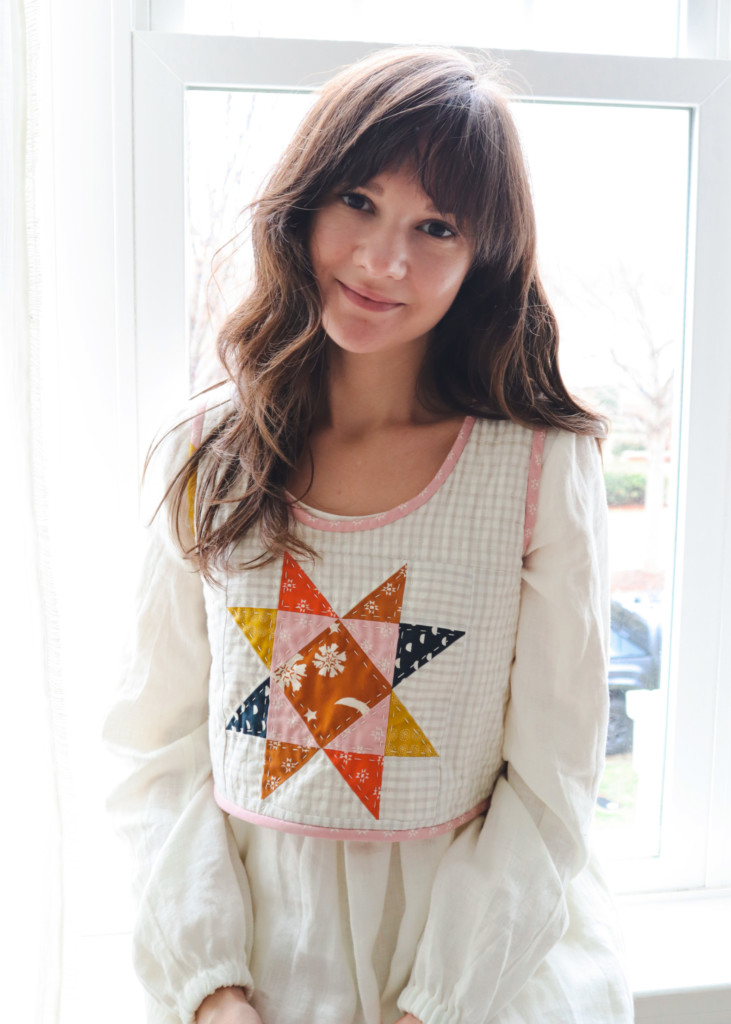
Let me start this by saying that hacking a pattern is a fairly new skill for me, but a fun one I have been exploring a lot recently. It requires some openness to the possibility of failure, or, maybe not failure, but missteps and mistakes.
But it is worth the time and process, because when it works you’ll have a one of a kind piece. I made this vest as an experiment, really, and as such, I am sorry that I do not have too many process photos. I didn’t anticipate this first one working as well as it did, and I made it as a personal project because I have been interested in piecing and quilting but thought starting small would be best. All you need for this project is your Hinterland Dress pattern (with any adjustments you usually make) quilting cotton scraps or fat quarters or other preferred woven scraps, a craft sized cotton batting, 1/2-1 yard each of lining and background fabrics.
Begin with the sleeveless Hinterland bodice pieces
- Lengthen the back piece. I lengthened mine just an inch, for a cropped look, but you may want to add more. Keep in mind there will be no hem, it will be bias bound as a quilt, so the length you cut is just about the length you’ll get. Repeat with the front piece.
- Remove the seam allowances from the armscye (⅝”)
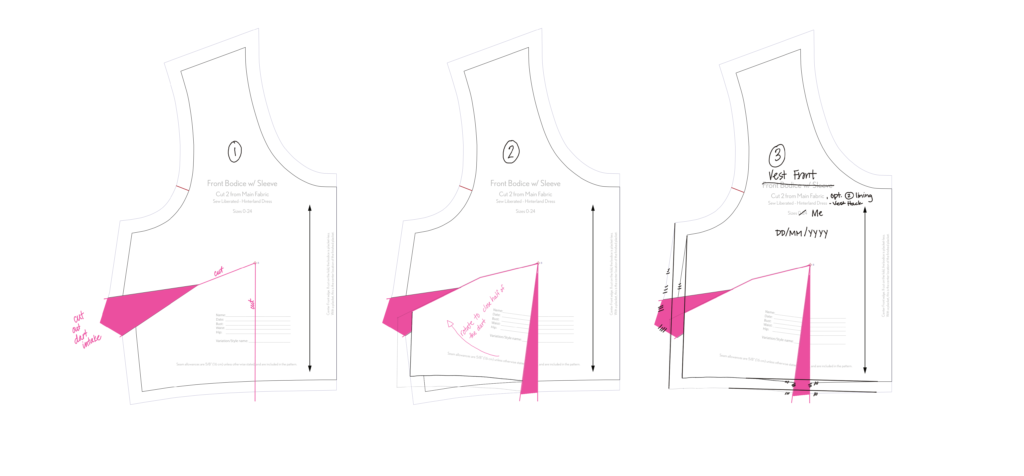
- Convert the dart to ease on the front bodice. I did this by rotating half the dart width to the bottom to distribute the ease, then redrafting the side and bottom seams to be straight. There is no reason you can’t have the dart if you prefer it, but it will make placing the block slightly trickier, and require some adjusting when cutting and sewing your batting. See the diagram below:
- Trace off a second copy of both pattern pieces and set aside.
- Using one set of pattern pieces, cut out your lining and your batting. Sew the shoulder seams of each at ⅝” as in the pattern and press. Set aside.
Now we get to the fun part, making your quilt block
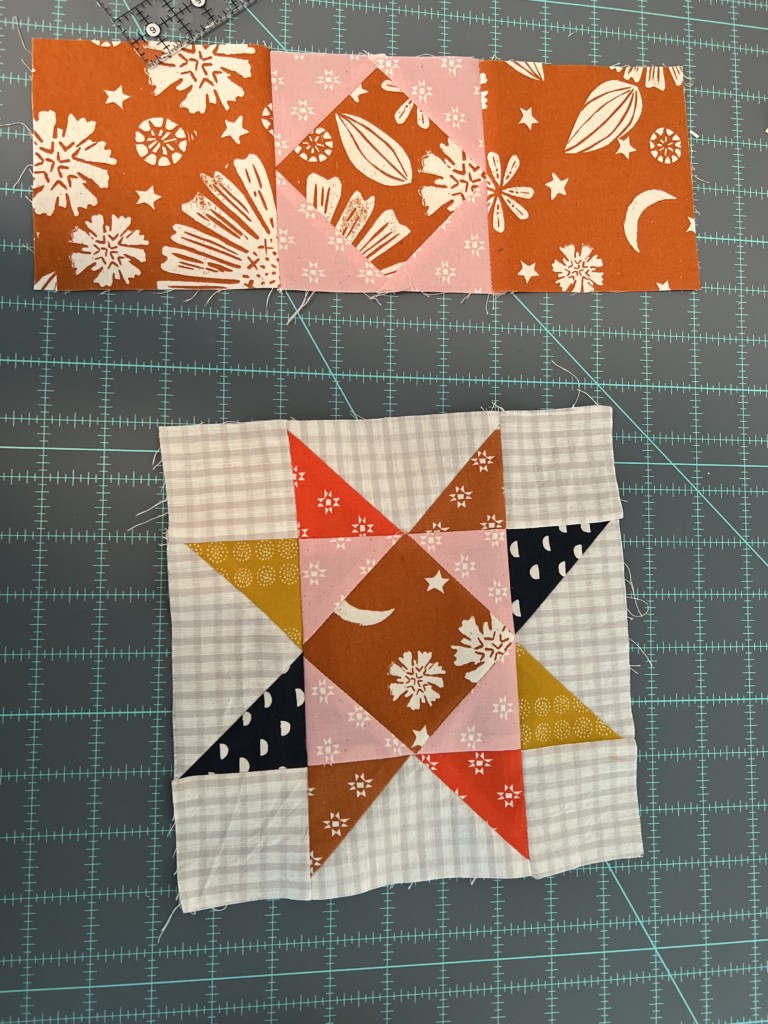
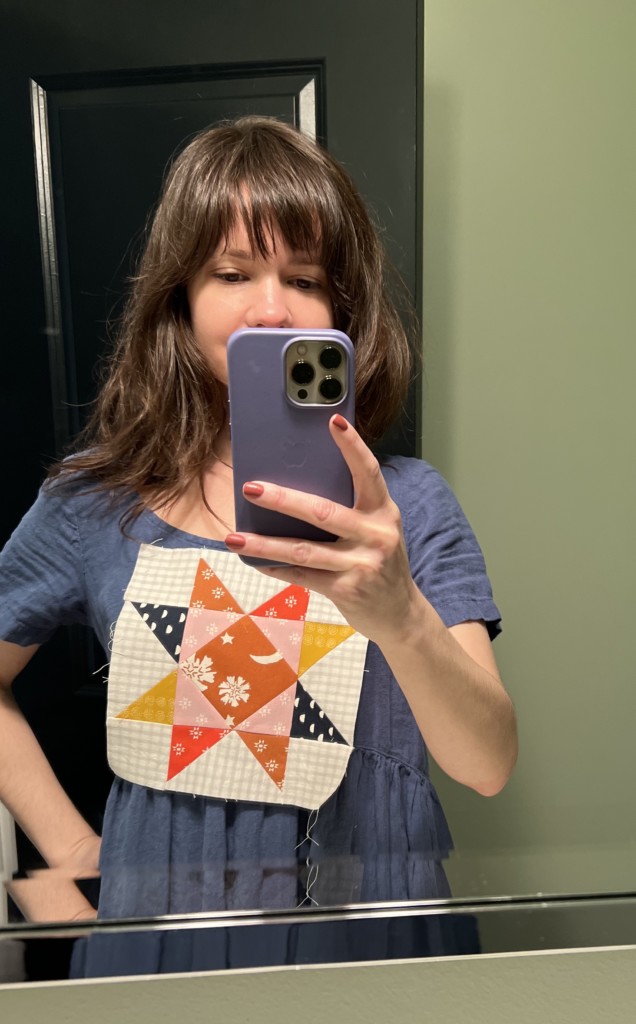
I have a deep fondness for an Ohio star, so I knew that is what I wanted, and I will be referring to the math for that block throughout. But you could use this formula for any quilt block you desire.
First, measure your bodice piece from the center line out to where you’d like the edge of the quilt block. Double this measurement. Mine doubled measurement was 8 inches, and I wanted a square block, so I knew I’d need my quilt block to finish at 8×8.
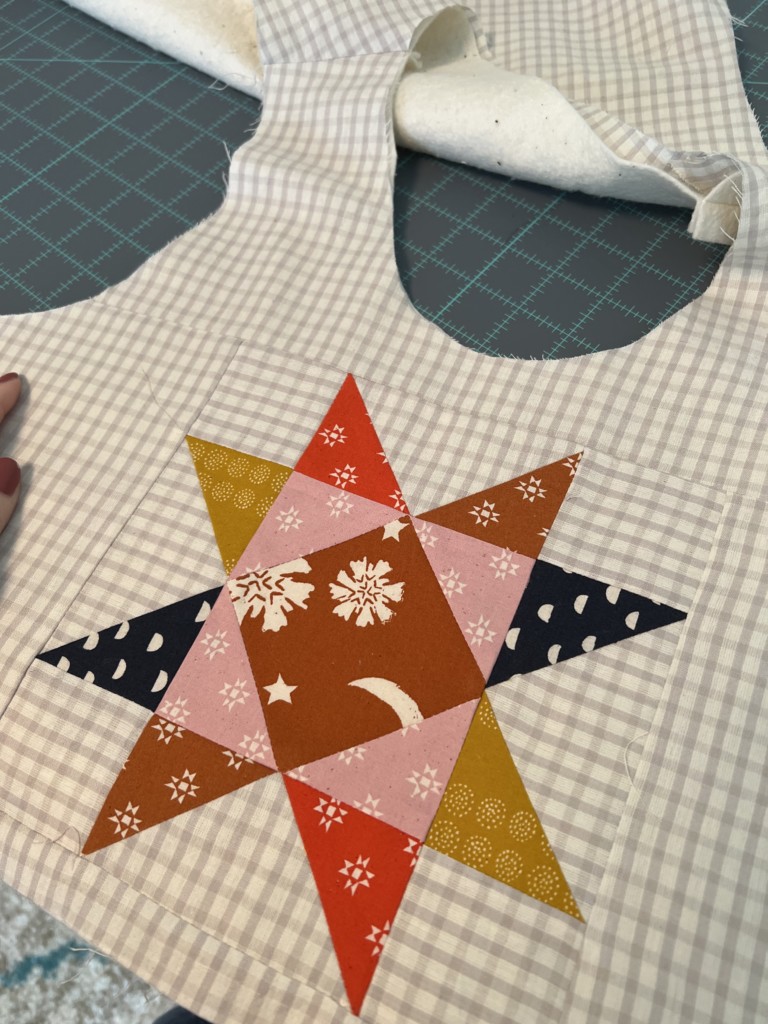
I drew out my block using a gridded ruler and measured each section. I added ½ inch to the length and width (for a ¼ inch seam all around) and determined I would need:
- 1- 4 ½” center square (ochre)
- 4- 2 ½” squares for center (pink)
- 4- 2 ½” squares in background fabric
- 4- 2 ½” x 4 ½” rectangles in background fabric
- 8- 2 ½ squares for points (I cut two each of four colors)
I cut everything using a gridded quilting ruler and my rotary cutter and assembled the block.
Cut the front bodice piece that you traced off to fit the square
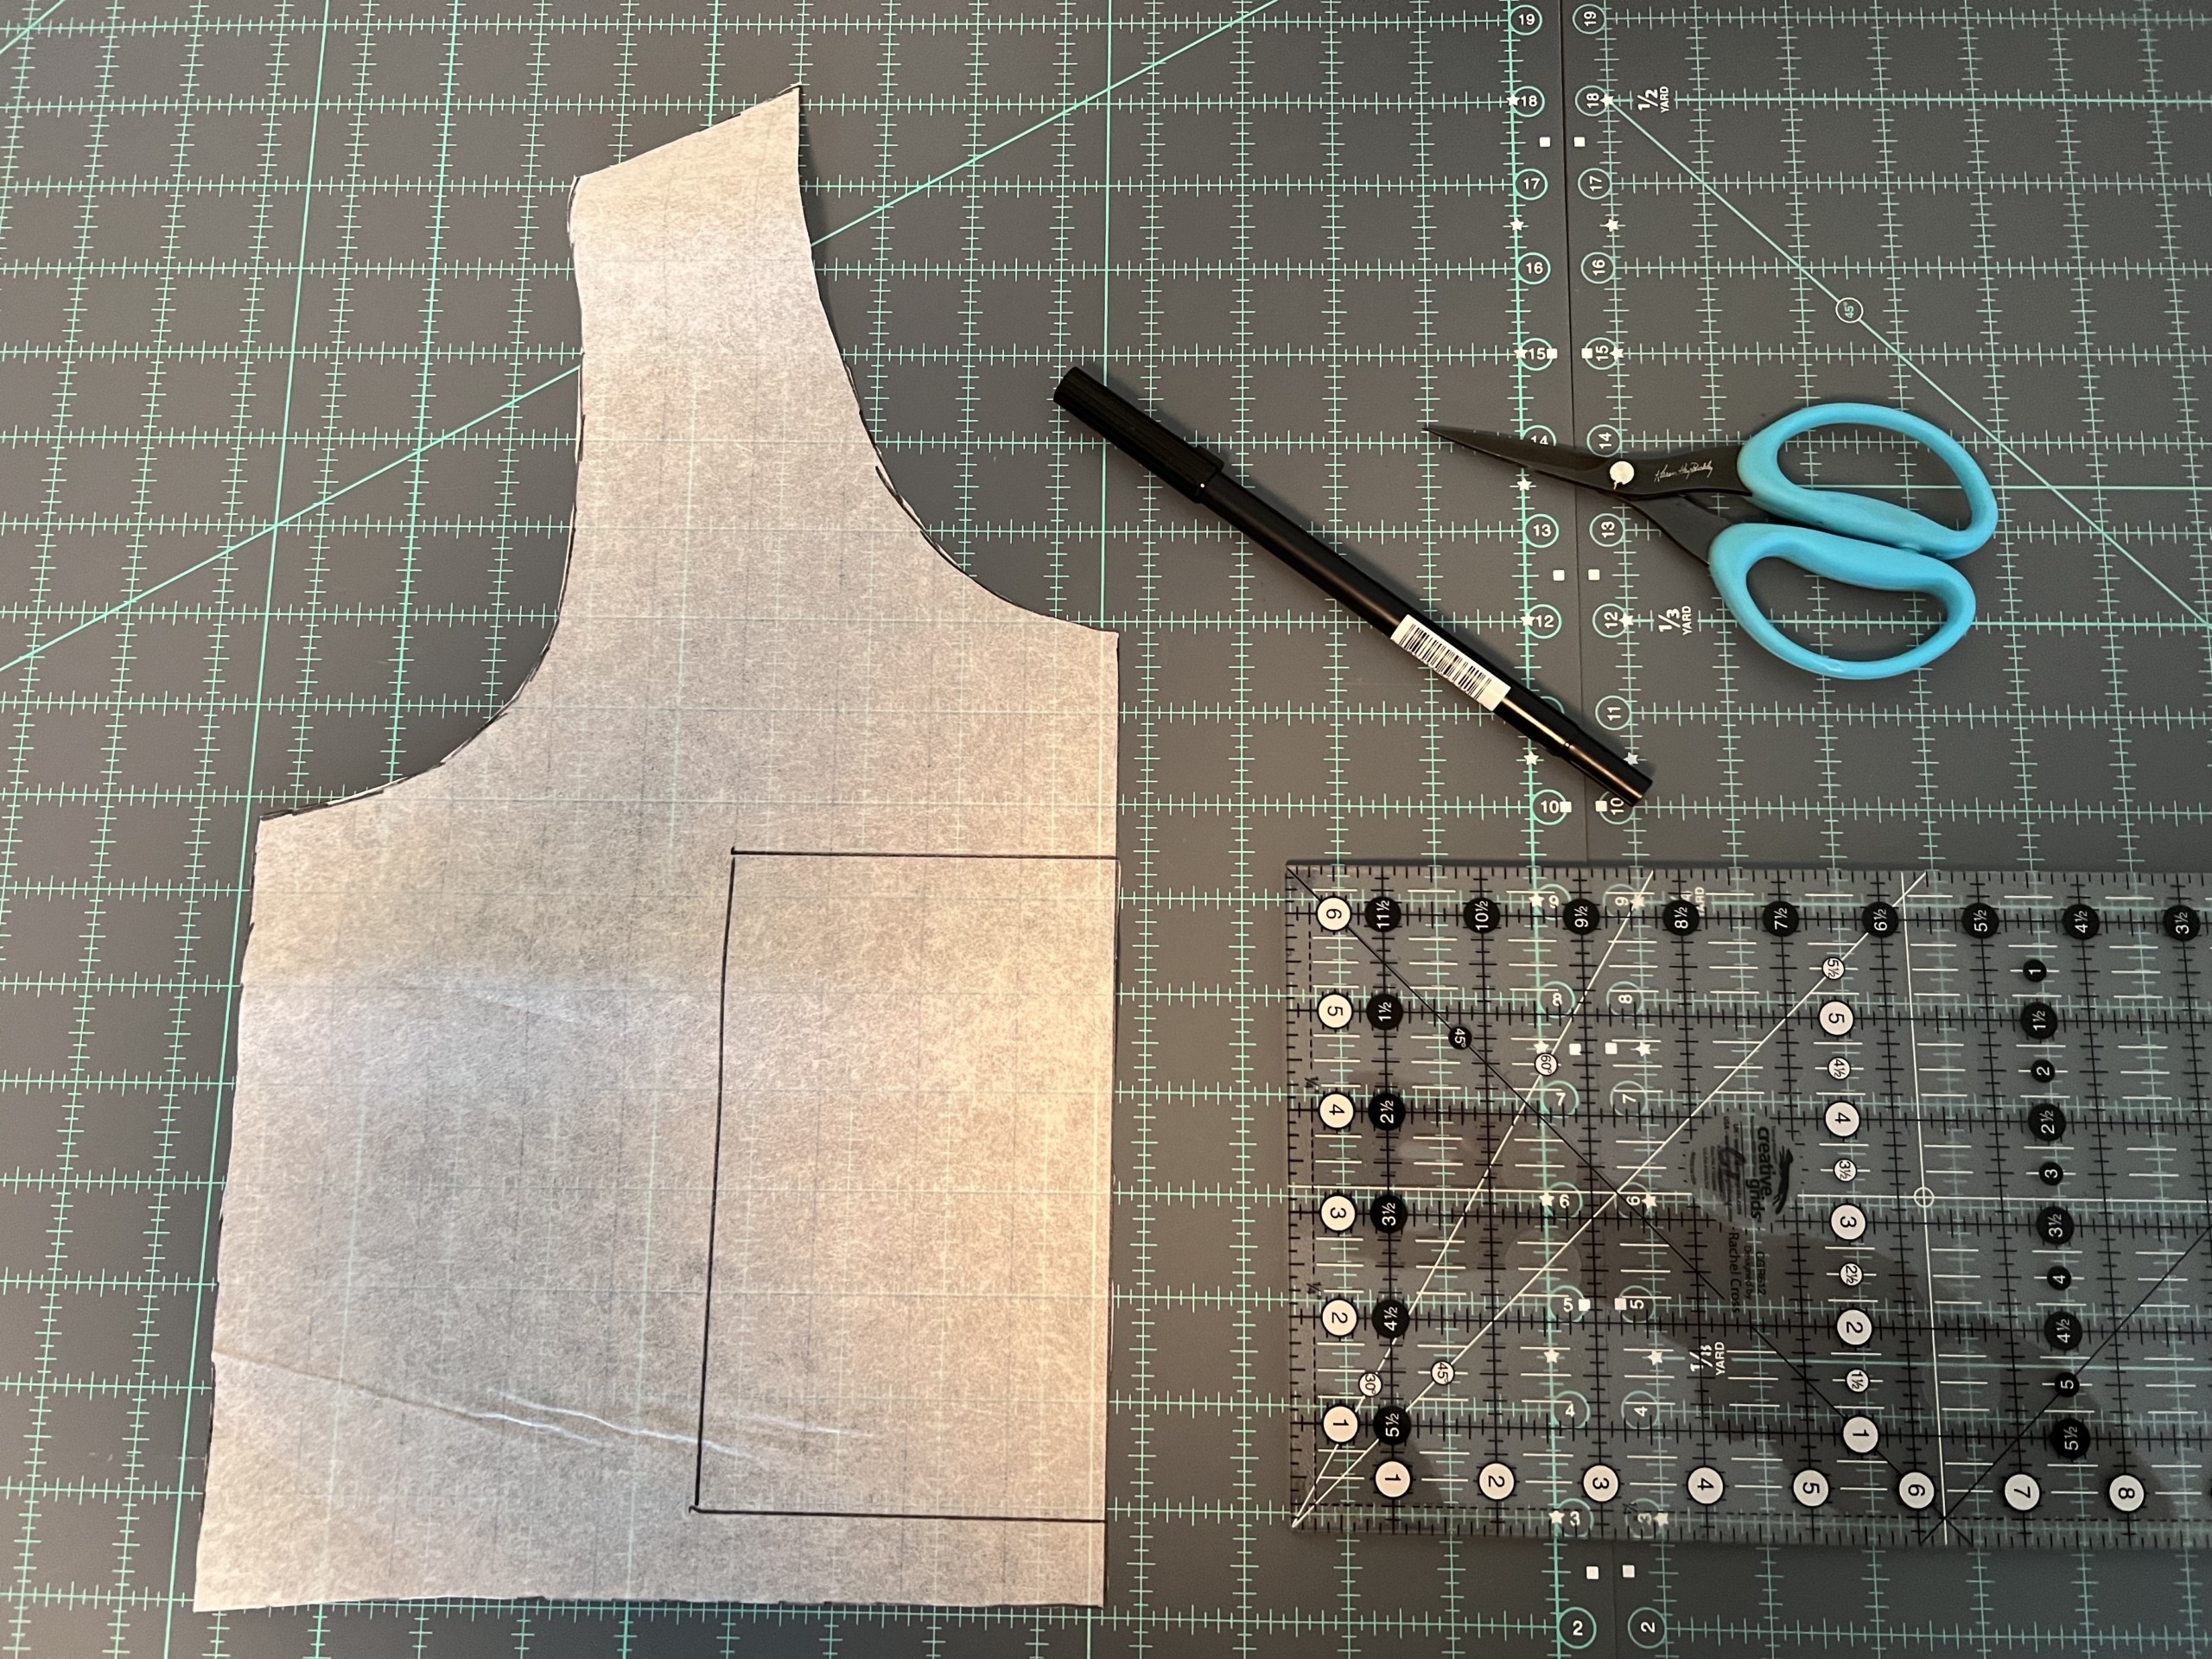
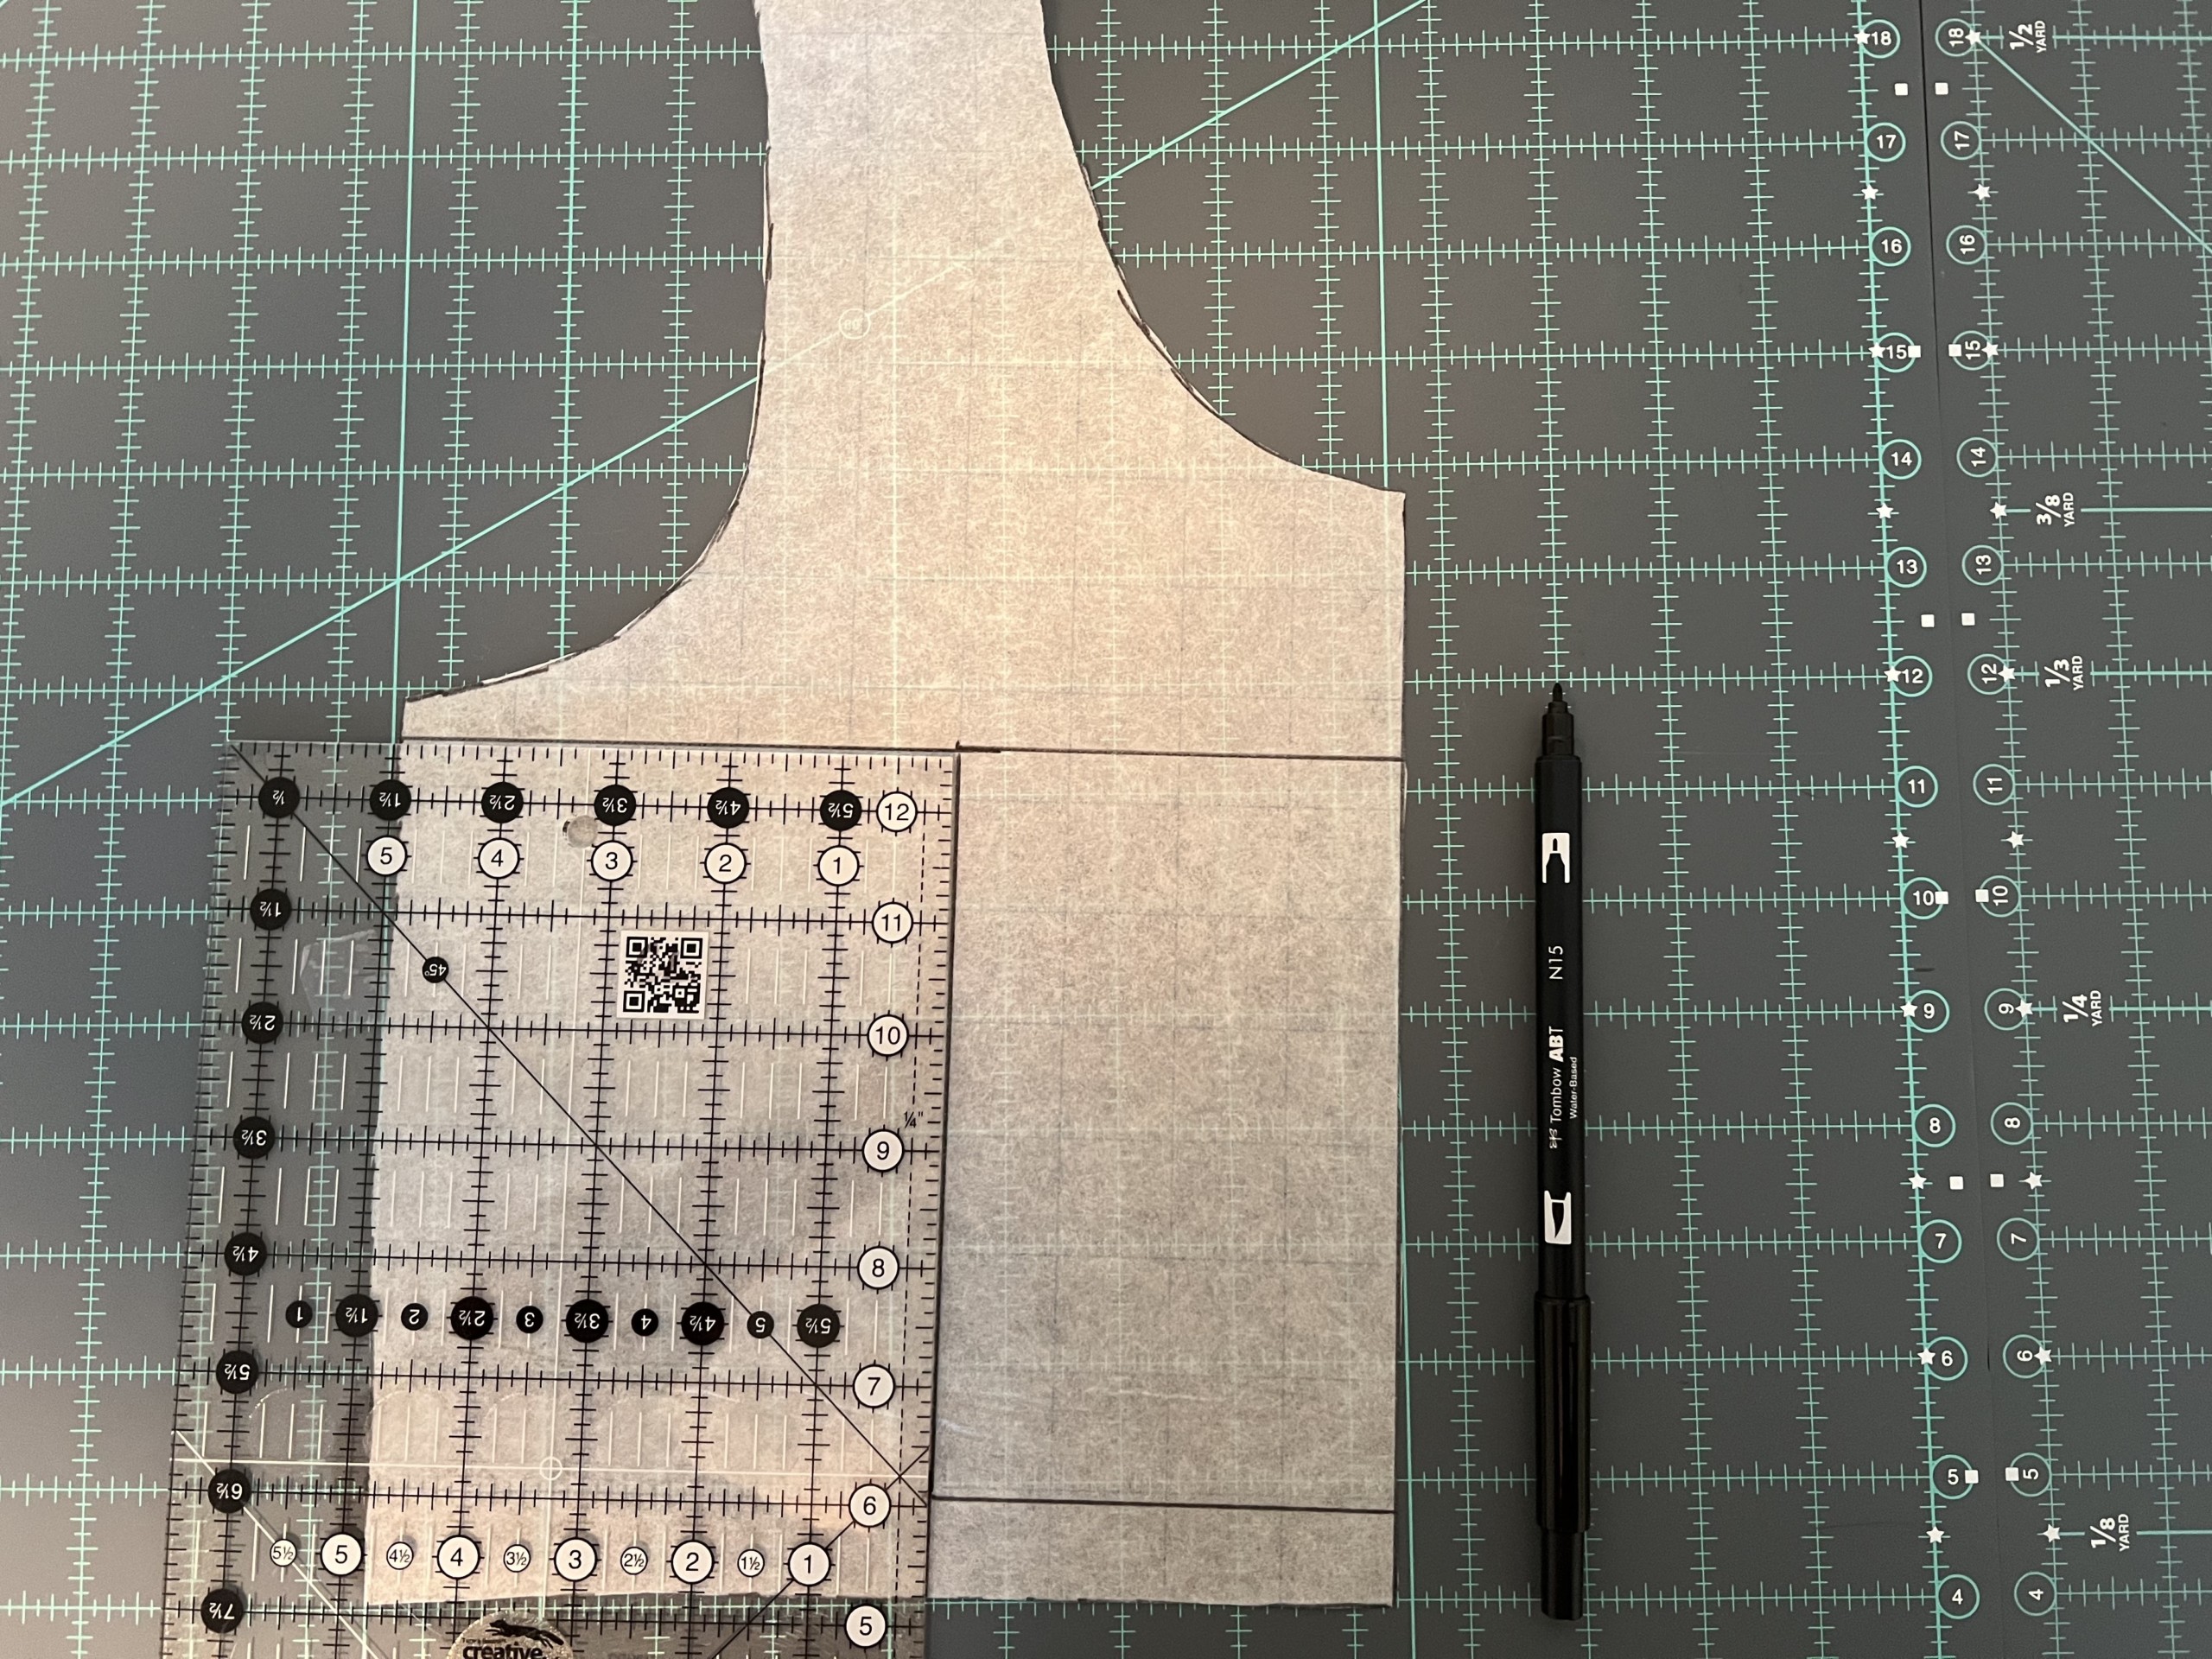
- Mark off on the pattern piece where you’ll insert the block
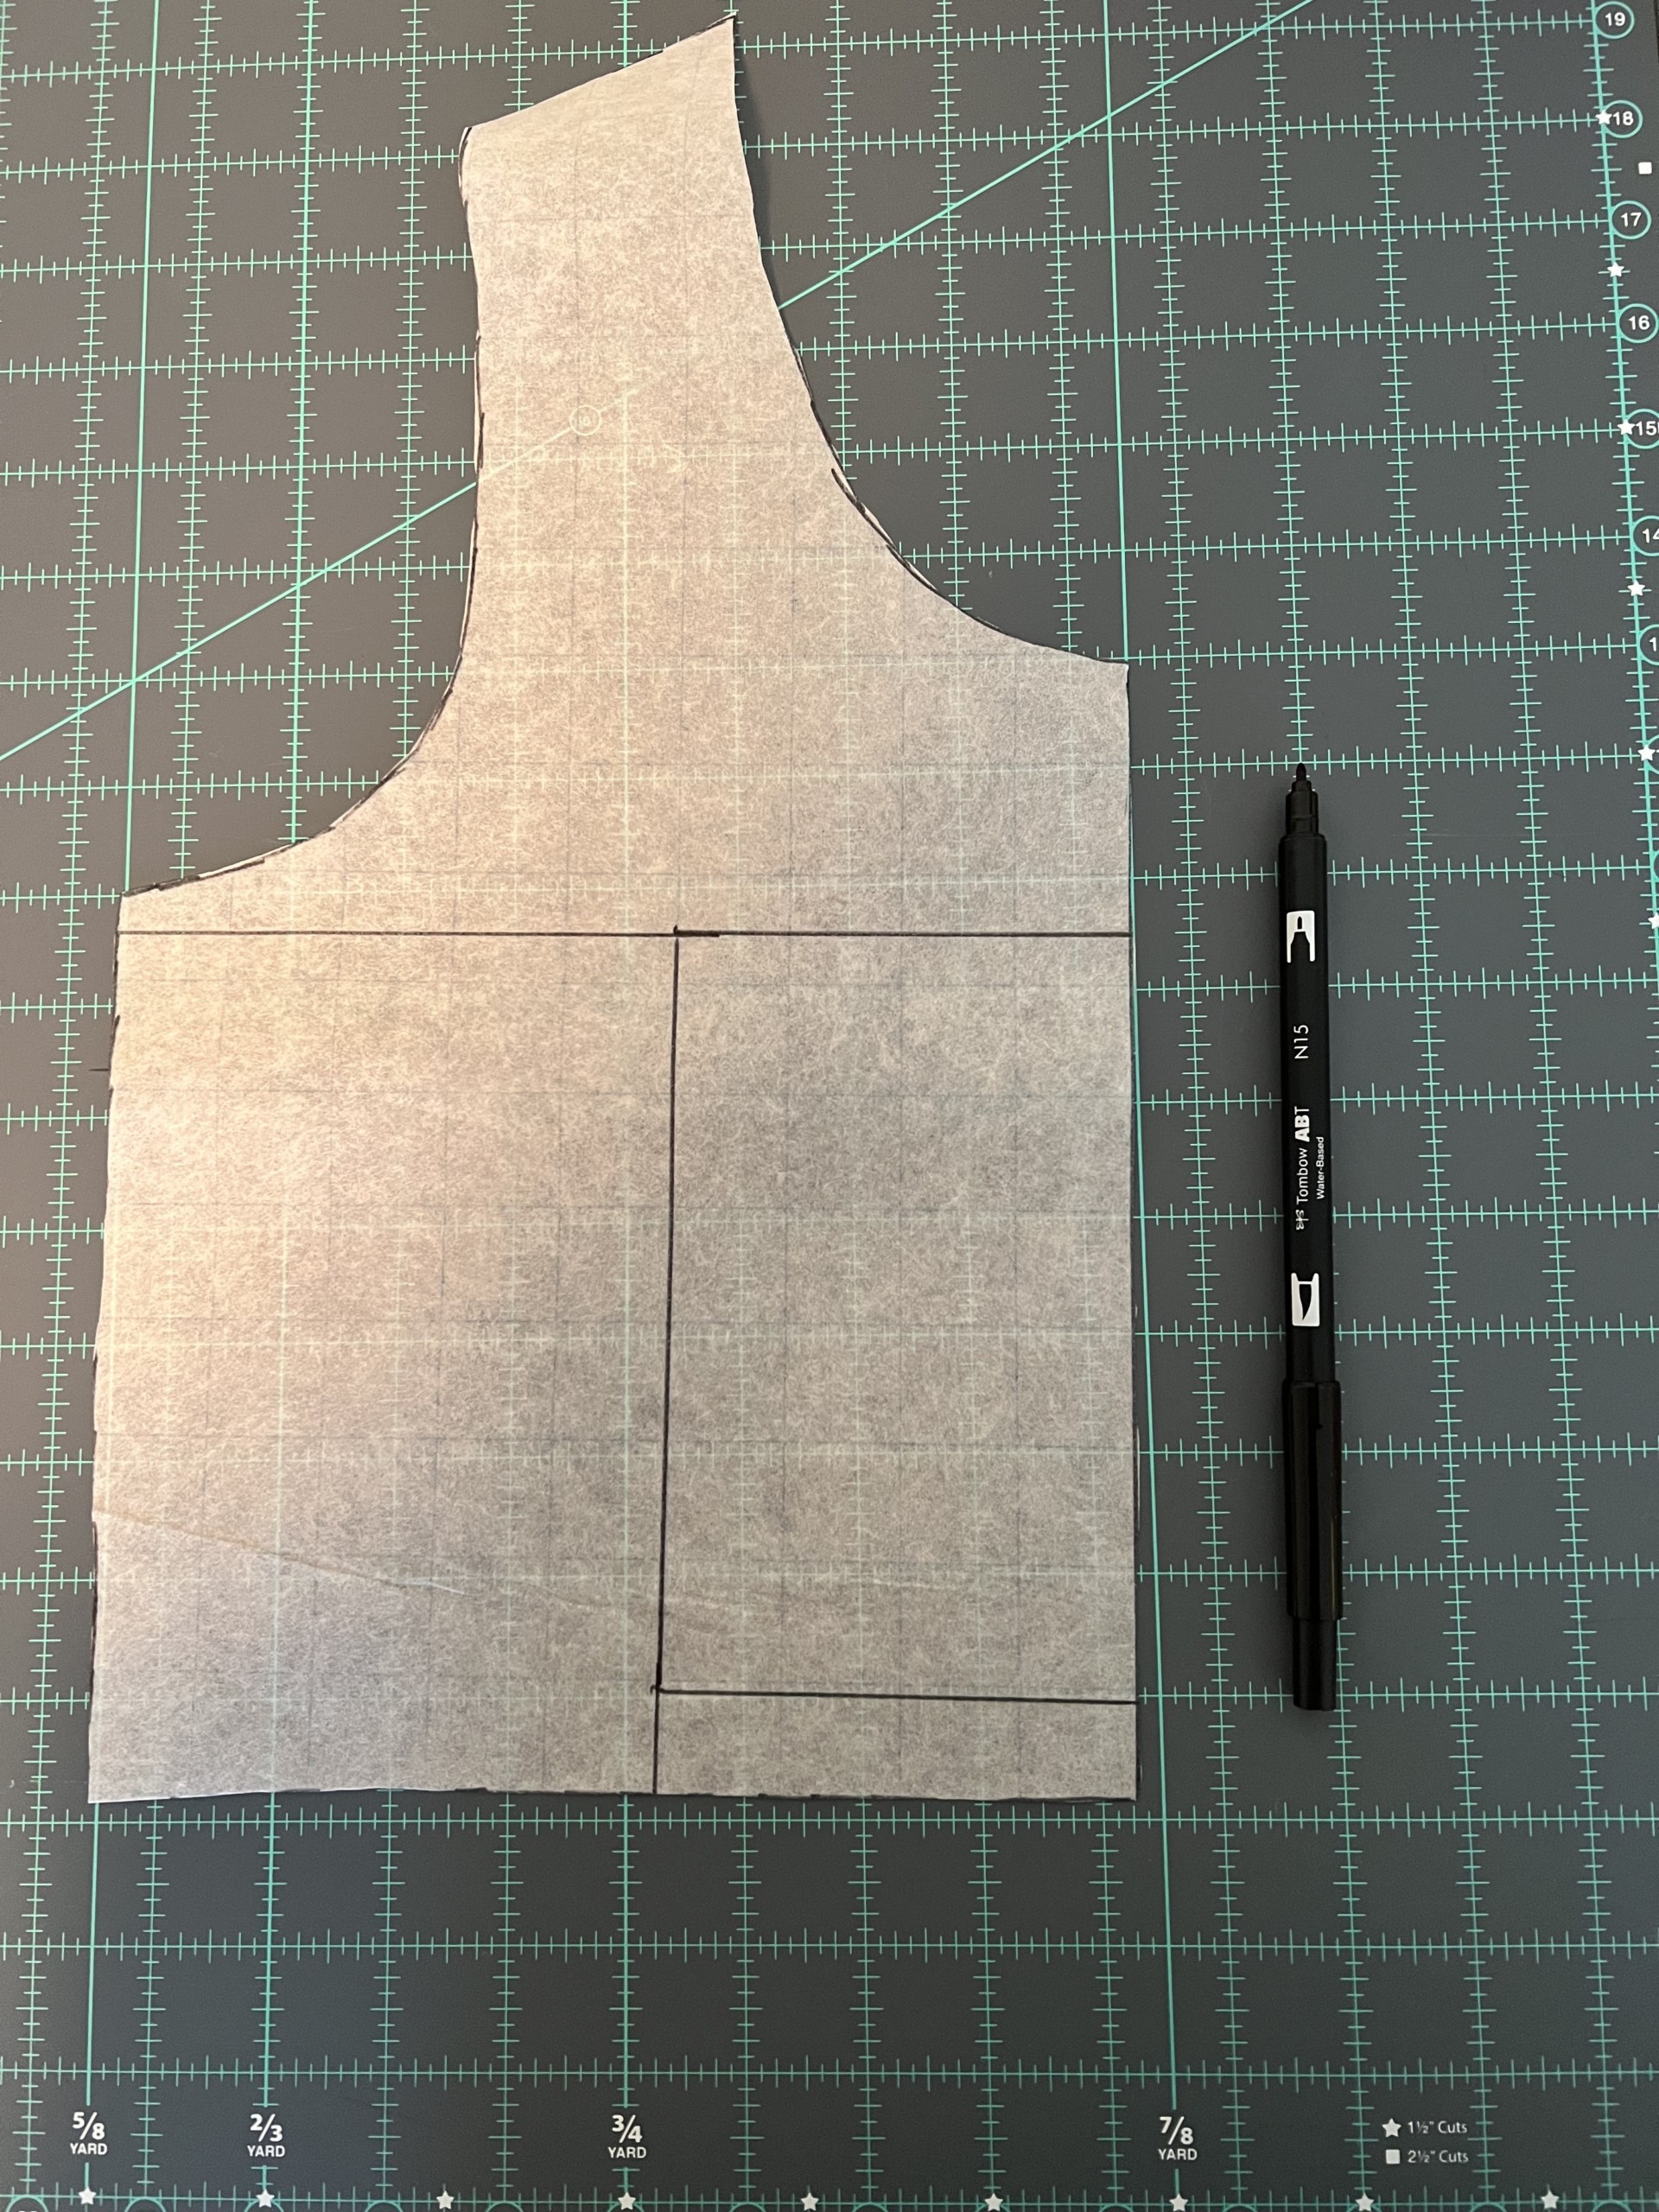
- Extend the top lines to the edge of the pattern piece, and the side line to the bottom.
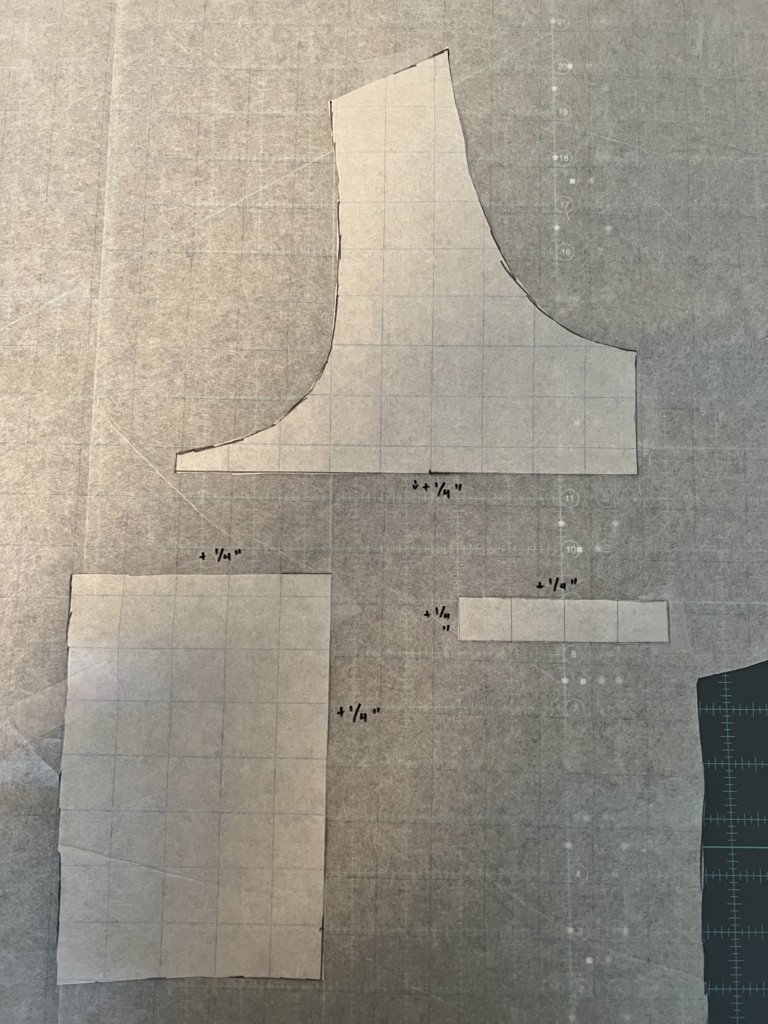
- Cut along the top line and on the side line, as well as around the small rectangular piece below the block.
- The last step is to trace off your newly cut pieces, adding ¼ inch seam allowance to the bottom of the piece containing the shoulder, the top and sides of the small piece that will be attached below the block, and the top and inside of the side piece
- Cut out your pieces from your background fabrics (remember to cut on the fold for the shoulder and bottom. And cut two for the side) and assemble your bodice using ¼ inch seam allowances. Press towards the background fabric, or open.
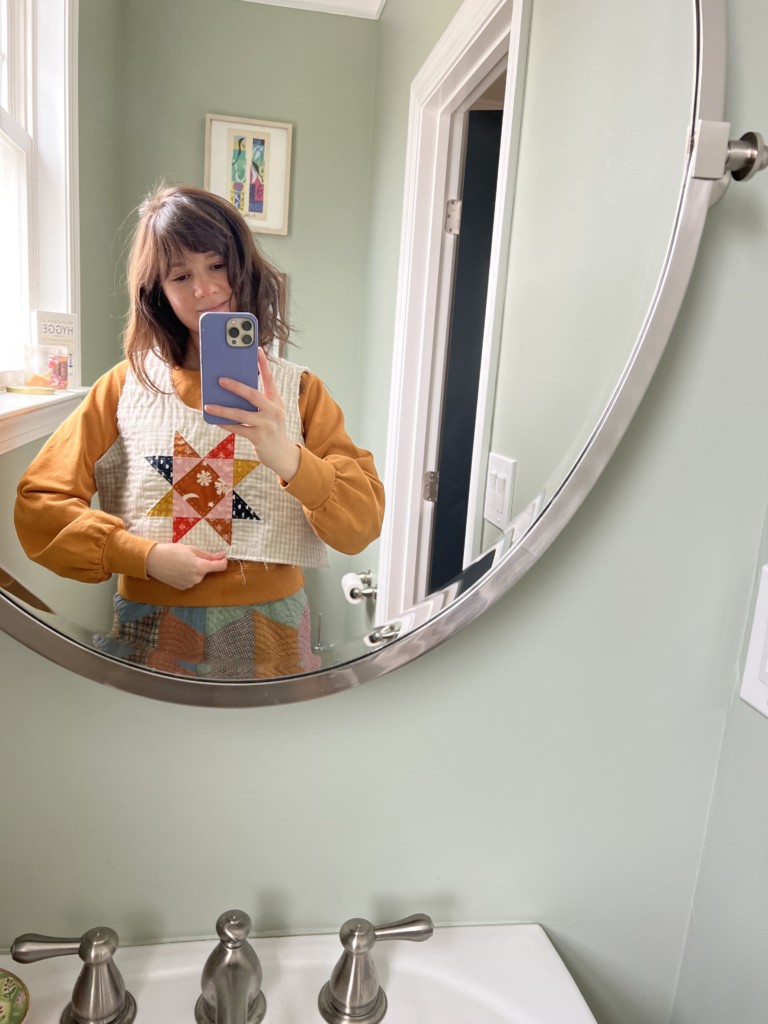
For the back, I did not originally plan to have a block, but made with some scraps. I did the same process to made my new back bodice piece, traced off where I’d insert it, and added seam allowance.
Now we come to the quilting!
Layer your three bodice sets. Lay the lining with right side towards the table, place the batting on top, then your pieced by bodice with right side up. Either pin or baste the edges to ensure the layers don’t shift while sewing. You could also use spray baste.
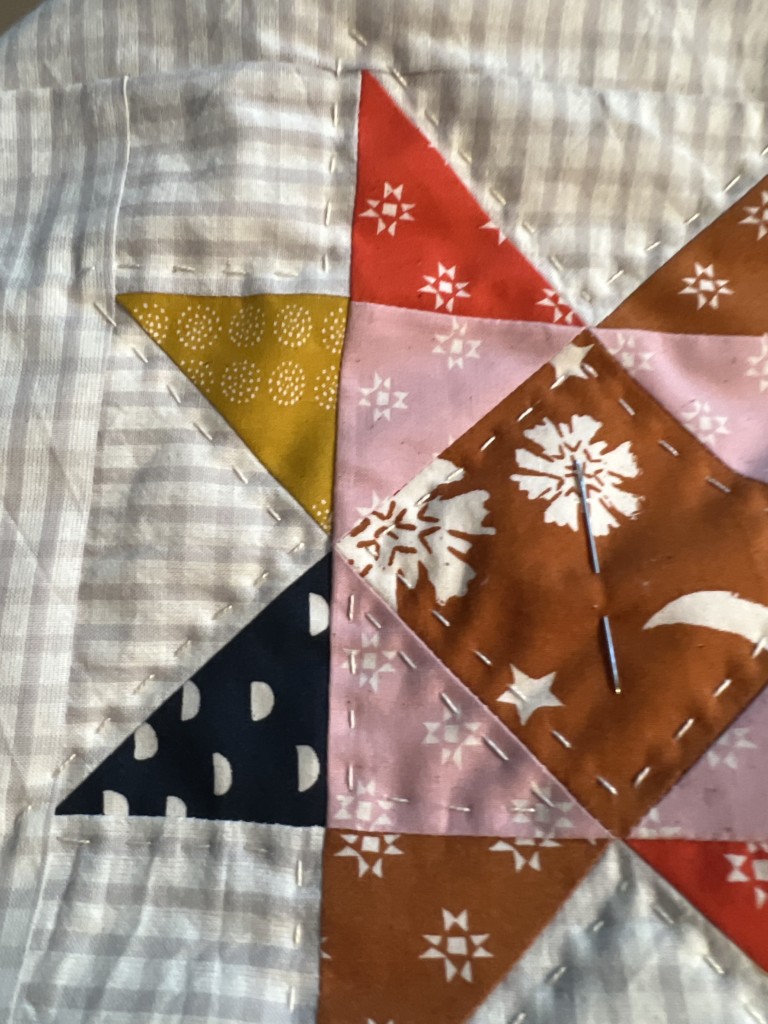
Quilt your piece, either by hand or machine. I chose to hand quilt mine, echoing the patchwork, and then just using a combination of horizontal and vertical lines spaced one inch apart. For more tips on hand sewing, see this post on our Nest Sweatshirt.
To finish, apply binding to your vest
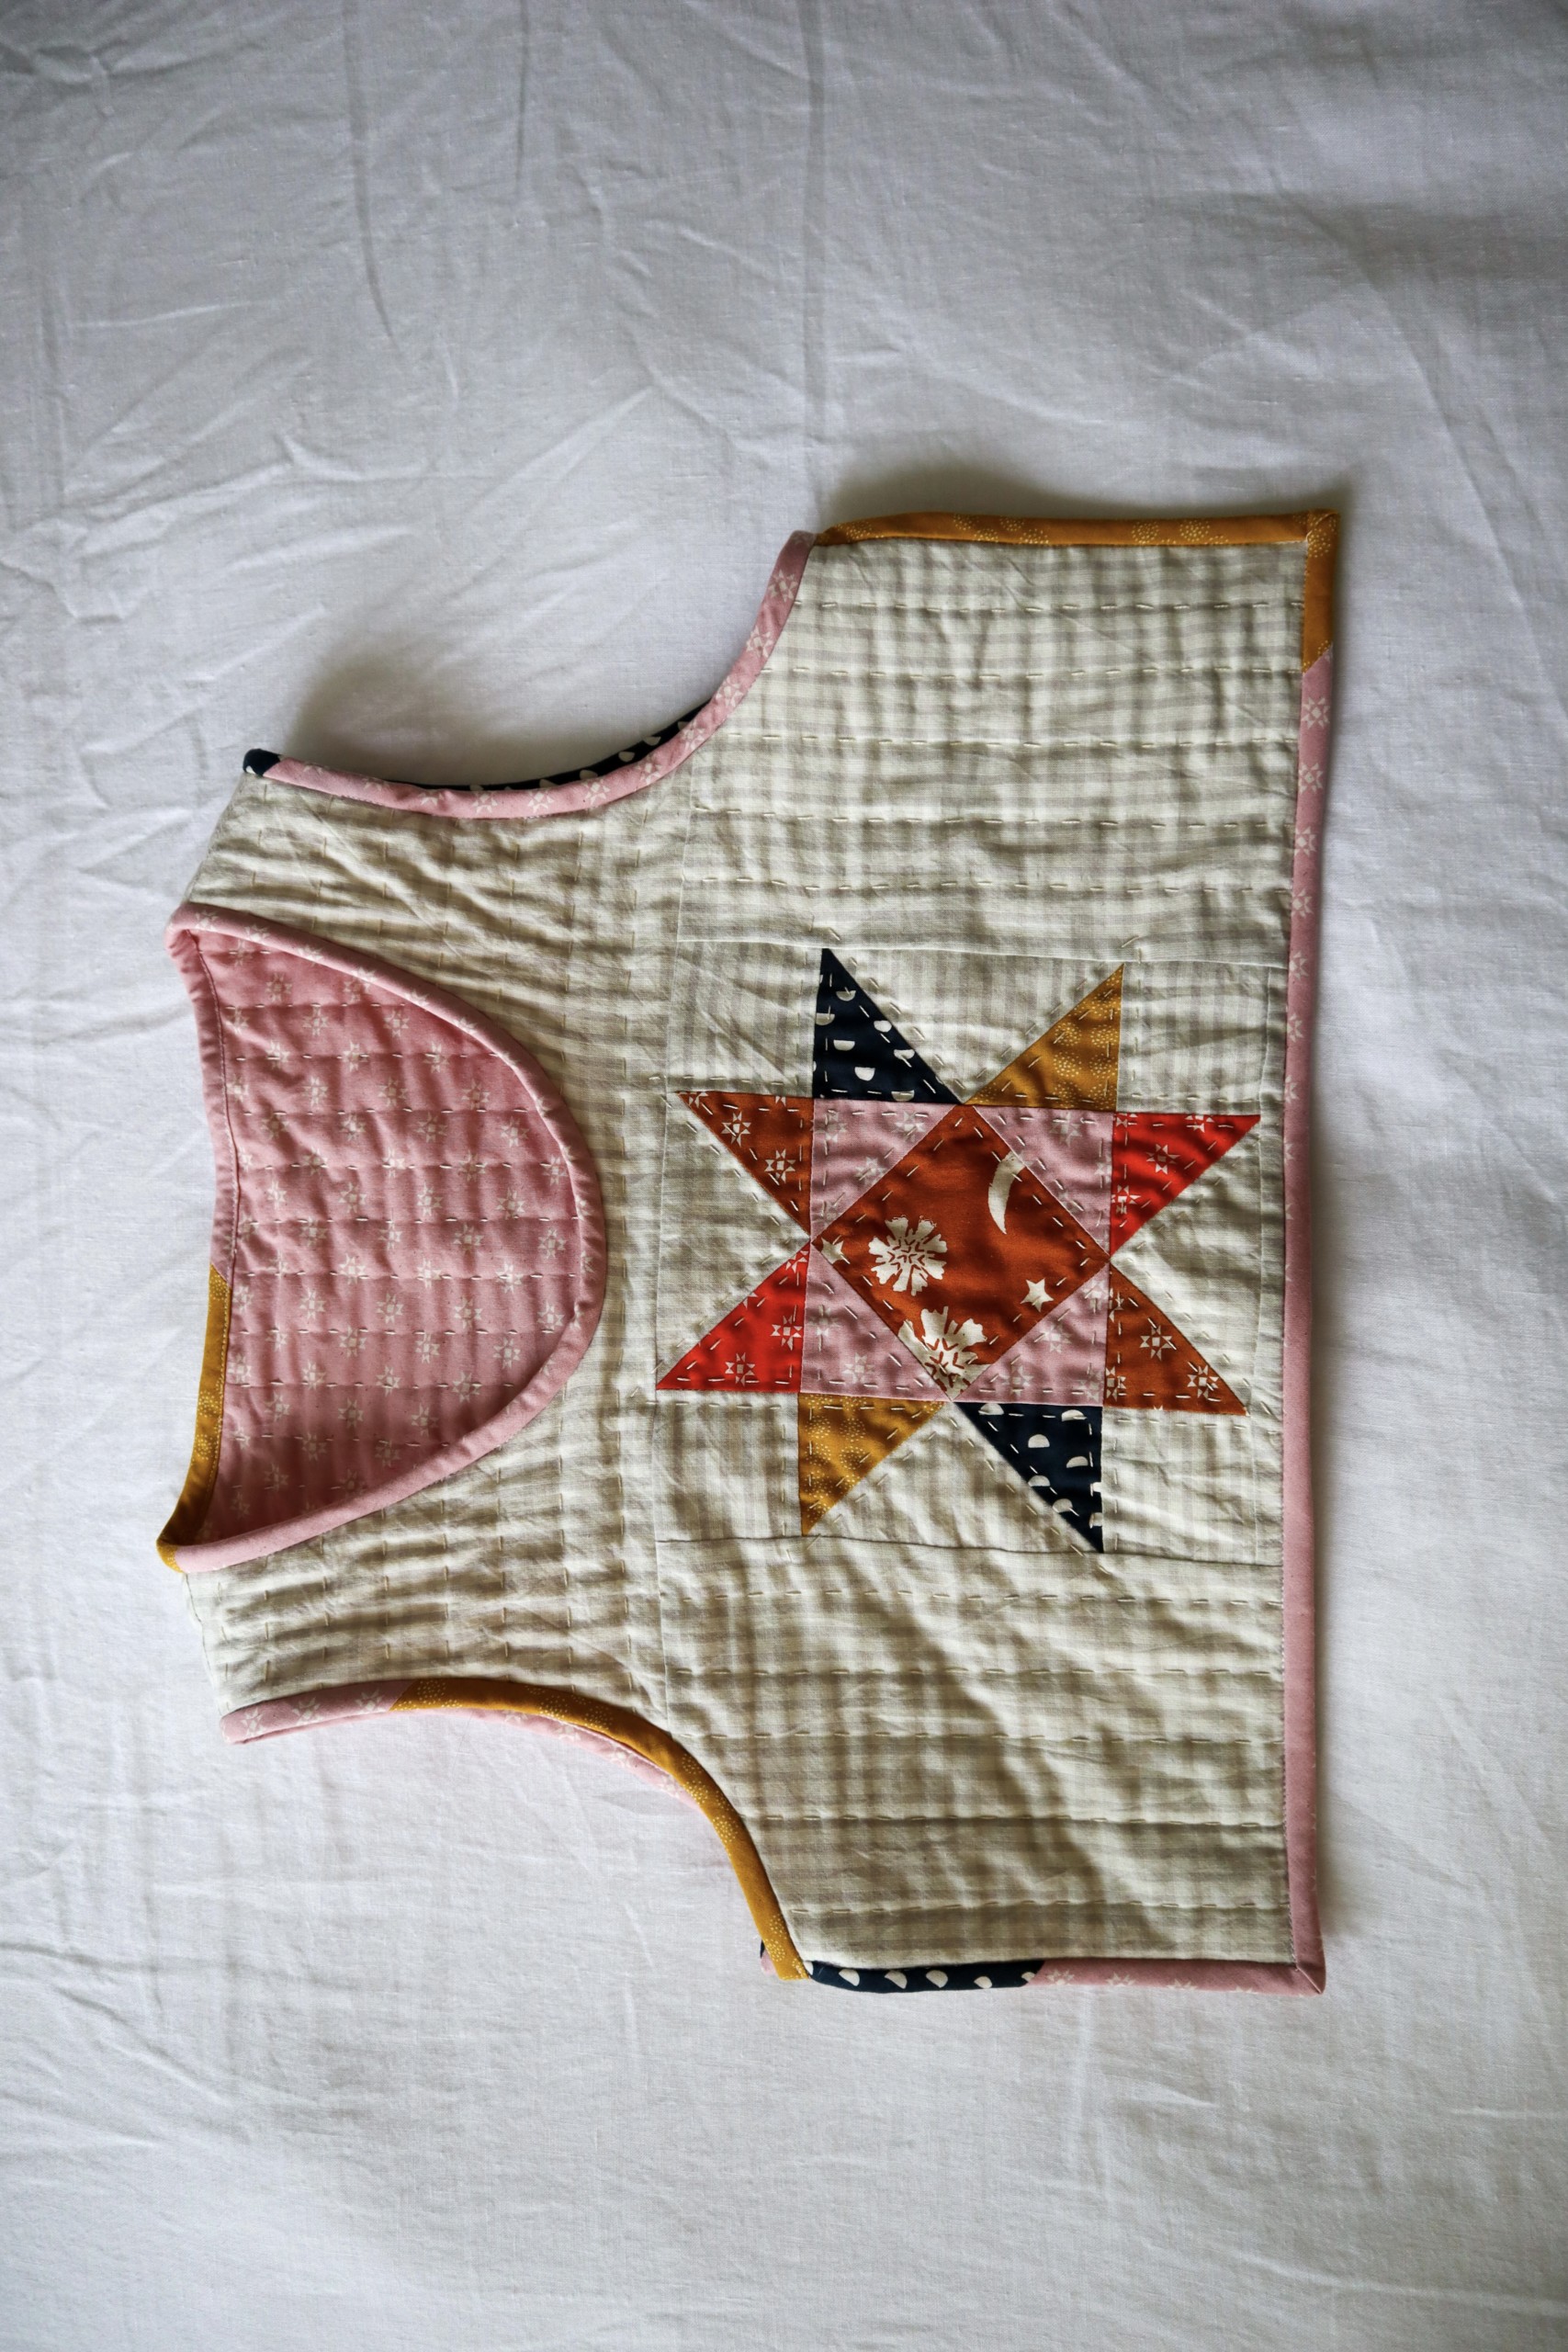
There are many ways to do this. For mine, I used single fold bias tape that I made from scraps, with a starting width of 2 ½”. I folded and pressed it vertically. Then I lined up the raw edges with the raw edges of my piece, stitched it down with a ⅜ inch seam allowance, folded it over and stitched in the ditch to secure it. It would be easier to hand stitch it down, in retrospect. My fingers were very tired after all of the quilting, so I did not. But were I to do it again, I’d hand stitch. Stitching in the ditch was very tricky with all of the layers, but is possible if you are determined.
I applied the bias to the neckline, then the bottoms and sides, mitering my corners, and lastly to the underarms. I originally had extra bias hanging off as ties, but decided to turn the front side into a loop by stitching it down the inside. I sewed a button on the back, and tucked the excess bias under and stitched it down by hand to finish.
Wear your new, one of a kind vest
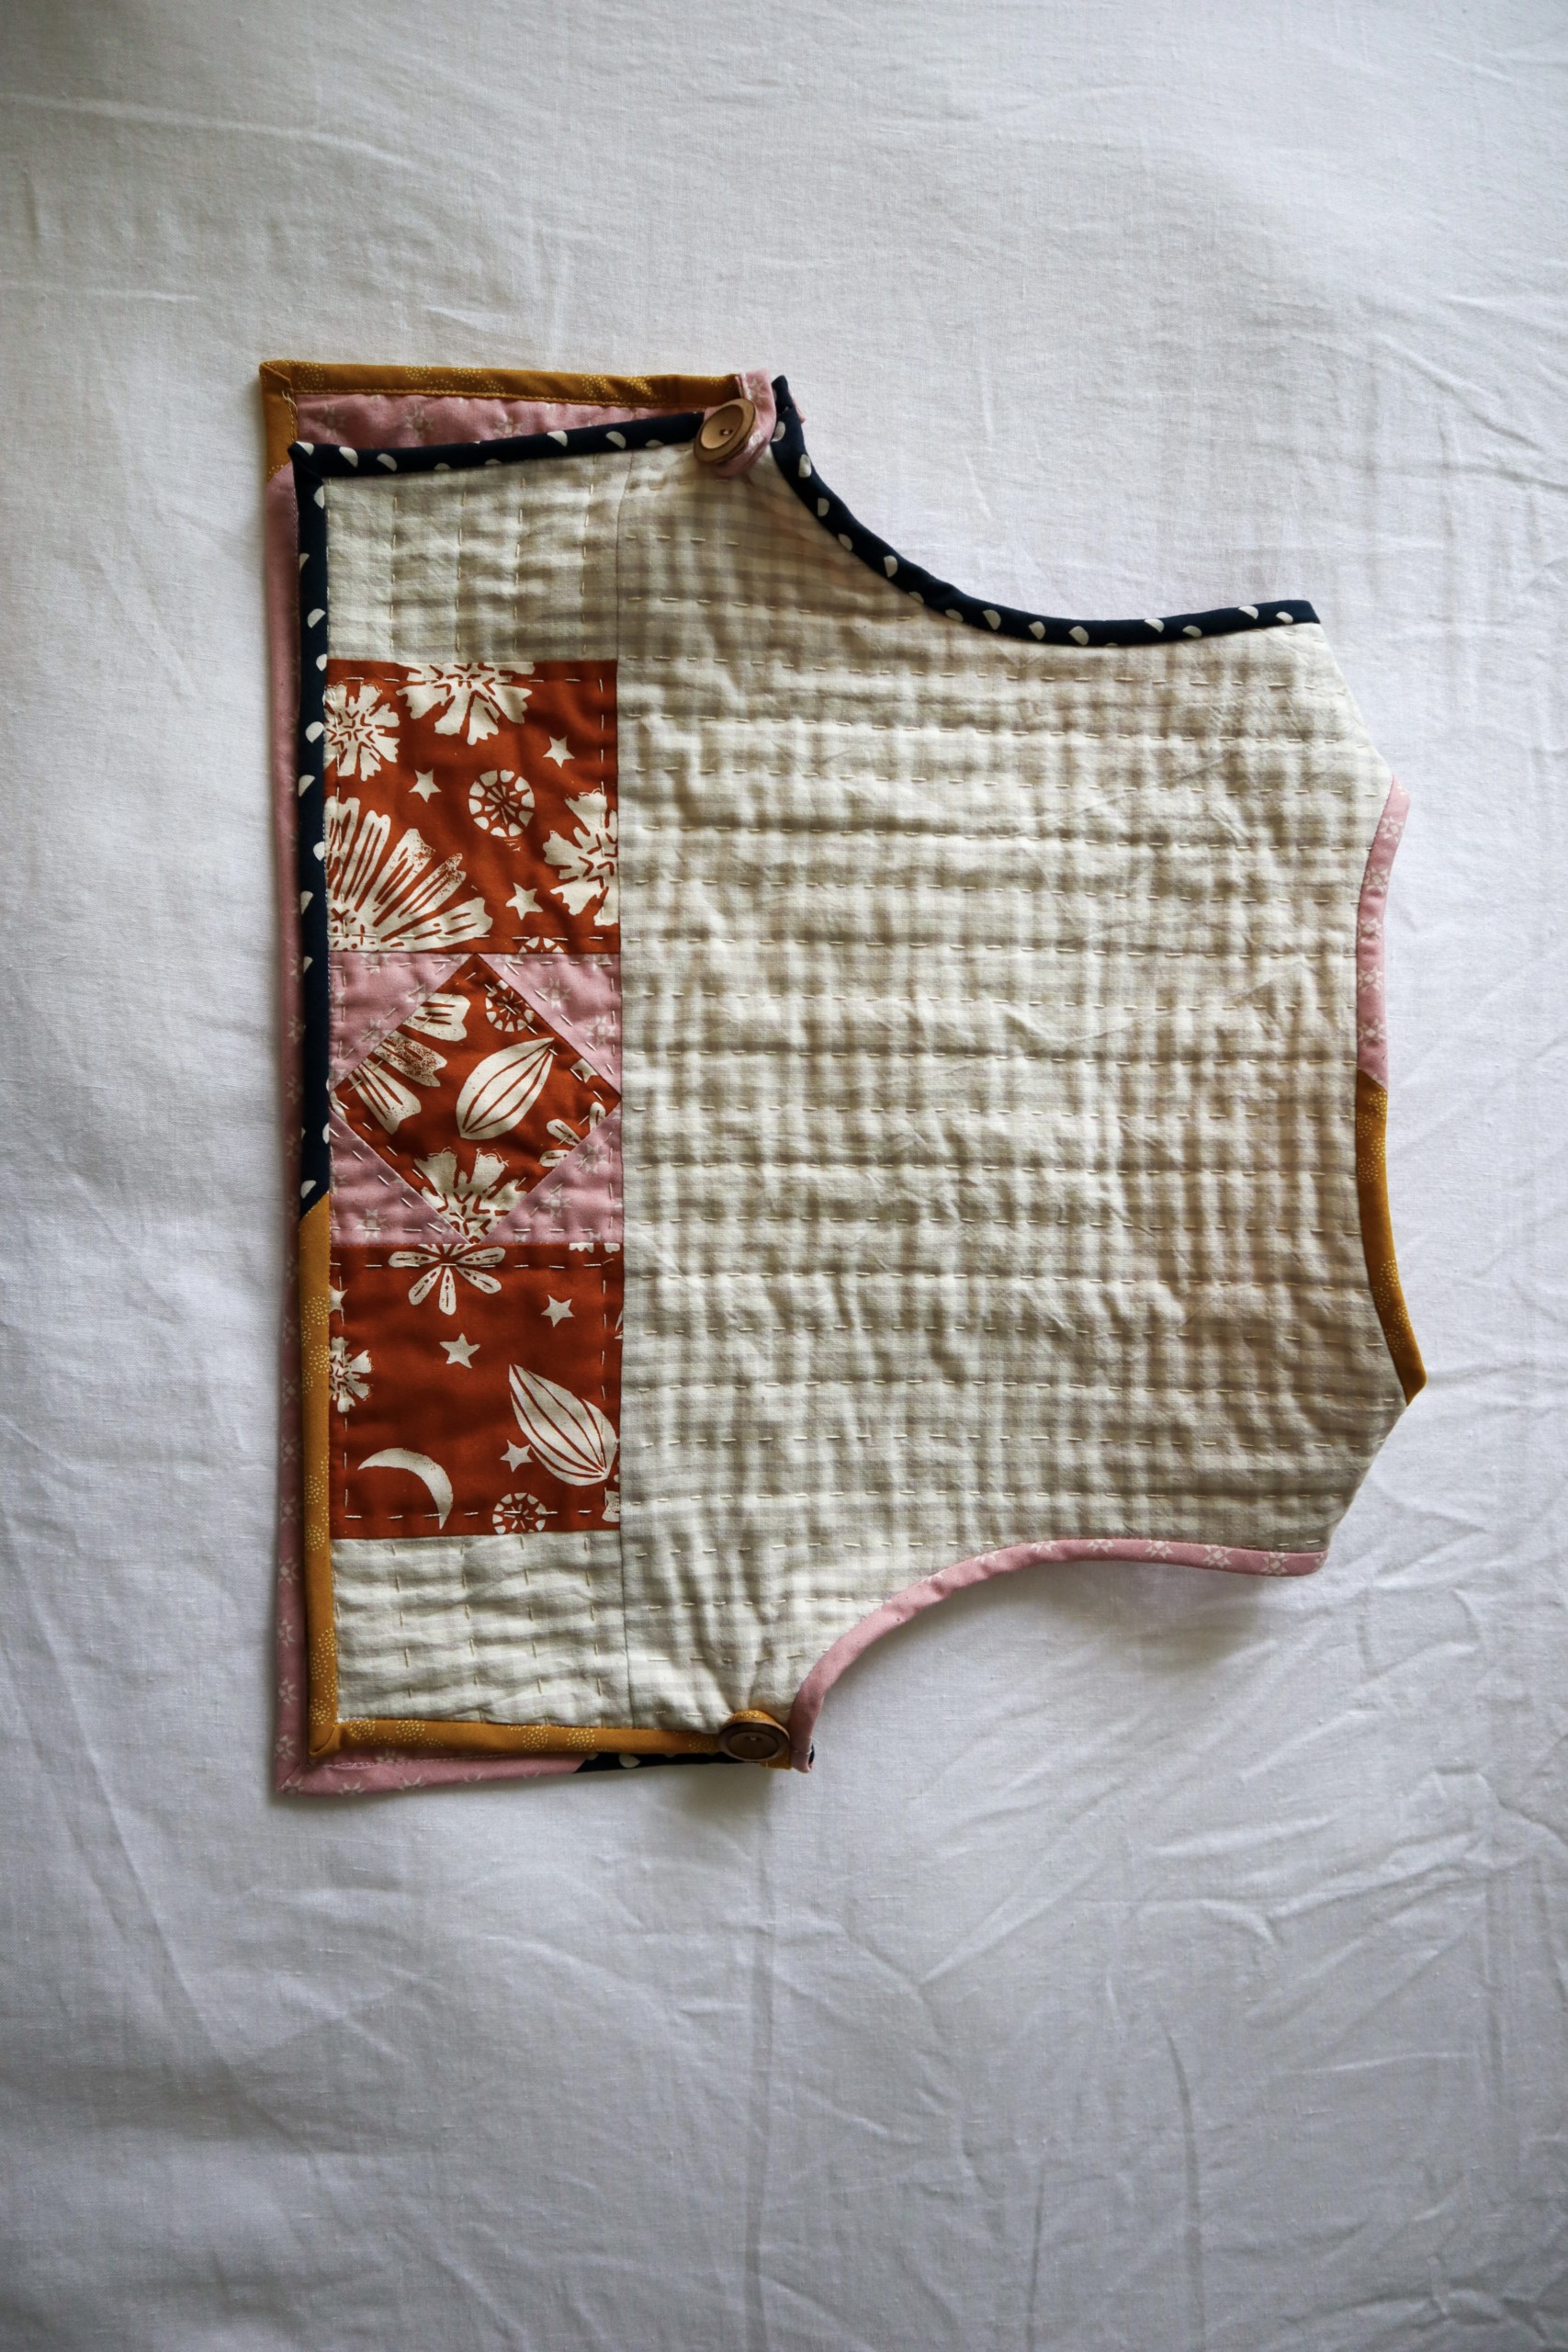
I made mine in one weekend, but this would be a good project to space out over a few days instead of binging two Lord of the Rings movies while hand quilting. But, you do you. However you approach it, remember to enjoy the process and take some creative risks as you go. I promise you’ll like what you make, even if it isn’t exactly what you envisioned.
We have two online courses all about the Hinterland Dress
Fit and Sew Bodices: The Hinterland is perfect for confident beginners to intermediate sewists looking to learn all about fitting a bodice and sewing a Hinterland Dress. This course takes your through every step of fitting and sewing your Hinterland.
The Creative Hinterland is a pattern making course for intermediate to advanced sewists. This course teaches you the skills you need to modify sewing patterns to your liking, bringing a spirit of playfulness to your sewing hobby and your closet. It includes 12 different hacks of the Hinterland Dress.


Really nice! I can’t wait to gain enough skills to try this!
I love this! I’ve already printed out and altered the darts…just need to add the straight edges to the sides. I watch The Hobbit when I hand sew – LOL!
Yay! I can’t wait to see yours! Long movies are the best for hand sewing.
Love it so much. Will you post a tutorial for the hacks you made on the Hinterland underneath, as well??
Thank you, Emily! The hacks on the dress underneath are part of a larger project, which we will be revealing in the coming months.
I love this layering look as a way to freshen up a blouse or dress with a one of a kind look! Thank you for the inspiration!
Hi Meredith, really enjoy your writing! Can you share information about the lovely grey dress (top?) shown in this post (sewing pattern/hack & type of fabric)?
Thank you, Nancy! The dress is a hack of the Hinterland, which we will be revealing more of in the coming months. It is made in white linen.